3D Printing in Steel: How to Get the Perfect Steel 3D Print
Being able to get a print in real, solid steel is one of the coolest things 3D printing has to offer. However, we get quite a few questions about the look and feel of this material. In this article, we want to explain to you how steel 3D printing works, what color and finishing options you can choose from, and how you need to prepare your 3D design to get a great steel print!
The Material and Technology: It’s All About Steel Powder
The technology behind our 3D-printed steel is known as Indirect Metal Printing. This technique builds up the model from a fine steel powder that is glued together – layer by layer, bottom to top. In contrast to this, some other metals such as Titanium or Aluminum are printed directly in a process called Direct Metal Laser Sintering (DMLS) and don’t use a binding agent.
In our steel 3D printers, a razor-sharp layer of steel powder is spread out. The printer head then moves back and forth over this layer and deposits binding agent at specific points. These locations will later become the solid 3D print. Everything that isn’t touched by the binding agent will remain loose steel powder.
Once a layer is finished and has been dried with the powerful overhead heaters, a new layer of powder is spread, and the process begins again. This way, layer by layer, from the bottom to top, a 3D print in steel is created. With this technology parts up to a maximum size of 762 x 393 x 393 mm can be produced.
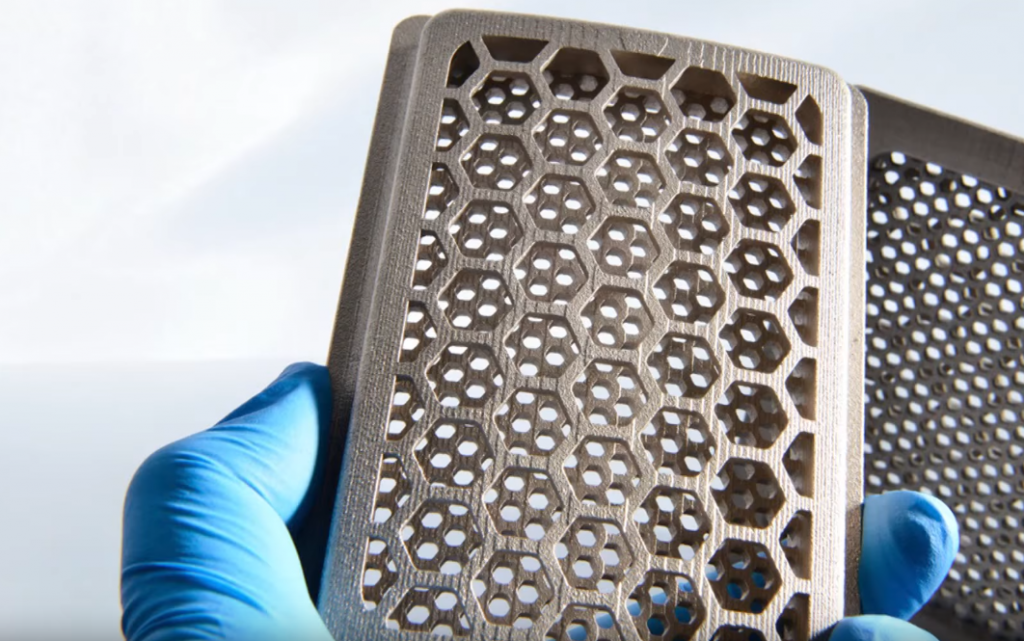
Once the printing process is done, the steel part is placed in a curing oven where it is sintered. After the removal of excess power, the print is in its “green state” and remains quite fragile. With the help of a flute system, the binding agent is replaced with a bronze infusion. That’s why the chemical composition of the final 3D printed product is around 60% steel and 40% bronze, with a density of 7.86 g/cm³.
After this step, the part finally becomes a solid and strong metal object. The flutes are then removed manually and the print is tumbled and polished for a smooth finish.
The Finish: Choose from an Extensive Selection
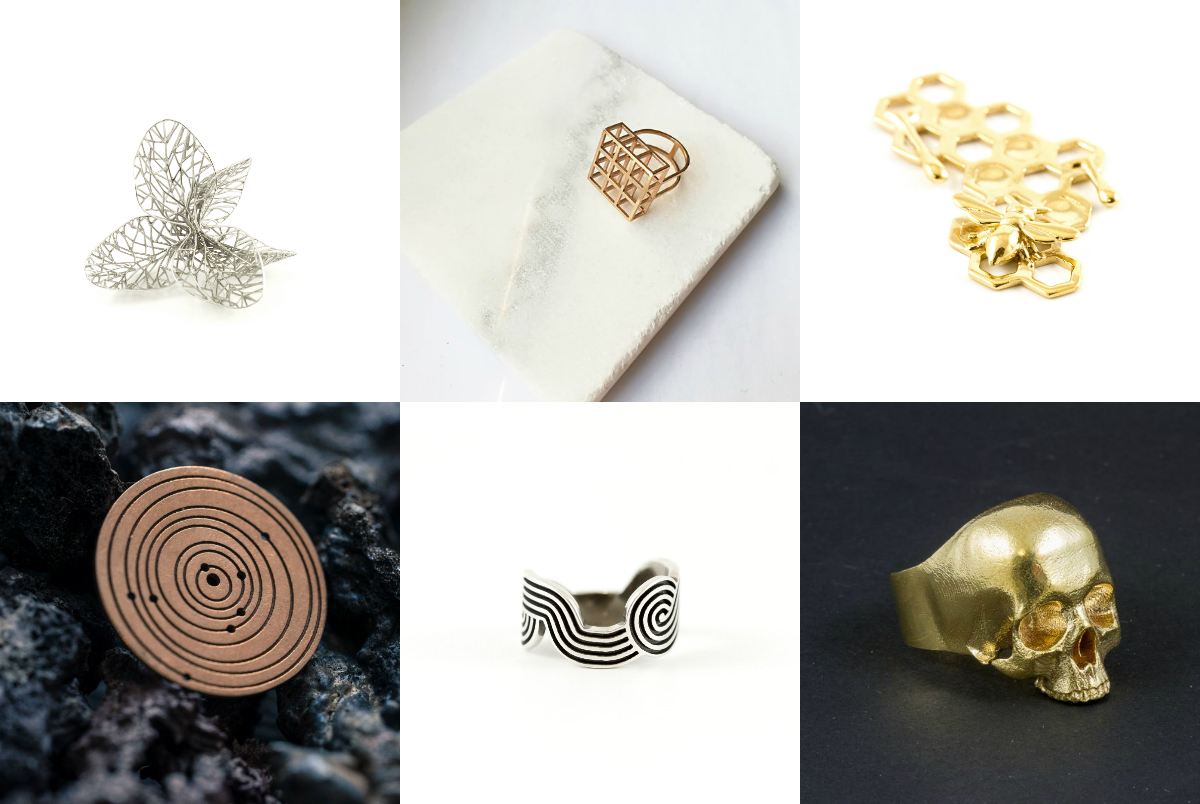
When using our 3D printing service, users can choose from seven different polishing and plating options.
Polished Steel is available in Polished Natural (1), Polished Gold-Plated (2), Polished Black (3) and Polished Brown (4) options. When the material is polished, unpolished (unreachable) spots such as tiny holes will stay darker than the polished surfaces, while the polished surface will be shinier and smoother. The gold finish is achieved with an electroless plating process. Unpolished Steel is available in Unpolished Natural (5), Unpolished Gold-Plated (6) and Unpolished Black (7).

If you need metal parts with a higher accuracy than Titanium, Aluminum, and High Detail Stainless Steel are suitable choices. If you are interested in getting metal prints with very smooth surfaces you should take a look at Brass, Bronze, Silver, Gold, and Copper.
Design Rules for Steel 3D Prints
Like any 3D printing material, steel also comes with some specific design rules. Taking these rules into account when creating your 3D model will ensure that your design will be perfectly printable, especially when it comes to Wall Thickness, Edges and Transitions.
Choosing the right minimum wall thickness:
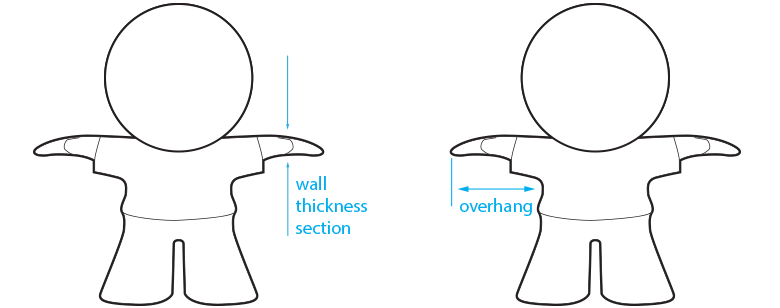
In 3D printing, wall thickness refers to the distance between one surface of your model and the opposite sheer surface.
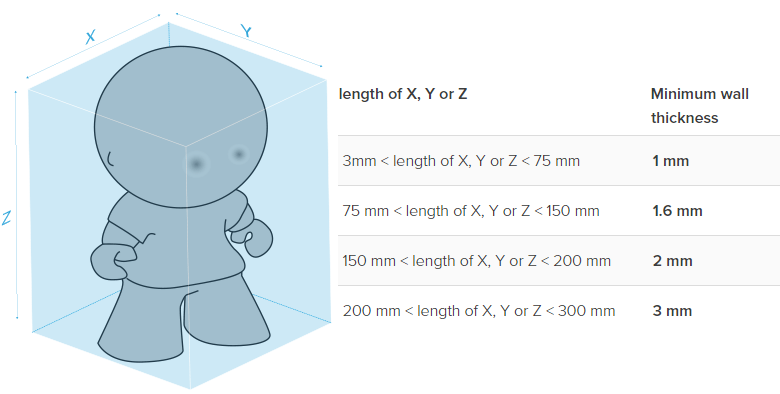
The recommended thickness of the walls heavily depends on the size of your model. Minimum wall thickness increases if the overall size of your model increases. You can consult the chart with the minimum requirements for walls with different ranges of X, Y or Z dimensions.
You will see that small models, such as rings, can have a minimum wall thickness of 1 mm if they are well-supported. Medium-sized objects can have walls between 1.5 mm and 2 mm. For larger models, we highly recommend a wall thickness of at least 3 mm.
Choosing the right wall thickness will make your model much stronger, but there is still a risk that fragile parts could break off. That’s why overhanging parts and unsupported elements need additional stability and require a thickness of 6 mm.
Edges and transitions:
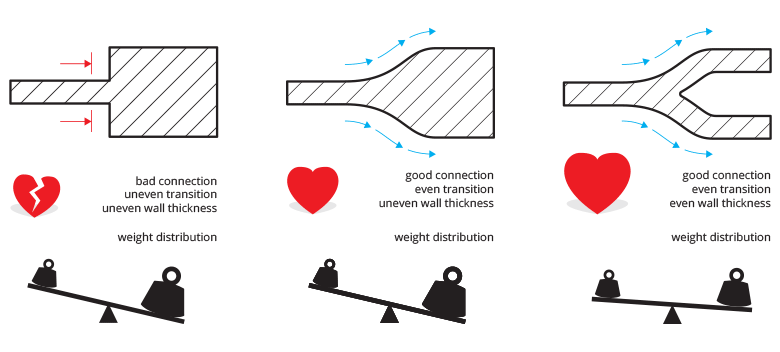
To make your model printable, it is important that the wall thicknesses and transitions in your design are even: avoiding sharp edges and enabling smooth transitions is key. Areas that have different thicknesses will heat (expand) and cool (contract) at different rates during and after the infusion phase.
Therefore, wall thickness needs to be kept as uniform as possible to minimize the chance of cracking. You can fillet or round sharp corners in accordance with the minimum wall thickness chart to accommodate this in the best possible way.
Besides these two rules, we always encourage users to read the “Design Guide” for steel 3D printing, which includes further information about issues like hollowing your model, engraving text, or accuracy and shrinkage.
Examples of 3D-Printed Steel Objects
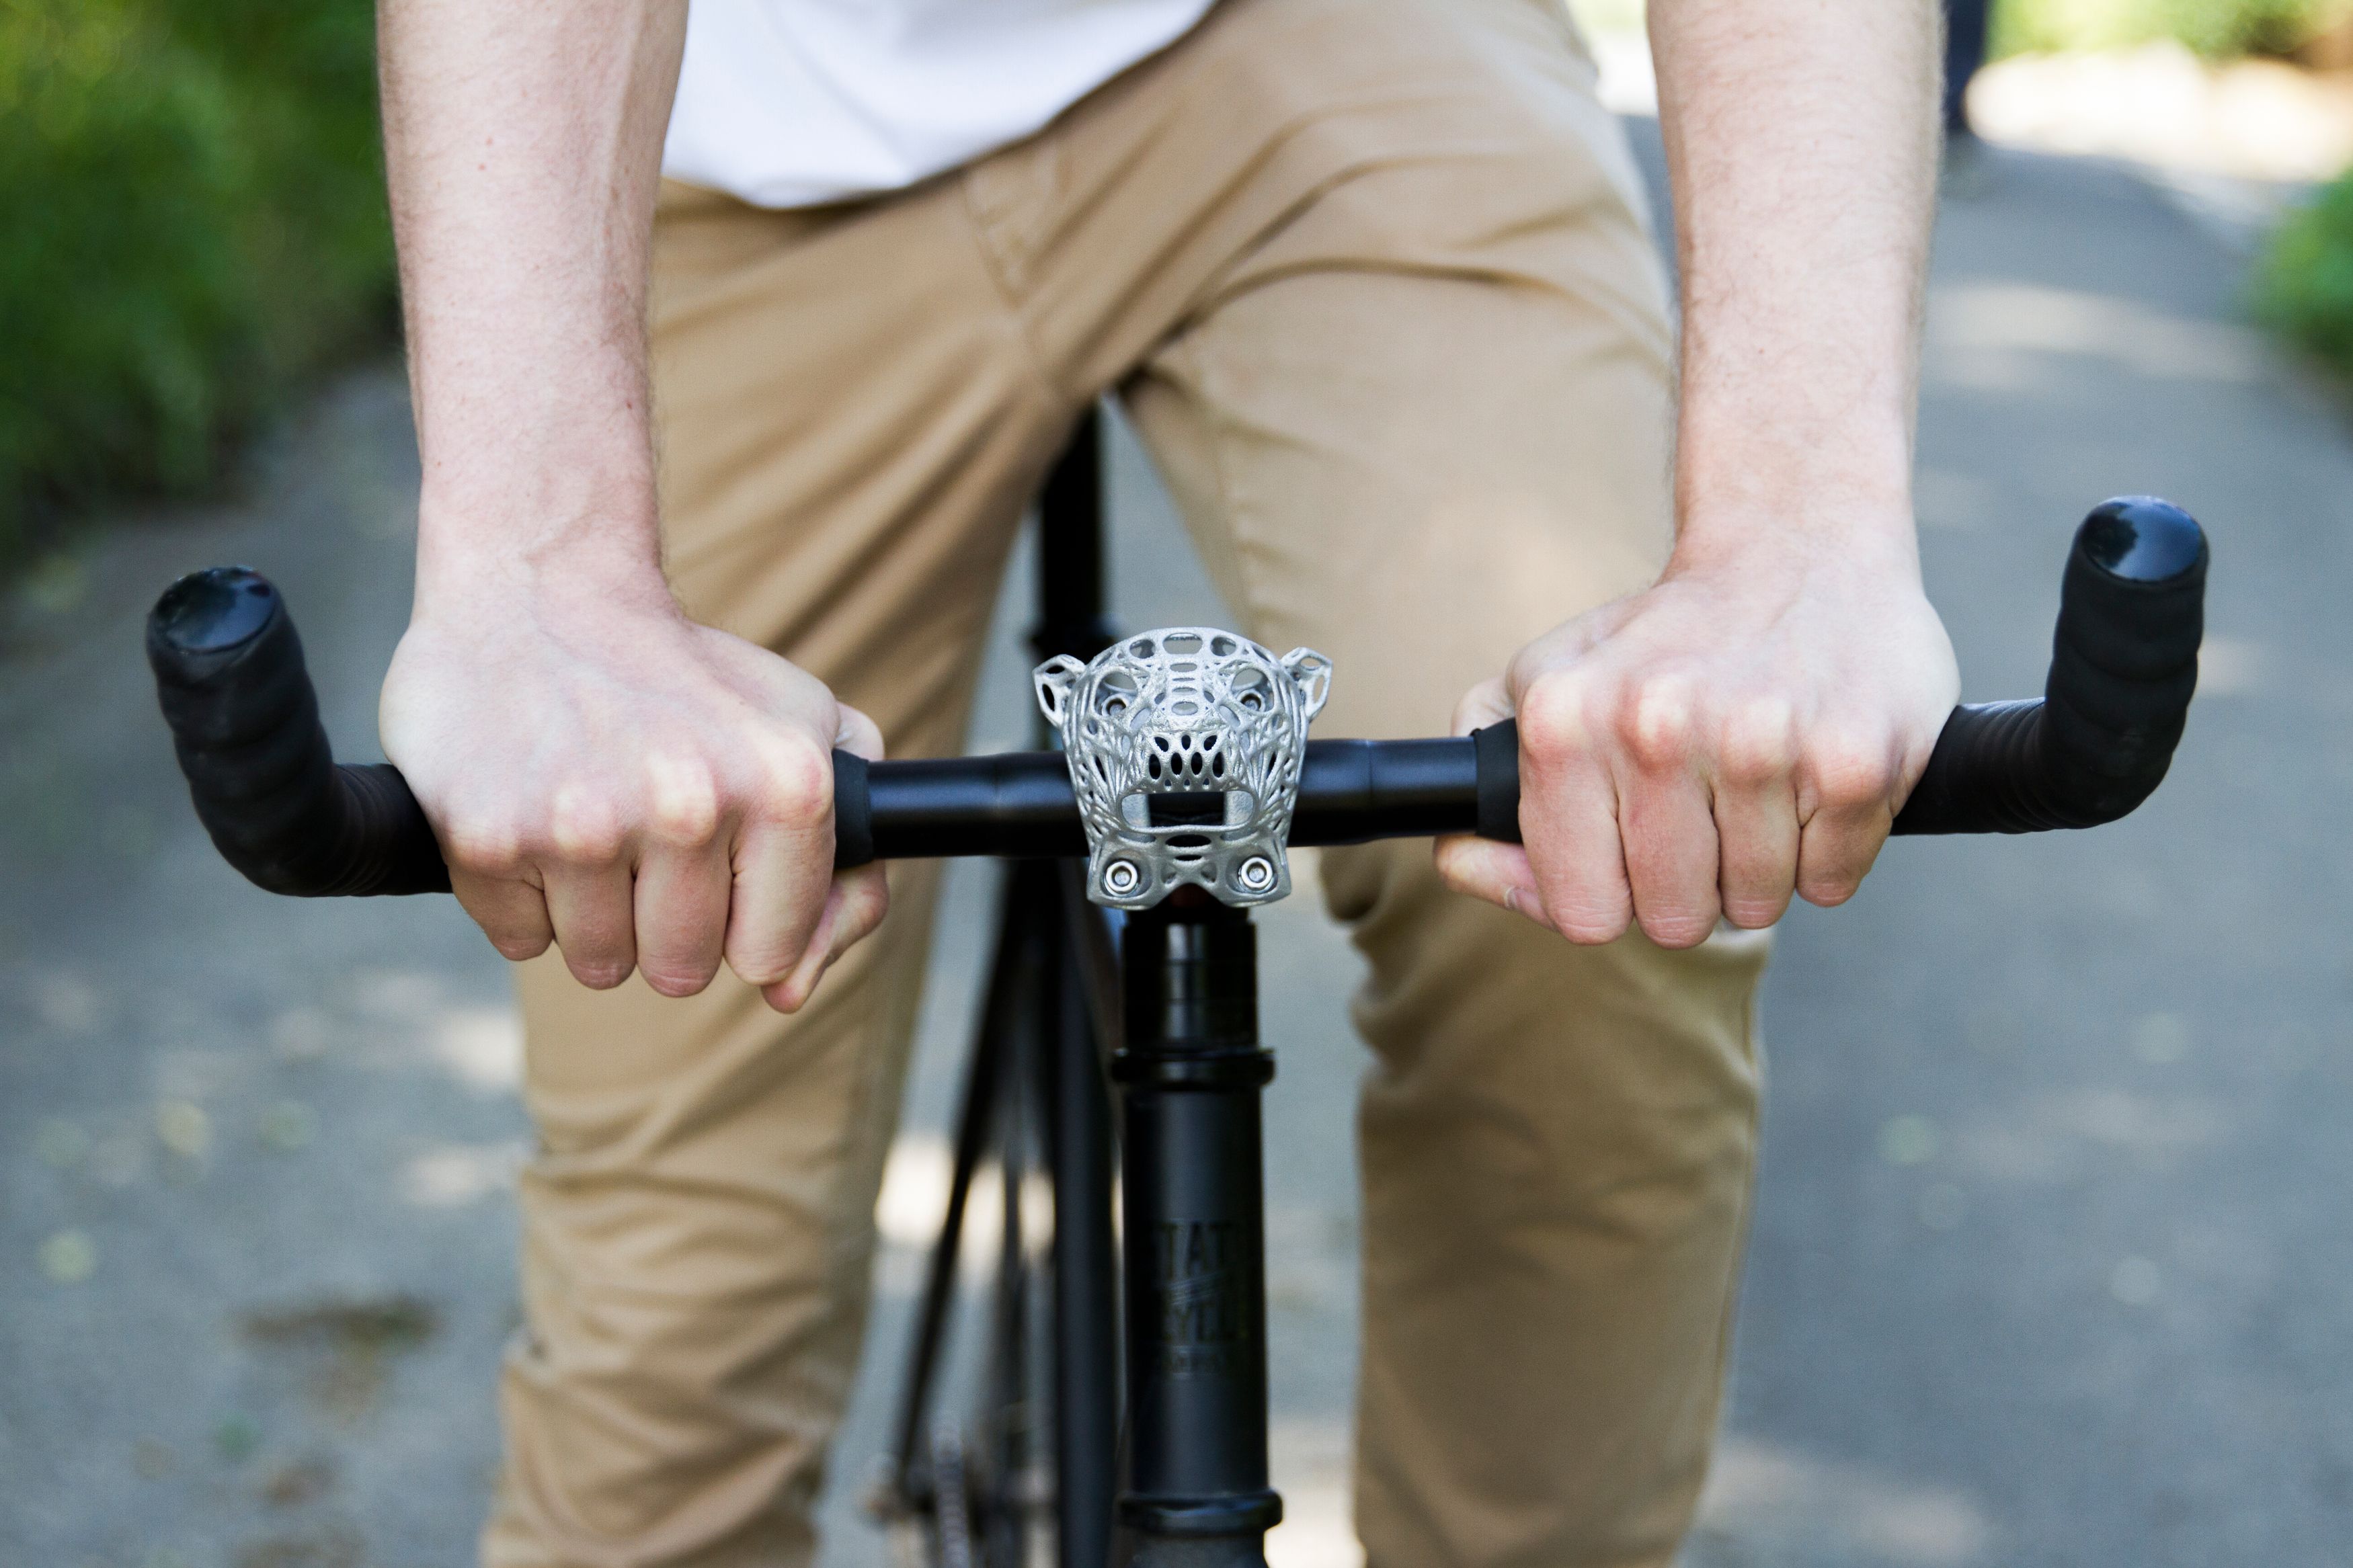
3D printing in steel and other metals is a great option, and not just for industrial parts. Have a look these amazing prints in steel.
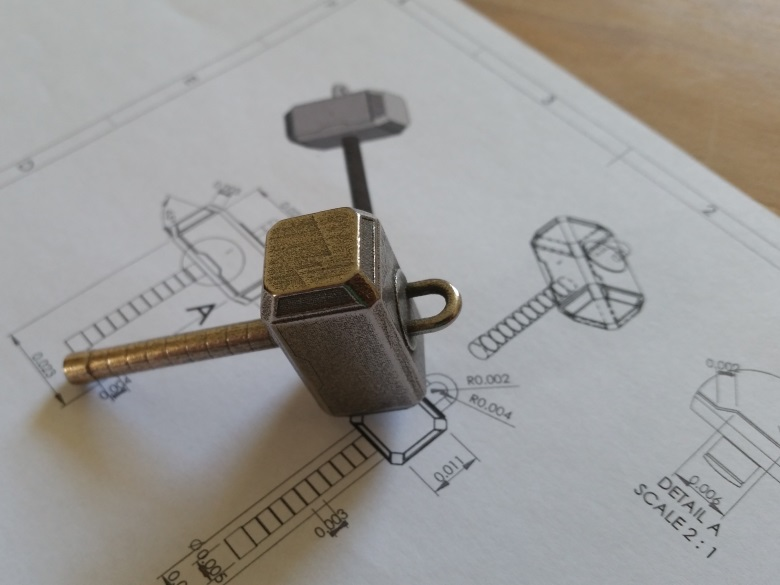
Mjolnir Key Chain by Little Things | 3D Printed in Polished Natural Steel
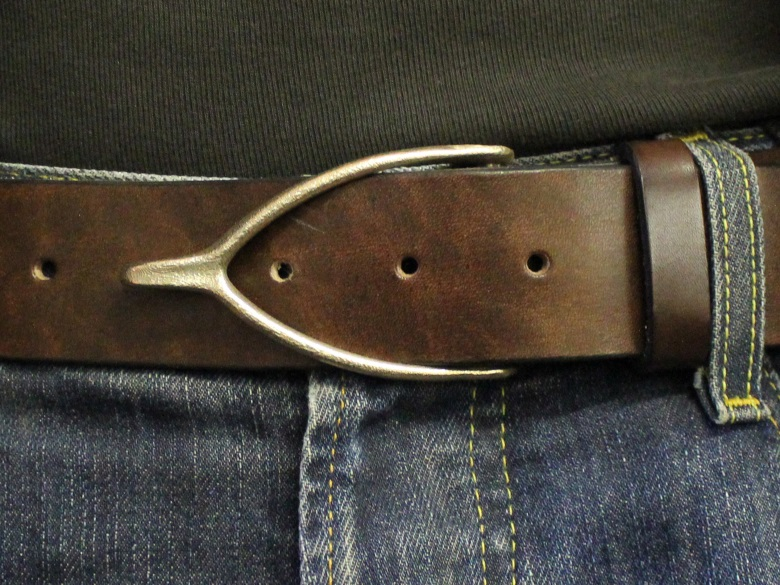
Luckybone Belt Buckle by Kord Averdunk | 3D Printed in Polished Natural Steel
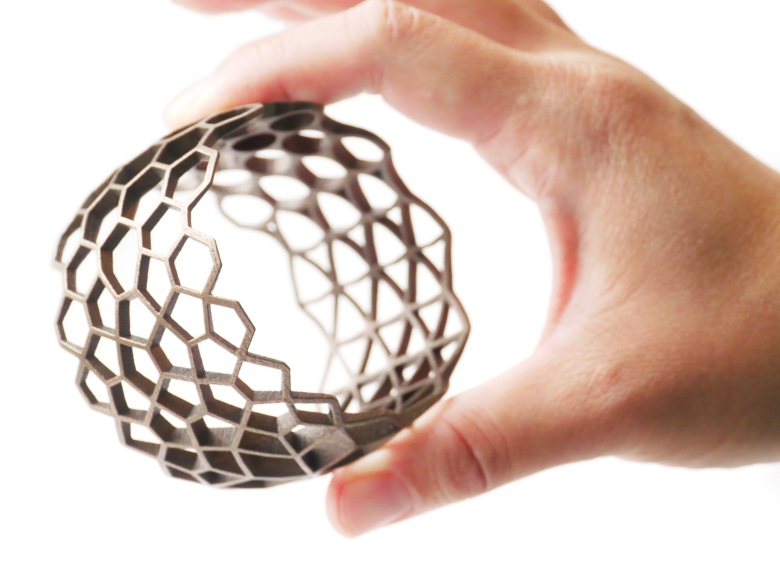
Polygons Bracelet by Eike Schling | 3D Printed in Polished Brown Steel
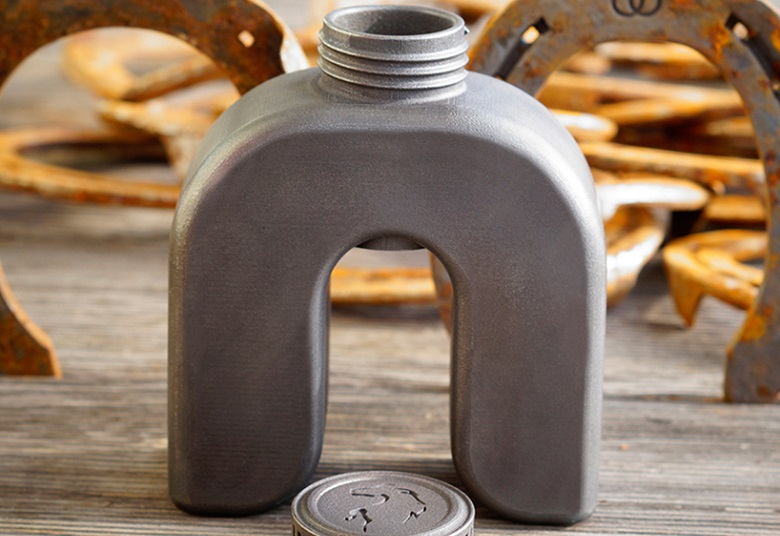
FlyingJACK Bottle Prototype by Franky Leering | 3D Printed in Polished Natural Steel
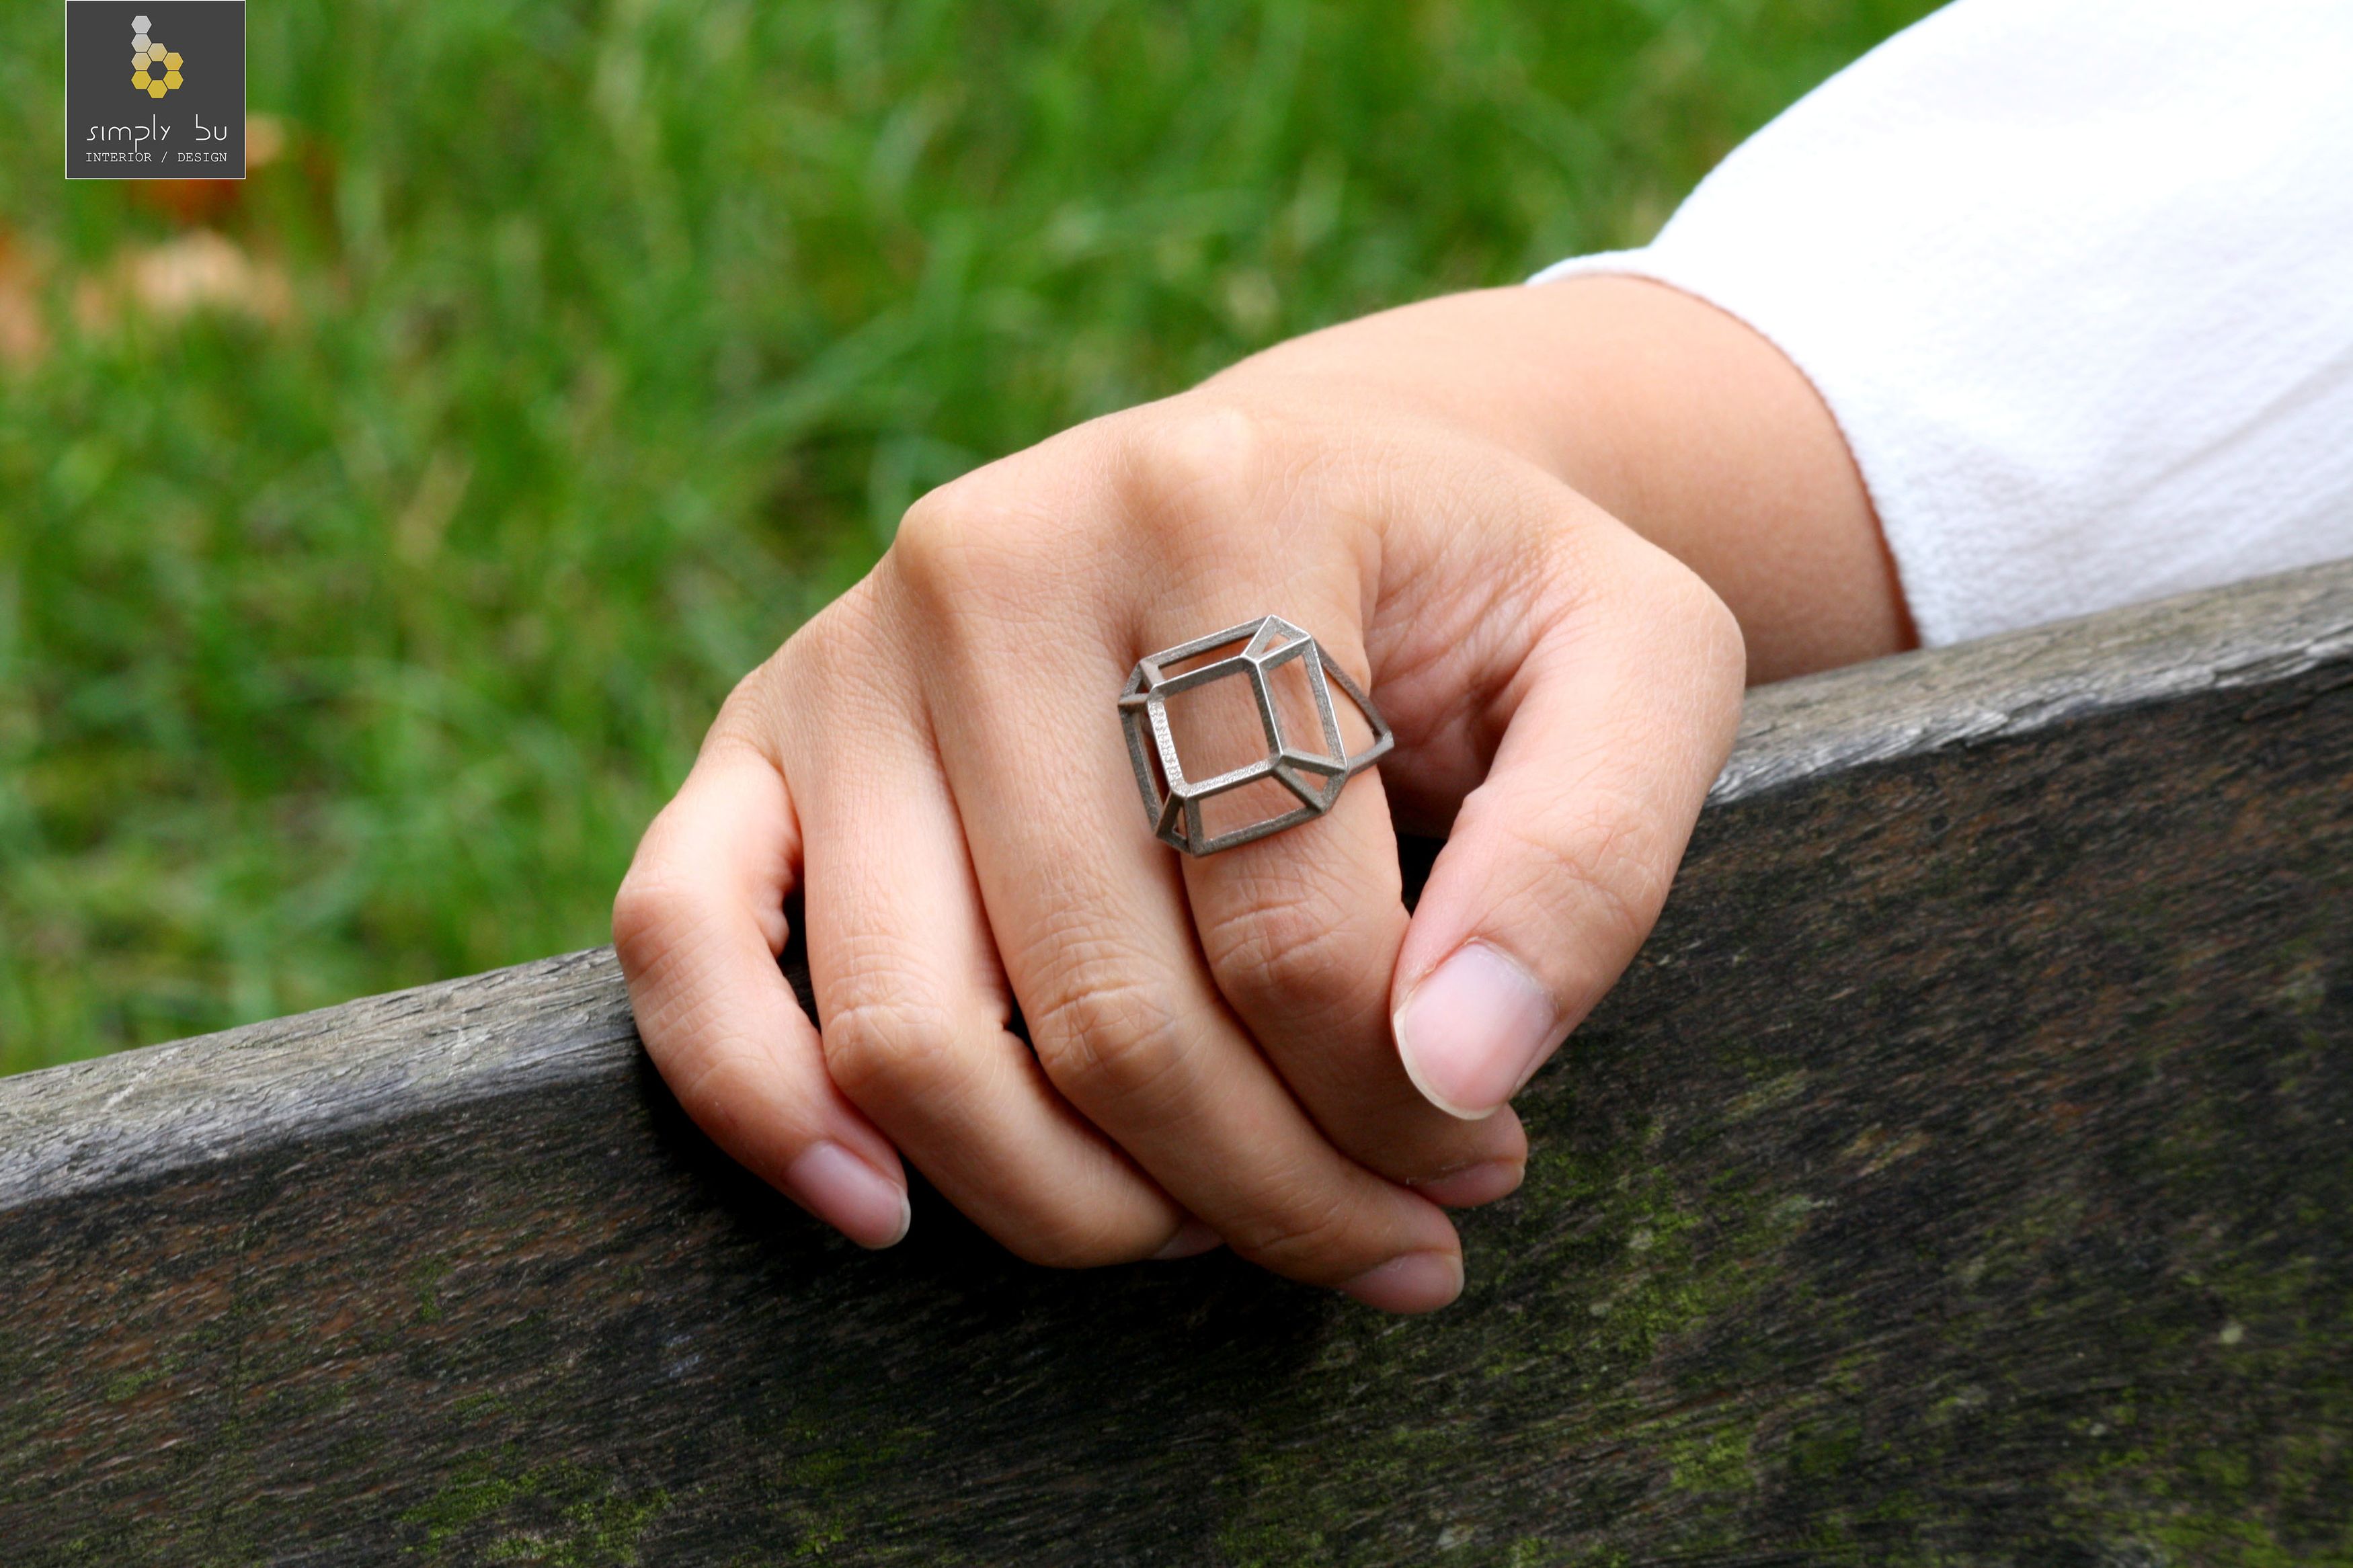
Cuadrado Ring in Natural polished Steel by Simply Bu
Discover the jewlery Titanium designs by Primal Crafts and the top 10 3D prints in steel.
Ready to give it a try yourself? Upload your 3D model here and get a quote for a high-quality 3D print in real steel in seconds!