5 Mistakes To Avoid When Designing A 3D Model For 3D Printing
We know that modeling for 3D printing can be confusing: in 3D modeling, as in 3D printing, there is no one-size-fits-all approach. We all use different software, print in different materials, and not only use different printers, but also different printing technologies. So it’s perfectly normal to feel lost and it can sometimes seem difficult to design a perfect 3D model for 3D printing.
That’s why we’ve put together the ultimate list of mistakes to avoid when turning a 3D model into a 3D print. Let’s get into it!
1. Ignoring material guidelines
Each and every 3D printing material is different. They can be brittle or strong, flexible or solid, smooth or rough, heavy or light, and so on. This also means that an object should ideally be designed for a specific material. For example, if you know that you want to print your 3D model in Steel, there will be specific material-related design recommendations that you need to take into account, such as supporting overhanging parts, strengthening elements that are sticking out, rounding off corners, etc.
The choice of printing material simply predetermines some of the basic design guidelines that you need to stick to.
Each 3D printing material is different. Make sure to read the design guide for the material of your choice.
Solution: Sticking to the design rules of your material is essential for a successful print. Ideally, you should read the design guides before you start to work on your model. You can find the design guides for all of our materials here. Additionally, you can compare several materials directly on our comparison page.
We also encourage you to browse through our shop items (you can set a filter for specific materials there) to get a better understanding of what designs other artists have created and in which materials.
2. Ignoring the printing technology
It’s not only the basic chemical characteristics of our printing materials that are different, but also the technologies that are used for printing each of these materials.
The best example of this is interlocking parts. You can print interlocking parts in materials like ABS, Polyamide, Alumide, or Rubber-like, while in others like Gold, Silver, Bronze, or Resin, this is not possible. The reason behind this is not the material itself but the technology used for printing each of these materials.
For ABS we use Fused Deposition Modeling (filament-based) with an extra nozzle and material for support. For Polyamide, Alumide, and Polypropylene, we use Laser Sintering (powder-based). For precious metals, we use lost wax casting, which is based on a 3D print in wax and a mold. And for the resins, we use Stereolithography (liquid polymer-based).
This might sound confusing but the important thing to keep in mind is the following: we cannot assume that Steel and Silver will have similar requirements simply because they are both metals. They are printed using different technologies. and thus, some design features will differ. However, materials that use the same technology, such as Gold, Silver, Bronze, and Brass (lost wax casting), are more likely to share similar design requirements.
Solution: Once again, our materials pages hold all the answers. Checking our material pages before you start designing is always key. Also, keep in mind that the maximum printing sizes differ according to the printer and technology. You can find an overview of these here.
3. Ignoring wall thickness
Even though you can find information about the wall thickness in the guidelines that were already mentioned, it’s worth stressing this point again.
Problems linked to wall thickness are by far the most common reasons why some 3D models are not printable. In some cases, the wall thickness is too thin, making small parts of the model unable to be printed or very fragile and easily breakable. In other cases, walls that are too thick generate too much internal stress and could cause the item to crack or even break.
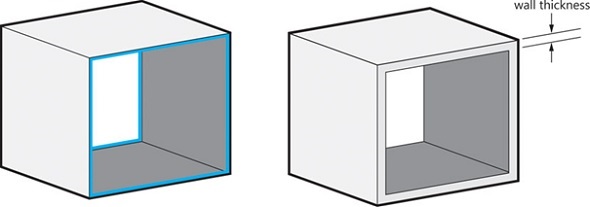
Getting the right wall thickness is crucial for a successful print.
Solution: First, read our general blog post about getting the perfect wall thickness for your 3D model. Then, head over to the design guide for the material of your choice and stick to the values mentioned there.
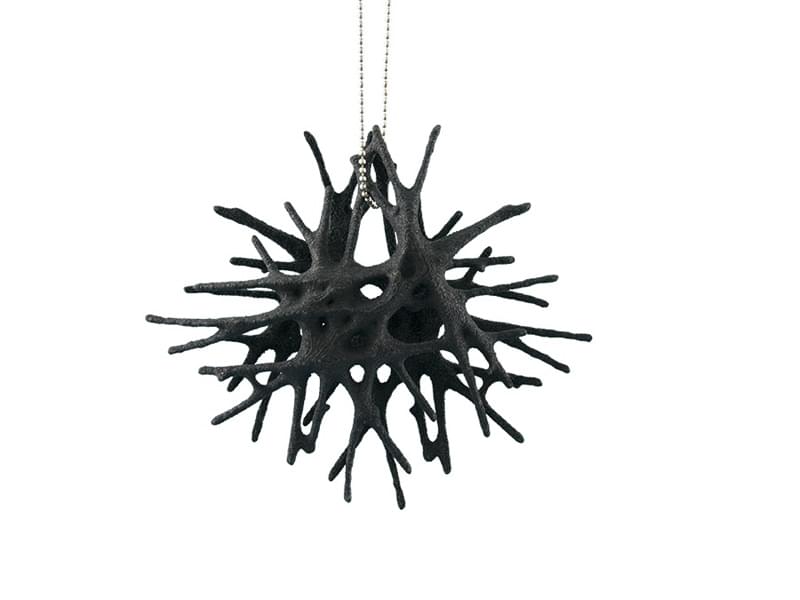
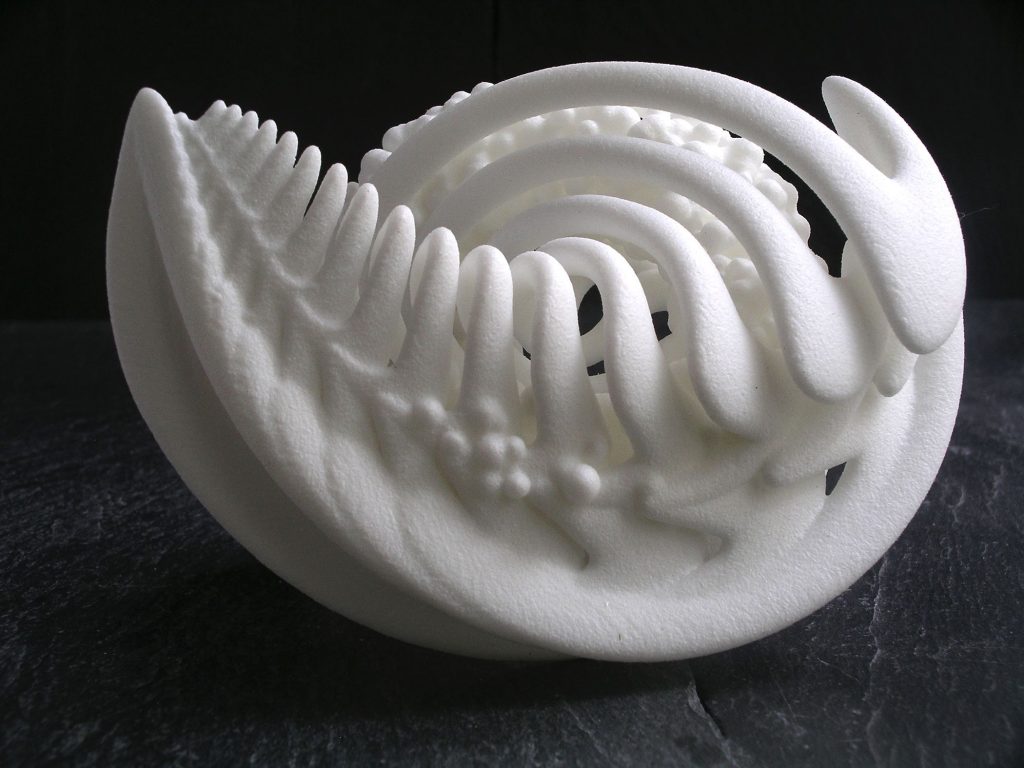
Necklace Starfish by Vaia Gkerlioti
4. Ignoring file resolution
Read the design guides? Know your material? Wall thickness ok?
Perfect, but now there is another thing to consider: file resolution.
For 3D printing, the most common file format is STL (standard triangle language), which means that your design will be translated into triangles in a 3D space. Most 3D modeling software offers the option to export your designs to an STL file and set the desired resolution.
Low-resolution STL file: It’s important to be aware that a poor-quality export will never allow us to provide you with a good print. Low-resolution means that the triangles in your STL file are big and the surface of your print will not be smooth. It will lead to a somewhat “pixelated” print.
Very high-resolution STL file: A file with a resolution that is too high will make your file too big and sometimes impossible for us to handle. It might also contain an extreme level of detail that the 3D printers simply cannot print. That’s why we ask you to stay below a file size of 100 MB when uploading your model to our website.
Solution: In most 3D modeling software, when exporting a file you will be asked to define the tolerance for the export. This tolerance is defined as the maximum distance between the original shape and the STL mesh you are exporting. We advise choosing 0.01 mm for a good export.
Here’s a visual representation of different file resolutions from extremely high (left) to quite low (right):
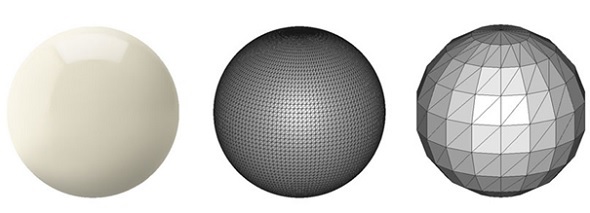
Choosing the right resolution for your file is important to ensure a quality print.
Exporting with a tolerance smaller than 0.01 mm does not make sense because the 3D printers cannot print at this level of detail. When exporting with a tolerance larger than 0.01 mm, triangles might become visible in the 3D print. You can read more about this in our blog post about file resolution where we also point out the 40 other 3D files that we support. If your file exceeds 100 MB we can provide an offline quote if you send a zipped file via a file transfer service to contact@i.materialise.com.
5. Ignoring software guidelines
Our community uses many different 3D modeling software packages. Some were designed for creating 3D prints, others are mostly used by 3D artists and their designs will require additional editing before they can offer a printable 3D model. For example, applying a wall thickness is automatic in some programs, while you must manually set it in others.
Even if you use beginner-friendly software that was developed for the sole purpose of 3D printing (e.g. Tinkercad), you might still have a difficult time creating a hollow model. In this case, free software tools like Meshmixer can help.
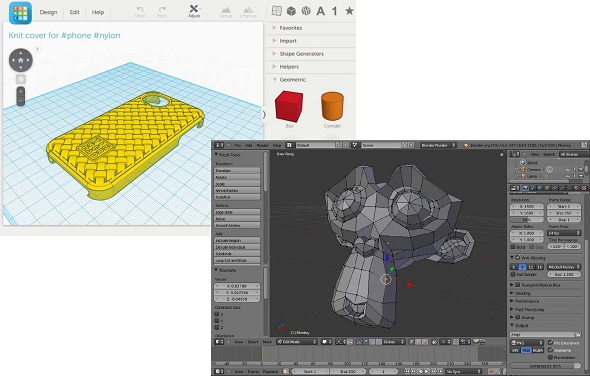
Different software, different file preparation procedures: Tinkercad (left) and Blender (right).
If you use software like Blender (used for 3D graphics and animations), SketchUp (popular with architects and scale modelers), or ZBrush (sculpting software for 3D artists), some further file preparation will need to be done. Depending on which software you are using, shells may need to be joined together, models may need to be made watertight, wall thicknesses may need to be applied, and printing sizes may need to be set. Once again, each and every software is different.
Solution: Read the software guidelines for turning a model into a 3D print. If you cannot find them on the official software websites, search online for tutorials. If you reach the limits of your 3D modeling software, open your 3D model in Meshmixer for some basic 3D printing preparation tools.
Summary: how to 3D model for printing
Okay, that was a lot. Take a breath and don’t worry; things sound more difficult than they are. Just make sure to know your software and material of choice well. If you are struggling to learn how to 3D model, you can always find more resources and tutorial videos online.
If you designed a 3D model for printing, why not print it with our online 3D printing service? It’s easy, fast, and efficient. When uploading a model to our website we will double-check your design manually. If there are mistakes or if parts of your object could break, we will inform you about this and tell you what went wrong.
Featured image: Spire Sculpture in Polyamide (SLS) by Charles-Eric Gogny