
Recreating A Virtual City With Multicolor 3D Printing
Brace Yourself Games is an indie video game studio based in Vancouver, Canada. For the launch of their city-building simulation game, Industries of Titan, they wanted to present their concept in a more original way — and used 3D printing to bring the game to life! We spoke to Antoine Lendrevie, Art Director at Brace Yourself Games.
(more…)
Which 3D-Printed Resin Is Right For You?
Are you thinking about 3D printing in resin? Would you like to know more about the technology behind 3D printing in resin? Or you just can’t figure out which one of our five resins to choose? Then this blog post is perfect for you!
(more…)
6 Planet-Friendly 3D-Printed Designs
Throughout the world, many people are becoming more conscious of the impact our daily lives have on the environment and are therefore taking steps to reduce their waste and carbon footprints. In fact, a study by Southern Cross University found that 87% of respondents make an effort to live an eco-friendly lifestyle.
(more…)

Going The Extra Mile: How i.materialise Ensures Quality And Agility For Its Customers
Research shows that 76% of customers expect companies to understand their needs. And when it comes to 3D printing, these needs may vary. Often, customers have questions regarding which material to use, how to better design their parts, or even which courier service best suits their order. Luckily, at i.materialise, we have a customer support team that is ready for anything. To find out exactly how they go above and beyond for our clients, we talked to Anna Vasylkivska, Customer Support Officer at i.materialise.
Anna Vasylkivska Customer Support Officer at i.materialise
(more…)
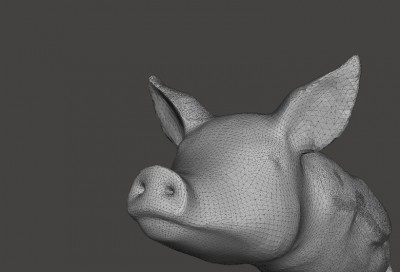
How To Reduce The File Size Of .STL And .OBJ 3D Models
3D files can be heavy, very heavy. This can be a problem when trying to upload 3D files to websites like i.materialise or when trying to share them online with your colleagues and friends. In this blog post, we will take a look at how you can reduce the size of your 3D model files and what level of detail you should be aiming for in order to get a high-quality 3D print.
(more…)
3D Printing Trends For 2024: Adoption Isn’t Just Growing — It’s Shifting
2023 was yet another year of change and growth for the additive manufacturing industry — and 2024 promises to be just as exciting. So, what can you expect? Read up on the four trends we expect to have the biggest impact in the year to come.
(more…)

How To Find The Best 3D Modeling Software For 3D Printing
We often hear: “What is the best 3D modeling software?” The ugly truth is, “It depends.” We can’t tell you which software you should use. But we can tell you how to find it!
(more…)

Top 10 3D-Printed Christmas Decoration Ideas
Are you looking for ways to bring 3D printing into your Christmas celebrations? Then look no further. In this article, we will show you the top 10 3D-printed Christmas decoration ideas — from Christmas tree ornaments to gift-wrapping inspiration. (more…)

6 Times 3D Printing Made It To The Silver Screen
Red carpet appearances. Oscar nominations. Award-winning pieces — and, of course, some notable credits in your favorite blockbusters. 3D printing has definitely made its mark in Hollywood, so we decided to think back to how it stole the show in some of our favorite films.
(more…)

PAL Robotics Makes A Case For A Perfect Synergy Between Robotics And 3D Printing
The era of robots is already here.
Over the last decade, robots have slowly moved from secluded research labs and automated production lines towards more interactive fields, such as pharmacies, hospitality, retail, etc. They can contribute towards high-quality products, shorter turnaround times in the manufacturing sector, and are usually highly reliable. Combined with AI, robots can successfully work with humans in more collaborative and interactive ways.
(more…)