Over the last decade, robots have slowly moved from secluded research labs and automated production lines towards more interactive fields, such as pharmacies, hospitality, retail, etc. They can contribute towards high-quality products, shorter turnaround times in the manufacturing sector, and are usually highly reliable. Combined with AI, robots can successfully work with humans in more collaborative and interactive ways.
One example is from the COVID-19 pandemic; there was a surge of medical and social robots powered by artificial intelligence technology. Social robots interacted with humans in a socially acceptable manner, and they supported humans in healthcare, residential homes, public spaces, and the hospitality industry. For example, social robots can act as receptionists to provide general information and control the flow of incoming visitors at hospitals. Thanks to their remote management, social robots can have social interactions and provide basic treatment without the fear of spreading the virus.
An example of a social robot is ARI, a humanoid robot created by PAL Robotics. To understand the process of creating such a complex machine and the intention behind it, we reached out to Tito Favaro, the Product Designer at PAL Robotics who created ARI.
“Working in robotics was my dream since I was a child, and an opportunity to work for a company that creates robots is a privilege. The PAL Robotics team can design, engineer, and manufacture any project from scratch. The range of professional profiles is great, and therefore, the technological advances are also great,” says Tito.
Leading service robotics
PAL Robotics was founded in 2004 with a mission to improve people’s lives through robotics. They specialize in producing different types of robots for five distinct business units: retail, intralogistics, social, research, and European research projects. Research and innovation come together in the best way possible at PAL Robotics, as they continuously try to understand how to improve robotics and find new meaningful applications.
One of their latest developments, ARI, is the most advanced AI humanoid they’ve created so far. ARI talks, recognizes faces, waves, dances, and interacts via touchscreen. With the robot’s powerful processing capabilities, thoughtful design, and a wide range of expressive gestures and behaviors, ARI is the ideal social robot for Human-Robot-Interaction.
Introducing ARI
“ARI was born as a technological revision of the REEM robot. To create ARI, we found inspiration in our current technological references, in a new design of the proportions, and in simplifying the robot’s construction,” Tito explains.
The dedication and passion of the PAL Robotics team really shines through in this project. After a year and a half of hard work and four different prototypes, the PAL team swiftly developed the final design, manufactured, and officially launched ARI in 2019.
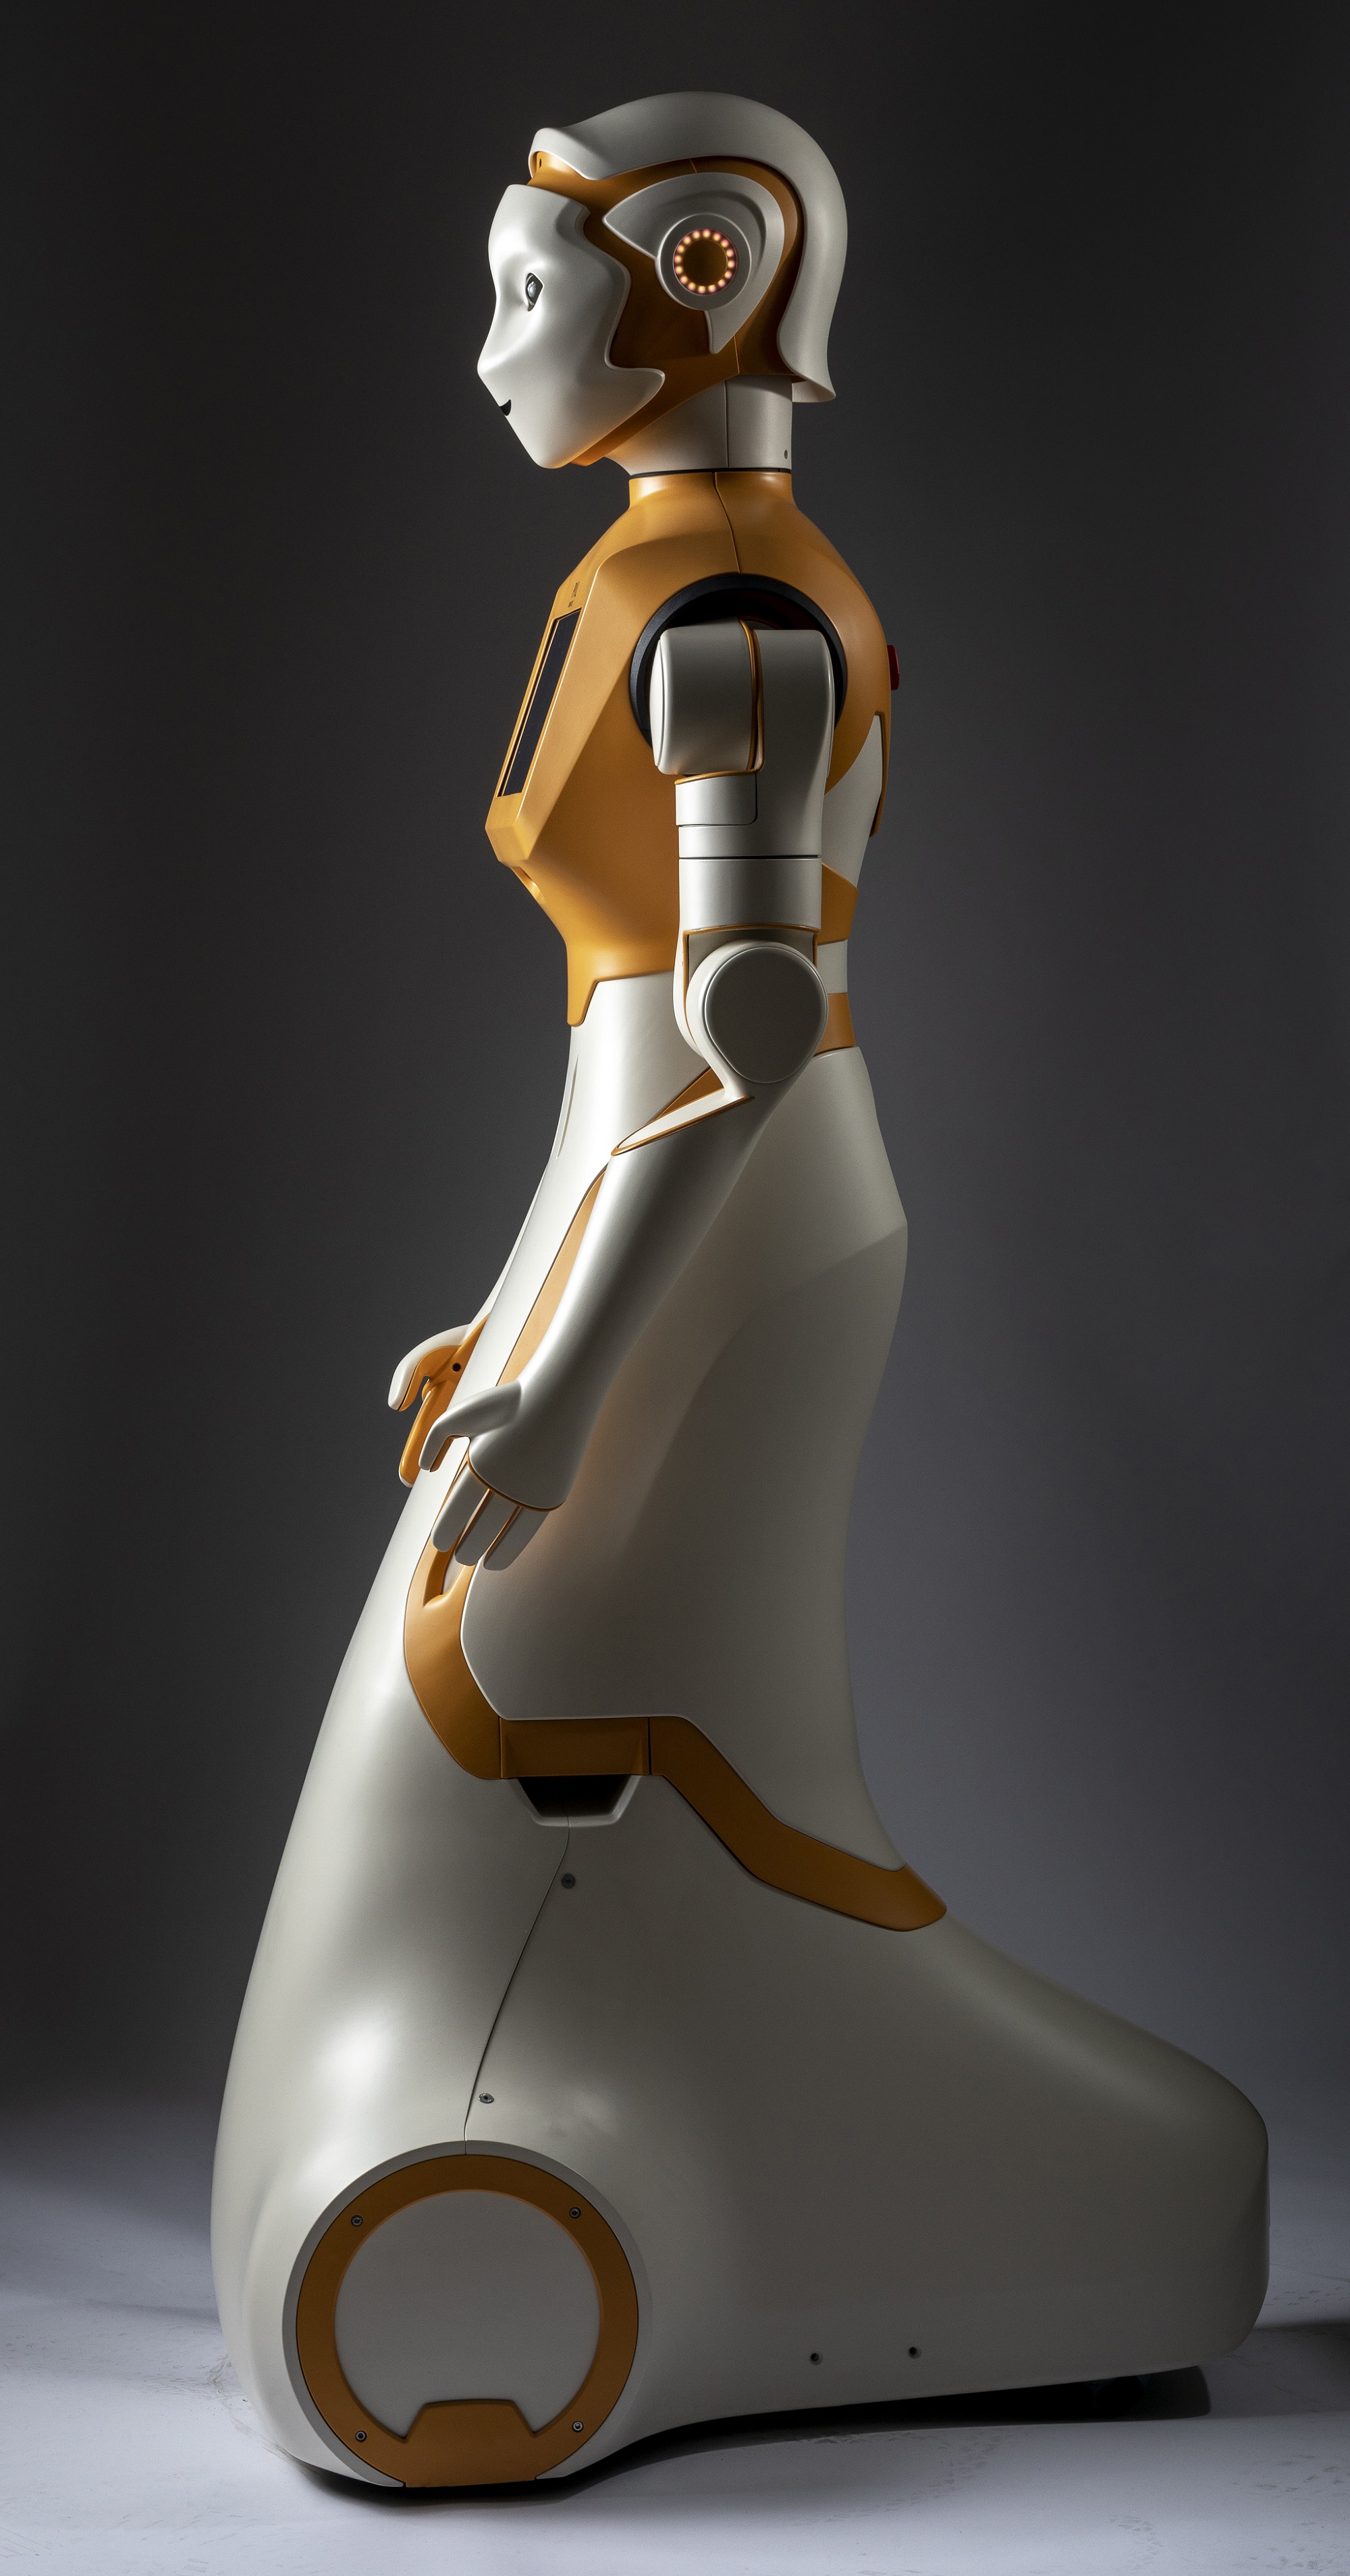
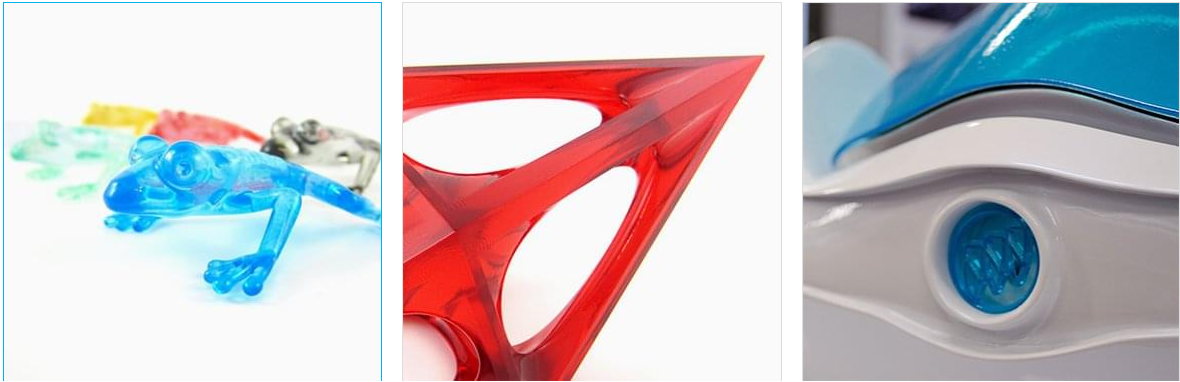
Combining 3D printing and robotics
Working on the creation of ARI, Tito and his team turned to 3D printing. 3D printing in robotics initially focused on building highly customized prototypes, but it has evolved into manufacturing in recent years. This journey parallels PAL Robotics’ evolution as a company. Specific niches such as social robotics are focusing more on the product concept, without demanding production runs; that is why additive manufacturing has been increasingly fitting into their processes.
“3D printing fits very well with the type of product we make, both for robots used in research and robots for more social purposes. For example, 3D printing enables short and customizable runs that fit perfectly with the needs of researchers, who constantly seek to update the model that comes out on the market, with new sensors or more powerful computers, for example, to integrate them into platforms such as ARI. This is precisely why 3D printing is the ideal technology for our projects,” explains Tito.
Since PAL Robotics started its journey over 15 years ago, Materialise has remained their reliable partner in expanding the synergy between robotics and 3D printing technology.
“For a robot like ARI, we need to manufacture approximately 50 pieces with sizes ranging from 20mm to 1200mm, with different materials and finishes. So, it is not easy to manage and secure a stock and control costs. Materialise integrates a multitude of 3D manufacturing technologies which helps to consolidate our collaboration,” confirms Tito.
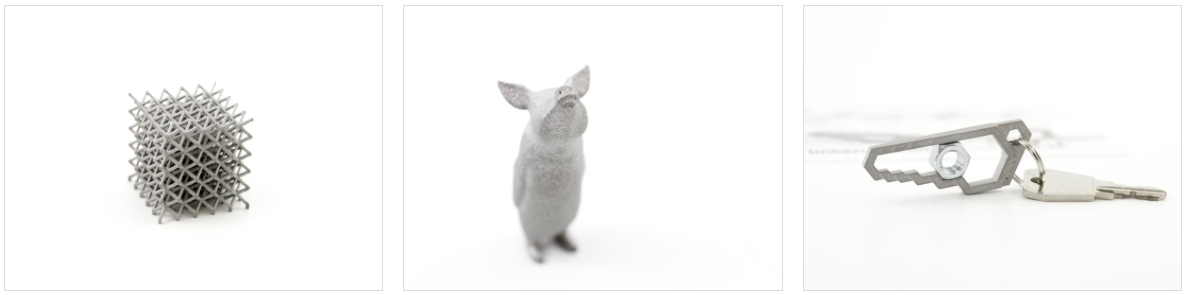
PAL Robotics’ engineers and designers work closely with the Materialise team, especially when designing and selecting materials, finishes, etc. With 3D printing, PAL Robotics has freedom of design as it makes it possible to print complex and lightweight geometries that traditional technologies usually can’t deliver. Through successful collaboration, they were able to reduce the weight and adjust the costs of parts of the robot.
Consistency in quality is another crucial element for PAL Robotics. Materialise manufacturing processes enable consistency by making sure each part is created according to high-printing and post-production standards.
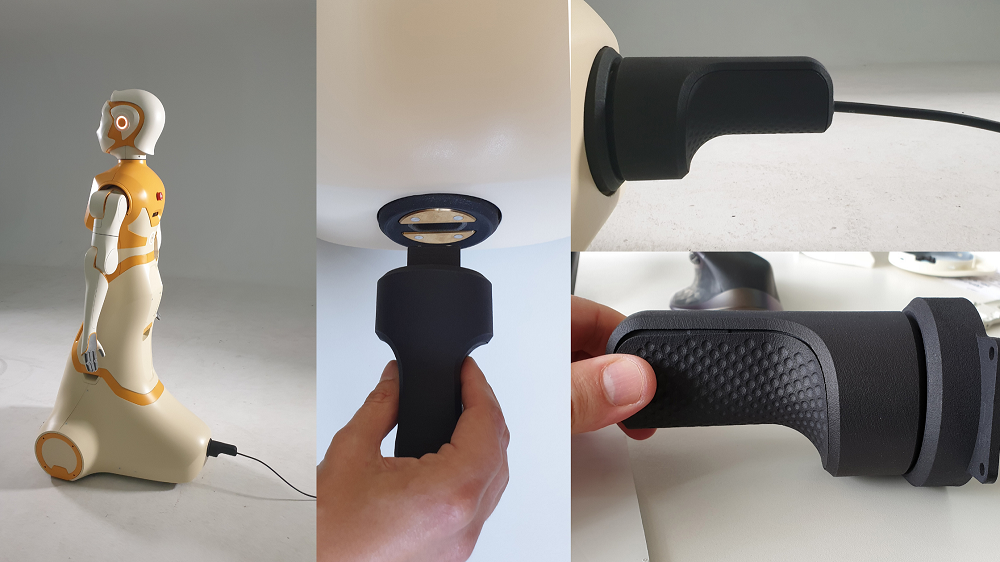
When it comes to creating orders, the PAL Robotics team is in direct contact with our designated sales team in Spain for large-volume projects. However, they regularly use the Materialise OnSite platform to get price references or place smaller orders that need to be delivered fast.
“It’s crucial for us to have a supplier that doesn’t only deliver the printed parts, but that monitors each order and offers effective solutions,” says Tito.
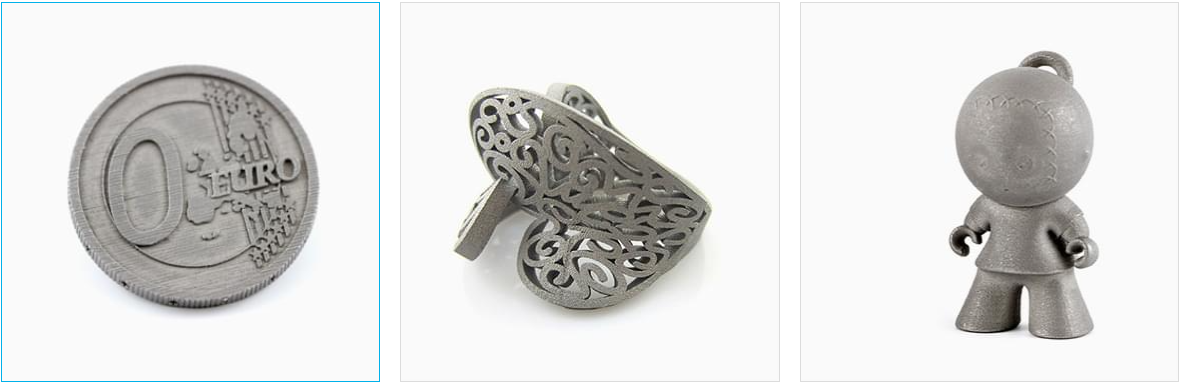
Enabling sustainability through flexibility
3D printing enables creative freedom and continuous improvement of design while delivering durable and high-quality solutions. It also helps PAL Robotics be more sustainable, as they only order and add new parts as they go, avoiding any additional waste.
“Materialise has helped us a lot with the finishes of the pieces in the last year. Being able to manufacture a piece that already has a final finish makes our products much more sustainable. Not only economically, but also environmentally,” admits Tito.
“As we don’t need to produce big batches, 3D printing is a much more adaptable and flexible solution that saves us money and time,” says Tito. Flexibility is also visible in the techniques PAL Robotics uses for their production.
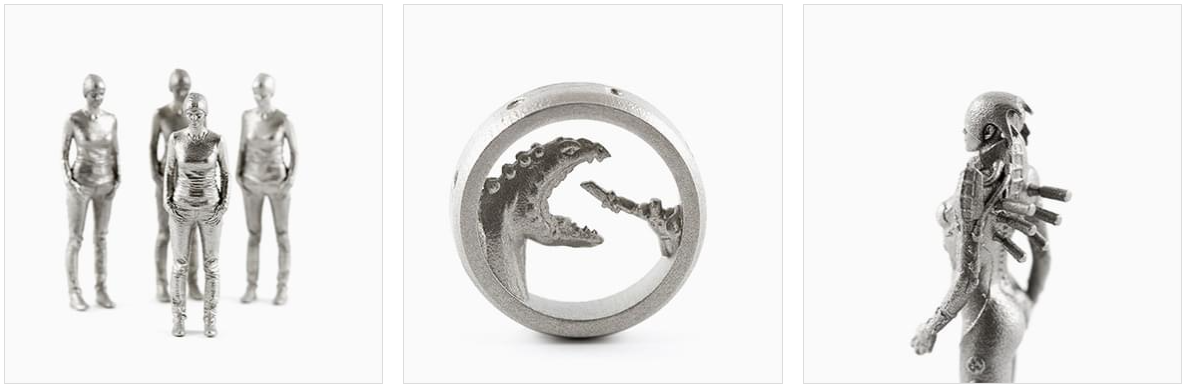
Their journey with 3D printing started with technologies like laser sintering and stereolithography. Following the market advancements, the PAL Robotics team also adopted a wider range of technologies, like vacuum casting and Multi Jet Fusion, that produce the finished look and extra functionalities. This way, they incorporated 3D printing in the entire production cycle, from prototyping to end-use parts.
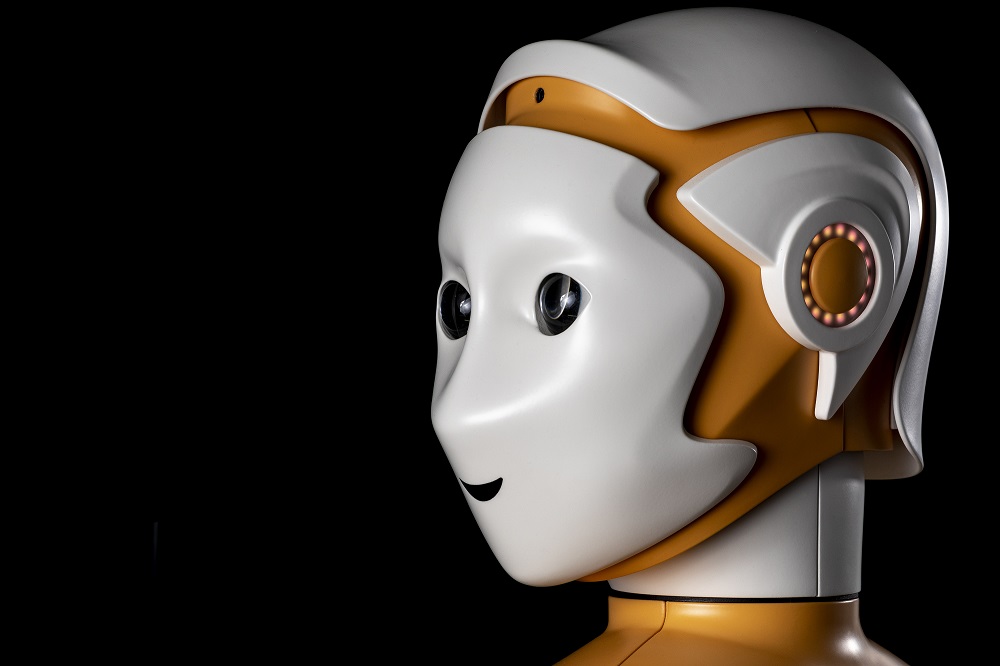
Ready to shape the future together
“Innovation is critical for PAL Robotics. It’s great to have a partner like Materialise that is a trailblazer in 3D printing technology. We usually make three or four variations of our designs in one year. Through traditional manufacturing methods, you could never do something like that!” explains Tito.
The fusion of robotics and 3D printing is something PAL Robotics will continue to explore. “We can change skins and colors of the robot’s surface, maybe even add a shock absorber to stabilize any impact or modify the materials during the AM process so the robots can contain bacteria-killing chemicals. This would be done to address our customer’s needs or to customize ARI for a specific purpose,” explains Tito.
“We are convinced that robots will have an increasingly important role in our everyday lives. The mission of PAL Robotics is to design robotics that will improve our lives and work. To do that, we’ll keep developing and improving our robots to meet the needs of society better. We consider additive manufacturing a big part of the discovery process to expand robotics and its value to society,” he concludes.
If you want to use 3D printing in your next project or need advice on how 3D printing can help you develop your idea, get in touch!
]]>
Frustration-free urban running — those are the words Runbell chooses for describing their unusual product: a bell for the urban runners amongst us. The goal of Runbell is to provide a stylish wearable bell for runners, solving the problem of how to courteously warn pedestrians on shared pathways.
Kevin Nadolny, an American living in Tokyo, is the mind behind this idea. Since he enjoys designing and running and lives in a densely populated region, it isn’t too surprising that he came up with this idea.
Kevin is a structural engineer at Nikken Sekkei, a large full-service architectural firm. He normally designs high-rise buildings and big structures that usually take more than a few years to go from the concept phase to completion.
While he enjoys his day job as a structural engineer designing tall buildings, he also loves designing and then creating smaller objects: “I am passionate about design and fabrication,” he told us. For Runbell, he controls the design, prototyping, production, and marketing — “I really enjoy this creative freedom.”
“I caught the entrepreneurial bug and just love the challenge of starting your own company. When you start your own company you have to learn and do everything, which is a fun challenge you don’t see at a typical day job. The work never seems to end, but holding your own product and hearing rave reviews from customers makes all the hard work worth it.”
Kevin got in touch with our 3D printing service when we wanted to produce the first fully functional prototype of a Runbell: “Our company (which started out as just me) could never have afforded to make a prototype without 3D printing. While the cost initially seemed high to me ($100 per prototype), they are actually a bargain. Creating prototypes the traditional way costs 10 times as much.”
“We could have bought our own 3D printer and found some very affordable options. However, we decided to use i.materialise and are glad we did. We can focus on the design and just receive 3D-printed objects in the mail. Plus, i.materialise has awesome materials to work with like Steel, Titanium, and Brass. Many times the customs officer had no idea how to tax our Brass prototypes because they arrived looking so beautiful.”
Kevin’s ambition is to turn Runbell into a sporting goods company with a focus on elegant, designer gear for runners and cyclists. He has since released his second project, an LED light ring for runners.
Our printers are always ready to produce the next prototypes or finished consumer products like this cardholder! Upload your design today, get an instant quote, and choose from our 100+ different materials, finishes, and color options.
]]>
We’ll talk about all 21 materials and more than 100 finishes that we offer here on i.materialise now! To make things easier, we’ll split this article into the following three sections:
For plastic 3D printing, the most popular choice is Polyamide — a strong and flexible nylon plastic. Its natural color is white, but it can be dyed in several colors. Its surface is somewhat rough, but it can be smoothed out. The printing option — laser sintering and Multi Jet Fusion — use powdered polyamide, enabling designers to use it for interlocking and moving parts (i.e., creating a chain).
Polyamide powder can also be mixed with Aluminum particles.
3D-printed Polypropylene has properties similar to the injection-molded kind, and the natural finish has a sandy, granular look in a translucent off-white color.
Another popular plastic choice is based on resin. Resin 3D prints are made from a liquid photopolymer cured with UV light during the stereolithography 3D printing process and feature a smooth surface. Resin printers can be huge — our biggest printers can print up to 2,100 millimeters! With five different resin options, you’ll find what you’re looking for, whether that’s prints with an extremely high level of detail or our more affordable option: Gray Resin.
Our Mammoth Resin prints are available with a natural finish or spray painted in the following colors:
By opting for this finish, you’ll receive your part with the support structures still attached. You can remove them yourself with tools and sanding paper.
By adding a small amount of paint to the varnish, we can create a colorful look in white, yellow, red, green, blue, gray, and black.
Our final plastic material is ABS. This material will give you a print that is strong and accurate. ABS is very useful for functional applications because it matches 80% of the properties of real injected production material. However, the surface quality of the models produced with this material is rough in comparison with other materials.
All of our metal materials are printed from their powdered forms. While Titanium is laser-sintered directly, Steel prints are created with the use of a binding agent and curing oven.
Aluminum is a great option for strong, lightweight parts. You’ll notice a subtle sparkle caused by the presence of silicon in the alloy.
If you’re looking for an extreme level of detail, High-Detail Stainless Steel is probably what you’re looking for.
Titanium is the strongest 3D printing material out there. It has a matte look and comes with an upscale price.
Our precious metal models come in silver, gold, brass, bronze, and copper. Most of these metals have several finishing options.
Although we polish copper models magnetically and by hand, the material is very sensitive to oxidation. By nature, copper has a reddish color but it will tarnish and turn green (verdigris) when it starts to corrode.
Gold objects can be created in 14k and 18k and in yellow, red, or white gold.
Silver comes in five different finishes, including our ‘antique finish’.
Multicolor is the only material that enables you to print models in more than one color. Models made of multicolor are constructed from a fine, white, granular sandstone powder. The interior of the model stays white while coloring print heads ‘paint’ the exterior of your model.
3D prints in Rubber-like are highly flexible and printed in Multi Jet Fusion machines. The surface of this material is fine and granular. Technically, Rubber-like is a plastic material; however, we put it in the ‘other’ category to highlight its extraordinary material characteristics.
Learn more about each specific 3D printing material in our overview table here. You can discover more information about all of our 100 different materials and finishes there. Once you’ve found the material of your choice, upload your 3D file here, select your material, and receive a high-quality 3D print right at your doorstep.
]]>
Cults offers its users the perfect range of 3D models — from maker-inspired 3D files all the way to high-quality professional designs. Cults checks each 3D design for printability and organizes them into different groups such as fashion, art, jewelry, home, architecture, or gadgets. The mix of a visual interface, a well-arranged database, and a focus on smart, useful, and beautiful designs makes browsing through their website a lot of fun. While many models come for free, others come at very affordable prices.
Cults facts:
Focus on 3D printing: Yes
Price: Free and payable
Target: Hobbyists and designers
Pinshape offers its visitors the opportunity to browse through a great selection of free and payable STL files from 70,000+ makers and designers. Finding great 3D printable models on the website is child’s play: both the visual representation and logical organization of the website are top-notch.
Pinshape facts:
Focus on 3D printing: Yes
Price: Free and payable
Target: Hobbyists and designers
Thingiverse is probably one of the biggest and most popular databases. It has a very active maker community behind it and offers free-to-use STL files only. You don’t even need to open an account in order to download a 3D model from their site.
Thingiverse facts:
Focus on 3D printing: Yes
Price: Free
Target: Makers
GrabCAD is different than the databases we have looked at so far. Firstly, GrabCad provides you with technical, engineering, and scale models only. Secondly, it lets you filter its database based on the 3D modeling software that the designs were created in. It’s the place to be for anyone looking for more than 5 million technical 3D files. However, take into account that this website is not intended for 3D printing.
GrabCAD facts:
Focus on 3D printing: No
Price: Free
Target: Professionals interested in technical/engineering parts
The 3D Warehouse simply screams ‘geometrical.’ Whether you are looking for architecture, product design, or scale models, 3D Warehouse offers anything that was created with the popular 3D modeling software SketchUp.
3D Warehouse facts:
Focus on 3D printing: No
Price: Free
Target: Professionals interested in geometrical/architectural models
CGTrader offers a dedicated database for 3D printable objects. We noticed that there are many printable jewelry designs in particular on this website. While many models are downloadable for free, others come at affordable prices.
CGTrader facts:
Focus on 3D printing: No, but 3D printing database available
Price: Free and payable
Target: Hobbyists and designers
TurboSquid is the place to be for downloading the most stunning 3D designs. It doesn’t get any more high-end and professional than this. The problems: the designs are great visually but are not optimized for 3D printing. There is also no filtering option for finding 3D printable models. Furthermore, all models on TurboSquid are premium (payable) files. Quality comes at a price.
TurboSquid facts:
Focus on 3D printing: No
Price: Premium
Target: Professional designers and 3D artists
3DExport is somewhat similar to TurboSquid: this is also a database that focuses on the visual aspects and offers amazing premium 3D models. In addition to this, 3DExport offers its users a filter for finding 3D printable models only.
3DExport facts:
Focus on 3D printing: No, but 3D printing category available
Price: Premium
Target: Professional designers and 3D artists
Printables is a community site for 3D printer users that offers thousands of free printable 3D models. Browse through many category options for functional, stylish, and fun models that are ready to print. Printables offers a great filtering system so you can find exactly what you’re looking for.
Printables facts:
Focus on 3D printing: Yes
Price: Free
Target: Hobbyists and designers
Last but not least we want to mention Yeggi, a search engine for 3D printable models. Yeggi scans all the databases mentioned above, and many more, for 3D printable files. So if you want to search the ‘Google’ of 3D models, this might be the right website for you.
Of course, we cannot mention each and every 3D model database out there, but we think that these 10 sites are great places to get your first stunning 3D models.
And by the way: After downloading (and maybe editing) a file, feel free to upload the 3D model to our website and let us print it in 100+ materials and finishes on industrial 3D printers. It’s the easiest way to get a high-quality 3D print.
]]>
The following examples are taken from Cults 3D, a 3D model database for 3D printing. Cults lets you download all of these designs as STL files and which you can use to order high-quality prints via our online 3D printing service.
This indoor planter features a printed wall cleat, allowing for it to be mounted to the wall, and giving it the ability to slide on and off in combination with other wall-cleat products. It’s perfect for small cacti and succulents. We printed it in Alumide (a mix of Polyamide with Aluminum particles) which gives this hanging flower pot the perfect look.
This little sign in the shape of a light bulb is designed to decorate a light switch. It is perfect for teaching kids to save energy by switching off the light when they are not in the room. In order to make it stand out, we decided to print this one in yellow-dyed Polyamide.
These miniature gardening tools were 3D printed in Alumide and can be attached to any standard hexagon pencil. The set includes tools such as a shovel, pitchfork, spade, hoe, and a rake. Simply perfect for taking care of your desktop Zen garden!
This handle allows you to upcycle a marmalade mug thanks to 3D printing. In the example below, the handle fits perfectly on a Jar of “Bonne Maman.” Once the jar is empty, it can simply be reused as a drinking mug.
3D printing can make organizing your desk much more fun. The heart-shaped bookmark will always show you where you left off reading something. The little yellow paper clip that says ‘LOL’ exists in all forms of messages and helps you categorize your paperwork, and the like stamp is the ultimate analog upvote button. We printed all these designs in dyed Polyamide.
This PET flower vase is another great example of upcycling. Give used PET bottles a second life by turning them into a useful decoration. We printed this object in our natural white Polyamide material.
What looks like a sticky note is actually the minimalist design of a smartphone stand. This 3D print is the perfect solution if you like to keep an eye on your phone while working at your desk.
Discover even more stunning 3D printed designs: Take a look at the top 10 Silver 3D prints and 5 stunning 3D prints in Alumide.
Do you want to print your own products? Simply upload your 3D design to our site and choose from 100+ different material options. We’ll print the object on our industrial machines and ship it to your doorstep.
]]>
The pricing for most 3D printing materials is volume-based. The less material you use, the less it will cost you. This means a hollow model will be cheaper than a solid one. For some 3D printing materials, hollowing your object will also avoid deformations.
However, creating a 3D model with an empty interior can be a bit tricky: you need to know how to hollow your model in the 3D modeling software you’re using, you need to define a wall thickness that is strong enough for your model not to break, and it probably makes sense to add so-called ‘escape holes’ to your model. So let’s take a look at these things a step at a time.
A hollow model means that the interior of your object will not be solid. Solid designs are not necessarily a problem — depending on the material they will be stronger and harder to break, but they will also be more expensive as more 3D printing material will be used.
With a hollow model the interior of your print will be empty. However, since our printers print layer by layer, 3D printing material can get trapped in the interior of your model as you can see in the image in the middle below. If you would like to avoid this, you can add ‘escape holes’ to your design. Material that is not used for building your 3D print can then be removed.
Creating a hollow model means that you need to design your object with ‘walls.’ A printer needs to know how thick the walls of your objects (the ‘outer shell’ if you will) are supposed to be. We don’t have a single, ‘one-size-fits-all’ wall thickness to recommend for each and every 3D printing material. Some, like High-Detail Stainless Steel and Titanium, can go quite fine with minimum wall thicknesses of 0.3 mm and 0.4 mm, while most of our materials range somewhere between 1 and 3 mm.
Maybe you are thinking about saving some money by pushing the wall thickness to the minimum. That’s only logical since this means that less material will be used and the print will be cheaper. However, think about the fact that making walls too thin can make your model too fragile and might cause parts of it to break off.
Read our guide on how to get the perfect wall thickness for your 3D print and make sure to read the guidelines for your 3D printing material first.
Each and every 3D modeling software works differently, so hollowing a 3D model is easier in some programs than in others. We’ll take a look at some examples here nevertheless.
One program with an easy-to-use hollowing function is 123D Design. It can hollow any shape by clicking on ‘modify’ and ‘shell.’ You can then select how big the hollowed space will be and how thick the walls will remain.
In other programs, like SketchUp, it’s a bit more complicated. An easy way is to start with a 2-dimensional rectangle and use the ‘offset’ function. This will create a rectangle within the rectangle. Delete this space and you’ll have an empty space in your rectangle (left-hand side in the image below). You can then ‘pull’ this 2D shape into a 3D object (right-hand side in the image below). In a final step, you can add ‘walls’ at the top and bottom of the design.
Probably the easiest way to get a hollow model is by downloading the free Autodesk software Meshmixer. Insert your 3D file, select ‘edit’ and ‘hollow’ and you will have immediate results.
As already pointed out, our 3D prints are created layer by layer. With a hollow interior, this means that 3D printing materials can get trapped inside the object. A hollow model full of trapped powder is in danger of deforming. Escape holes are recommended for getting ‘trapped’ 3D printing material out of your 3D print. We typically use pressurized air to clean the excess powder off.
Now the questions remain how many escape holes a print needs and how big they need to be. And once again there is no universal answer to this: it all depends on the 3D printing material and the size of your print.
Let’s take a look at some examples: while we recommend at least two escape holes for Multicolor+ prints, you should design more holes than that for Gold, Silver, Brass, and Bronze prints. Once again, taking a look at the individual design guides will provide you with all the answers.
The exact procedure depends on your software but the idea is often the same: create a cylinder at the bottom of your model and extrude or subtract from its wall (see image below). Meshmixer’s hollowing tools even come with a function that lets you create escape holes automatically.
Now that you know how to create hollow models and cut 3D printing costs, what’s holding you back from uploading your 3D file here and creating a stunning 3D print? You might also be interested in learning more about the 5 mistakes to avoid when designing a 3D model for 3D printing.
]]>Every so often, an artist comes along who pushes the boundaries of what we believe is possible. Danny van Ryswyk is an acclaimed Amsterdam-based digital painter and sculptor who creates surreal, paranormal sculptures using 3D CAD (computer assisted design) sculpting software and hand-painting techniques. His sculptures and two-dimensional render-based paintings join childlike fantasy with the macabre and fantastical world of nightmares. His work is dark, brooding, and admired all over the world. His sculptures are 3D paintings, instantly recognizable by their smooth surface, dark colors, and minute level of detail.
The examination of a reality that exist outside the range of science’s ability to explain or measure.
When I first started painting 3D-printed sculptures, I envisioned classic polychrome-painted religious sculptures made from wood. I wanted to create hand-painted objects with an authentic feel and look. Traditional methods involve covering the sculpture with plaster first, and then applying oil or tempera paint to its surface. In my case, I use a modern approach because my sculptures are 3D printed in Polyamide, a material which requires different painting methods.
Half a year ago, I started using 3D printing technology. I create my sculptures in Zbrush, a 3D software specifically used for high-poly sculpting. As an artist, high-poly sculpting software allows me to work with digital objects as if they where made of clay, and to sculpt with utmost attention to detail. This gives me unlimited freedom to create whatever I have in mind.
Because my work is made in a digital environment, 3D printing is an interesting new method to get my work out of the computer. You know… I do not consider it important that it is made of polymer, clay, or porcelain. What is important are the final results, the realization of the idea, not the 3D printing technology itself. That is just a way to get there.
So far I prefer Polyamide, because it is the only material that can print in the highest detail level for the sizes I want. I have considered muliticolor sandstone material, but the colors used in this printing process are based on dye inks that are sensitive to UV-light. This makes them unsuitable for my artwork. Furthermore, there is no color profile system for this type of printing.
The moment I visualize an idea, the real work begins. I never make a sketch, so nothing is written in stone at this stage. Instead, I make a mental projection of the idea and work from there. I can spend weeks, even months, working in 3D software on a sculpture that might contain many layers and parts. From there I can go two directions, namely: creating a digital painting, or letting i.materialise create a 3D-printed sculpture of my model.
My 3D-printed sculptures are an adaption of its existing digital painting I made of the sculpted 3D model. The digital painting serves me as an example of how the hue/values on the 3D-printed sculpture should be like. I choose to work in a monochrome color scheme for all my works.
The first thing I do when I receive my sculpture from i.materialise is thoroughly clean it with water. This washes off any powder that is left on the sculpture from the printing process. After that, I leave the sculpture to dry for several days.
Then, I prepare my paints and brushes. I only work with high-grade paints and materials which are tested for their durability and fade-resistance. I make use of several brush sizes, since it is often hard to reach the small corners and places with just a normal paintbrush. One trick I use is bending the metal ferrule of an old brush, so that I can paint these impossible-to-reach corners!
When needed, I also use a few other unconventional methods. For example, using a toothbrush to splatter paint on parts of the surface to create texture. I might also cover the surface with a transparent wash of paint and wipe it away to highlight the focus on parts and bring out the details. There are no rules, I invent and take risks and see where it goes from there. This is how I make my art.
When I start I painting, I give the whole sculpture a warm mid-tone grey under-painting color. This serves as a good base for later hues and values.
After I lay the base, I start painting all the elements. I do not start in any particular order. Instead, I just start with what feels right: flesh, clothes, masks, skulls, and bones. From studying the old masters, I became experienced painting layer upon layer until I reached that high level of perfection. The same methods are applied here, except with acrylic paints instead of oil or watercolor.
The smaller the scale of a sculpture, the more details need to be painted onto it. For instance, the folds in clothing. I paint the higher parts of a fold lighter, and the lower parts darker. Depending on natural light and shadows is not enough, they need to be added and accentuated as well to raise the dynamic of the form. This is very important, or else it will become flat and lifeless. The illusion of depth is the key.
Many hours go into painting a sculpture. Every detail takes time and dedication. The eyes can take up to several hours of work just to get the right expression. The texture of the skulls are painted in many layers as well. The surface of an old bone or skull is covered with little specks, dirt and discoloration. It is a meticulous job to paint this effect. When the sculpture is finished I sign it and place it under an antique glass dome.
Art is all about finding your own style and methods. I do things my way and you should do things your way. If you want to start making art with 3D printing because you think that 3D printing technology is cool, then you are thinking the wrong way. See if the method and material can give you what you are looking for. That is what truly matters.
To create a digital painting, I import my 3D model into rendering software. That’s where I apply textures, lights, and camera. I use the rendering software to create a complex scene with intricate backgrounds and atmosphere. This scene is then rendered into a 2D image, which I further refine with digital paint. The final results of this process are 2D printed using pigment inks on museum quality cotton paper, and then framed.
Do you need a new 3D print? Simply upload your 3D model here and choose from 100+ materials and finishes from our online 3D printing service.
]]>
We have put together a compilation of 3D-printed camera accessories that can bring photography to the next level.
Get your camera ready for an upgrade with this inspiring 3D-printed camera gear!
Sometimes, even the smallest actions can ruin it all. Do you know that annoying feeling when you take the lens cap off your camera and can’t find a place to keep it? Or, even worse, when you lose the lens cap altogether? To avoid these sticky situations, Dutch designer Willem Sparreboom designed this lens cap holder in 3D-printed polyamide (MJF).
This 3D printing material is perfect for this camera project because it’s light yet sturdy, and the black color matches the camera perfectly. It’s a simple but smart 3D printing project that allows you to improve your photography experience. You can buy the 3D-printed lens cap holder here.
GoPro is the camera of choice for the most adventurous photographers. Those looking for alternative ways to use their cameras can experiment by 3D printing mounts for their GoPro – and tailor it to their wishes.
The scuba diver Felipe de la Torre 3D-printed this mount to attach his camera to the side of his diving mask. This 3D-printed camera mount was made in alumide to make it sturdy and lightweight at the same time. It’s certainly an original way to bring 3D printing to the bottom of the sea! You can even match the color of your diving mask to the mount with our wide range of colors for alumide.
This smartphone adaptor is a birdwatcher’s dream! Conceived by the customer optics company Opticron, the adaptor was designed on Tinkercad and is the perfect gadget for digiscoping. This photo technique allows photographers to capture distant images with their digital camera or smartphone by coupling it with an optical telescope.
The gadget is the perfect compact, easy to use and low-cost adaptor to take impressive pictures of nature and birds with a smartphone. The adaptor can also be customized to be used with different smartphones, which allows for a lot of flexibility. The gadget is 3D printed in polyamide (SLS): a lightweight, affordable and sturdy option.
Another popular camera for recording outdoorsy activities is the EVO Camsports. The Dutch designer Monique de Wilt created this mount for ski goggles, enabling the user to record ski tours, snowboard stunts or dirtbike trips without the need to attach a camera to your head. With this polyamide (SLS) holder, you can mount the tiny EVO Camsports camera unobtrusively on the elastic band of your ski goggles.
“You can easily and securely attach your camera. So easily that you can even put your camera in the holder without taking your helmet or gloves off. You push the camera in the holder, twist it until you can push it all the way back and twist it until the knob points up. Voila, it is secured, it cannot move back or forth. The holder fits on elastic bands with a width of 4cm,” explains the designer about her gadget. You can find Monique’s 3D-printed camera mount in her online shop.
Another creative and useful 3D printing idea to make the most of your camera is this customized rig for a DSLR camera. DSLR cameras are more affordable than high-end cameras and they offer very high-quality images, but it can be difficult to use them for shooting. So the filmmaker Daniel Samier decided to unite his work as a cinematographer and his interest in 3D printing with this 3D-printed camera rig.
Moonrig is a collaboration between Samier and the industrial designers Jan Heinzelmann and Sami Ayadi. To get the perfect design, they talked to other cameramen to know more about their preferences and expectations for a camera rig.
The result is a lightweight 3D-printed camera rig in polyamide, perfectly suited to long periods of work. You can find Moonrig camera rigs on their online shop.
Did you get inspired by this 3D-printed camera gear? You can also find other ideas to take your camera to the next level with the help of 3D printing by checking out these 3D designs.
Whether you design the camera solutions in 3D yourself or you download them from a database, you can upload your 3D file to our 3D printing platform to get it 3D printed.
Do you have any 3D-printed projects for your camera? Share them with us on social media! #imaterialise
]]>
Sticking to this checklist will make sure that your 3D model is perfectly prepared to be 3D printed.
A printable model must not have any holes in its surface. Ask yourself the question: if I were to put water inside my model, would it flow out? If that’s the case, then you need to find those holes and close them. Sometimes this process is also called ‘creating a manifold model.’
The design below is an example of a model that is not watertight. You can clearly see that there is a big gap in its surface.
It’s very important that every surface of your 3D model has been assigned a wall thickness. When using your 3D modeling software, it is possible to design a surface without a wall thickness. Many visual 3D models (e.g., 3D models intended for games) only have surface visual purposes and thus do not have wall thickness.
However, 3D printers need information about how thick you intend the wall of your object to be or if you want to print a completely solid model. Therefore, when turning a 3D model into a real 3D print, the wall thickness or volume information is needed.
Wall thickness is simply the distance between one surface of your 3D model and its opposite sheer surface. Many printing problems can be traced back to wall thickness issues. The minimum printable wall thickness primarily depends on the material you choose.
You can learn how to choose the perfect wall thickness for your 3D print here.
While a model might look great for 3D printing from the outside, intersections in the model can make it unprintable and confuse printers about what exactly you want to print. Intersections and walls within your design will therefore make your life difficult. That’s why it makes sense to think about your model in a 2-dimensional space first.
In the case below, the left shape will not be printable once it is transformed into a 3-dimensional object since it will feature paper-thin walls within the object. The shape on the right, however, won’t be a problem to print because it won’t feature those walls on the inside. In most cases, it is useful to implement a boolean operation, which is a function that helps to merge several overlapping elements.
Another problem that can occur is the phenomenon of so-called inward-facing or reversed faces. Most 3D modeling programs distinguish between the inside and outside of a surface in order to determine the model’s volume.
A reversed face or inverted normal means that the surface of your model is facing in the wrong direction: typically, this means that it is facing the inside of the object instead of the outside.
It’s important that you double-check your file and make sure that all normals are facing the correct direction.
Unfortunately, so-called grouped models are a common reason for us to cancel orders. For example, users that upload the following design with six separate shells will get a notification that their order will be canceled (of course, they will be fully reimbursed).
When you need more than one print, simply upload the separate objects individually. If you need exactly the same design several times, there’s even a quantity discount. If you need many small polyamide or alumide parts, then consider designing a grid container for your 3D prints.
The details, or the small decorative parts of the 3D object, such as embossed or engraved text, need to be of a certain size or they will not appear on the printed object. The exact minimum size of the smallest possible features of the design depends heavily on the material of your choice. That’s why you need to carefully read through the design guide of the material of your choice first.
This is especially important if you intend to add embossed or engraved details such as text. Sticking to the minimum detail size will make sure that everything is as readable as you intended.
A hollow model means that the interior of your object will not be solid. Solid designs are not necessarily a problem — they will be stronger and harder to break, but they will also be more expensive as more 3D printing material is used.
With a hollow model, the interior of your print will be empty. However, since our printers print layer by layer, 3D printing material can get trapped in the interior of your model.
If you would like to avoid this, you can add ‘escape holes’ to your design. Material that is not used for building your 3D print can then be removed.
You can read more about hollowing and how this reduces 3D printing costs here.
For 3D printing, the most common file format is STL (Standard Triangle Language), which means that your design will be translated into triangles in a 3D space. Most 3D modeling software has the option of exporting your designs to an STL file format and lets you set the desired resolution. Here’s a visual representation of different file resolutions from extremely high (left) to quite low (right):
In most 3D modeling software, when exporting a file, you will be asked to define the tolerance for the export. This tolerance is defined as the maximum distance between the original shape and the STL mesh you are exporting. We advise choosing 0.01 mm for a good export. Exporting with a tolerance smaller than 0.01 mm does not make sense because 3D printers cannot print at this level of detail, and your file will be unnecessarily heavy.
When exporting with a tolerance larger than 0.01 mm, however, triangles might become visible in the 3D print. You can read more about this in our blog post about file resolution, where we also explain the 40 other 3D file formats we support.
Let’s take a deep breath. Don’t worry: things sound more difficult than they are. If you are struggling to learn how to 3D model, you can always find plenty of resources and tutorial videos online. Once again we want to point out our material guides, where you will find valuable and precise instructions for each 3D printing material.
If you designed a 3D model for printing, why not print it with our online 3D printing service? It’s easy, fast, and efficient. When uploading a model to our website, we will always double-check your design before we send it to the printers, and if there are mistakes or if parts of your object could break, we will warn you about this and tell you what went wrong.
Learn about these 5 mistakes to avoid when designing a 3D model for 3D printing to make it even easier.
Featured image: 3D model of the Šibenik Cathedral of St. James 3D-printed in transparent resin
]]>
Over the last thirty years, additive manufacturing has become an important part of the manufacturing toolbox. Its versatility and flexibility bring plenty of added value — yet it has also spent much of that time isolated from conventional production processes. However, those walls are slowly coming down, with the two worlds beginning to merge.
The implications of this are huge.
Each year, our parent company, Materialise, presents the 3D printing trends that will shape our industry in the coming months. For 2023, we believe that these four trends hold the key to breaking down the barriers that are still associated with adopting the technology as part of an industrial manufacturing process. They are:
By addressing these topics, companies can scale up their 3D printing operations into volume production and advance the overall adoption of 3D printing. Watch the video below to learn more about the four biggest 3D printing trends for 2023.