How to Get the Perfect Multicolor+ 3D Print
Have you already discovered Multicolor+, our new 3D printing material in full color?
Maybe you are thinking about 3D printing your next design with Multicolor+ but you don’t know what to expect. In this article we will explain how the technology behind Multicolor+ actually works, what colors can you expect, and how to model your 3D design to get the perfect full-color 3D print.
Here’s all you need to know about 3D printing in Multicolor+!
The technology behind Multicolor+
Multicolor+ is a 3D printing material that enables you to print models directly in more than one color. And get ready to be amazed: we can print up 10 million different colors!
The technology that makes Multicolor+ possible is a full-color 3D UV inkjet printer. UV Inkjet printing is similar to 2D inkjet printing technology and makes use of UV-curable inks that are hardened with UV light.

The printing process involves applying successive layers of curable ink on top of each other until the desired design is completed. Water-soluble support material is used to build overhanging elements and is removed after the printing process.
Watch this video to understand how the technology works at full speed, and how the 3D models turn out after the support material has been removed.
A better material for your full-color 3D prints
Multicolor+ offers brighter colors and stronger parts for your full-color 3D prints, with better surface quality. Because of the 3D printing process, some layers will be visible if you look closely.
Multicolor+ allows for higher precision and more detailed designs. The 3D prints can have thinner walls because the material is stronger.
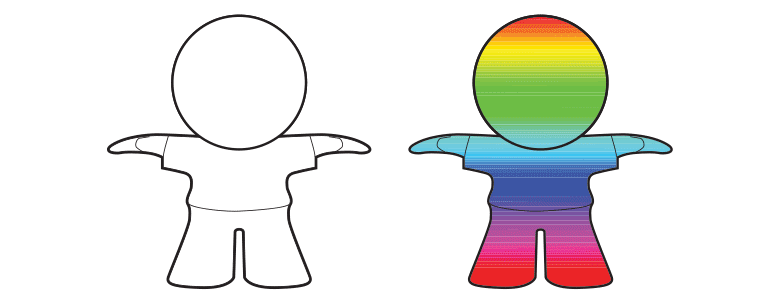
What’s more, no extra support is needed for overhanging or thin parts because the models will be surrounded by support material. Look at the arms of the heart on the following image as an example of this.
Another big improvement for Multicolor+ is the possibility of 3D printing interlocking parts such as chains and other interlocked structures.
The Multicolor+ 3D printing material is also splash-proof. That means that it can handle some exposure to water. It’s not waterproof, so it’s not advisable to submerge it in water, but a drop won’t ruin it.
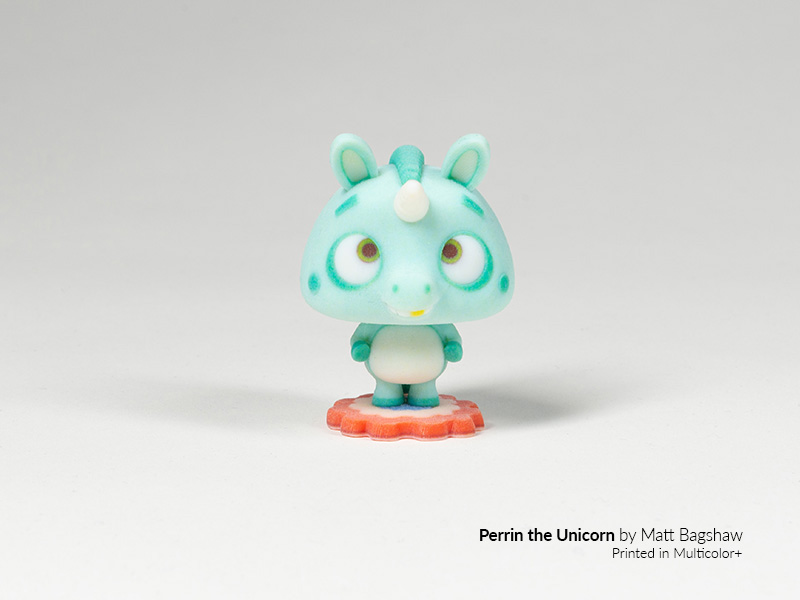
Multicolor+ is ideal for decorative parts such as figurines, avatars, or architectural models.
At the moment, there is just one finishing option for your Multicolor+ 3D prints: Standard.
What colors should you expect from your Multicolor+ 3D print?
A short physics lesson on colors will help you get the best possible color on your print because the color you see on your screen can differ slightly from the printer’s colors. The pixels on your screen are all composed of red, green, and blue (RGB); whereas multicolor printers use cyan, magenta, yellow, and Key (black).
Since your screen and our printers do not use the same color system, the set of colors might shift slightly.
In both CMYK and RGB, mixing these basic colors leads to new color options.
CMYK works pretty much like the box of paints you used back in school. If you don’t have the color you’re looking for, you need to mix two existing colors together. Adding colors together usually means that the new color will be slightly darker (when you mix yellow and black, the resulting color simply cannot be brighter than yellow, can it?). That’s why this system is called a ‘subtractive color model’. Adding all colors together produces black.
Screens, however, do not work like our box of paints. Instead of using paint or ink, they use light. The colors of light are red, blue, and green (RBG). When the colors are added together, the result gets brighter. When all three colors overlap, the color becomes white. That’s why this system is called an ‘additive color model’.
When colors are converted from RGB to CMYK, the color intensity changes a bit. So, what you see on your screen and what comes out of the printer might look slightly different.
Bright colors on a screen tend to look duller and darker in CMYK. Generally, the brighter, more vivid and vibrant the colors on your screen are, the bigger the difference between your 3D model and your 3D print will be.
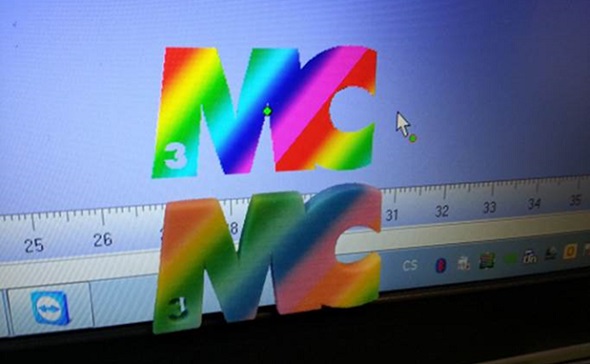
Example of a 3D print in multicolor and a bright computer screen
Another problem is that computer screens have adjustable settings – so things like brightness, gamma, and color temperature can make a huge difference. Monitors can also vary greatly in color accuracy, depending on the technology (TN, PVA, IPS, OLED) and the calibration setting.
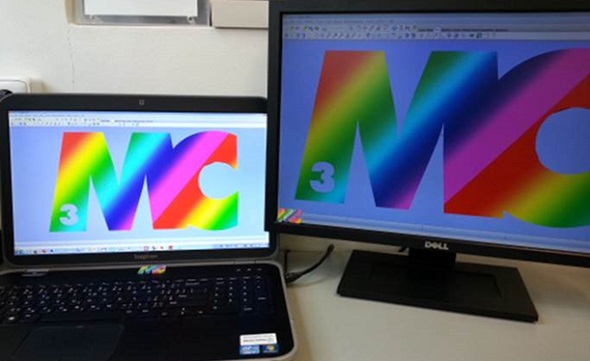
Example of two monitors with two very different color and brightness settings
Does this color variation make a huge difference? In most cases, it really doesn’t. But if you need a precise color that must not change even slightly – let’s say for a 3D model that features skin color – you might want to order a smaller test print first and experiment a little to get the color exactly the way you want it.
Keep in mind:
- If your 3D file doesn’t contain any color information, it will result in a white print
- For multicolor, you must either upload a file that already includes the textures (e.g. 3MF, colored STL, WRL, SKP, X3D, and DAE) or a ZIP file containing all the necessary color information (e.g. an OBJ file with a texture map and an MTL file). The texture will be shown if you select the Multicolor+ material. If the texture is not shown, contact our customer support.
We’ll cover textures later on.
Design Guidelines for Multicolor +
Wall thickness
One of the main advantages of the new Multicolor+ is the possibility to 3D print thinner walls. Wall thickness is one of the most important things to take into account when designing for 3D printing. A thinner wall can ruin your design, but with Multicolor+ it’s possible to create walls as thin as 1mm. For larger sections, it should be increased to at least 1.5 mm.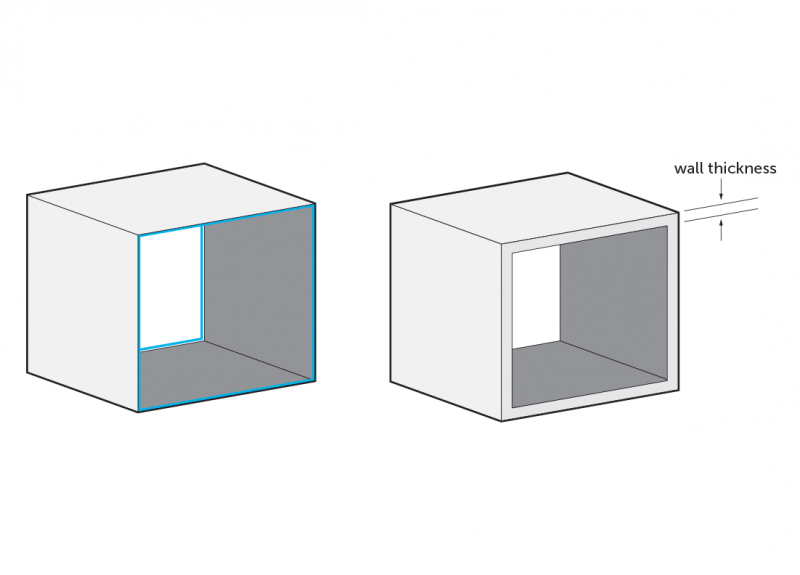
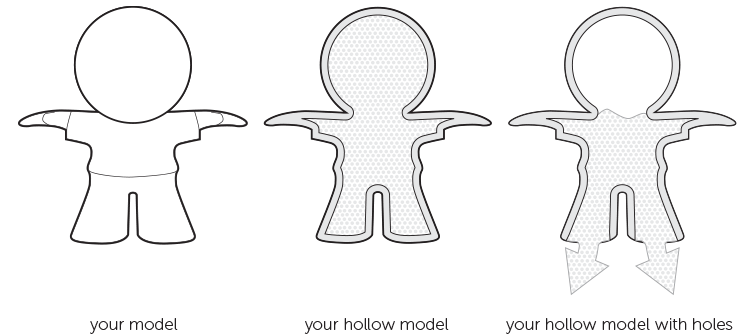
Hollowing model
A rule of thumb for hollowing out your models is to maintain a wall thickness of at least 1.5 mm. For other materials, on the contrary, we advise keeping the support material trapped in your model. If trapped support material is not an option, you will need to make at least two escape holes with a diameter of 10 mm.
Hollowing your Multicolor+ models can also help you reduce the price for your 3D prints.
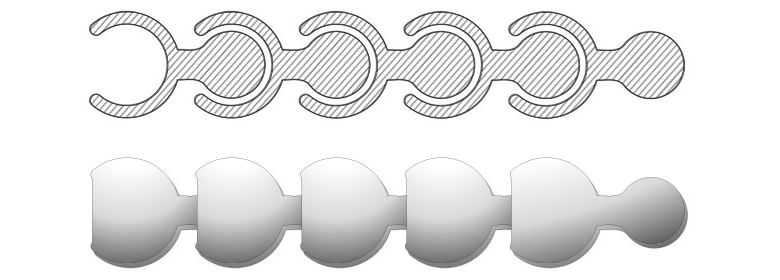
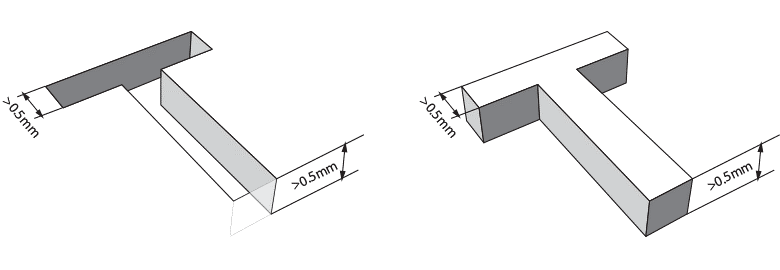
Interlocking parts
With Multicolor+ it’s also possible to 3D print interlocking parts. To 3D print a chain in Multicolor+ it’s very important to keep a minimum space of 0.5mm between designed surfaces. The more space you can afford, the better.
The more complex your design is, the more complicated it becomes for the support material to be removed from the empty spaces. Try to visualize how the support gel will flow through the spaces of your 3D-printed design.
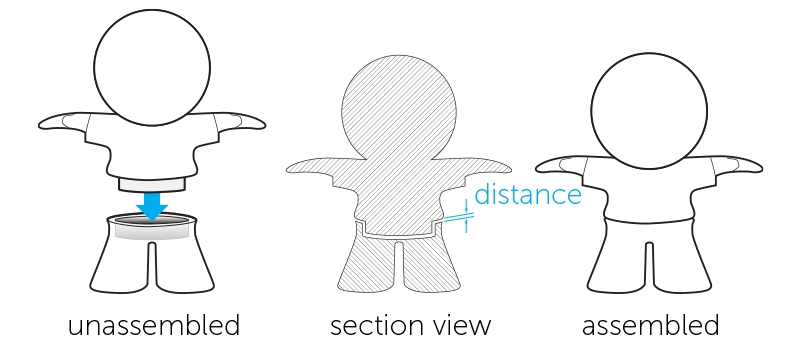
Assembled parts
When designing models that need to be assembled, it’s important to provide enough distance between the parts that will be attached together. A perfect fit in your software package does not mean a perfect fit after printing because your software ignores the friction present in the real world. Therefore, always leave at least 0.6 mm between the different parts.
Embossed and engraved details
For engraved text or surface details in Multicolor+, we recommend letters with a minimum line thickness of 0.5 mm and a depth of 0.5 mm.
For embossed text and surface details, a line thickness of at least 0.5 mm and a height of at least 0.5 mm is advisable.
Maximum size
The maximum size for your 3D prints in Multicolor+ is 150 mm x 150 mm x 150mm.
The texture: getting color information into your Multicolor+ 3D model
As our multicolor material is colored during the printing process, your 3D file must contain texture information.
If your model features textures, be sure to upload all the necessary information to our site. How can you check we’ve received all the information? Well, if you see your texture on the model in the display screen after having uploaded it to our website (and after selecting Multicolor+), then we have the information. However, if you see a monocolored or untextured model, it’s possible that some information is missing. If this happens, check your export settings and the file format you used. Some file formats are able to include textures directly in the file (e.g. colored STL, WRL, SKP, X3D and DAE), while others store the texture in a separate image file and map file (this is the case for obj).
In the latter case (obj files), it’s important to remember that an obj file alone only has the information about the model’s shape and volume. It’s a mesh without any texture information. For printing in color, you also need to save a mapping file (mtl), which tells the printer where the colors and texture information should go.
If you have used texture images (for example, png files), they must also be included in the upload. Simply group all files related to the model in a zip file and upload it to our website. Our viewer still won’t show the texture, but we’ll have all of the information we need to print the model the way you want it.
We hope that you have found all you need to get the perfect 3D prints in Multicolor+.
Read our design guides on the material here.
When your 3D designs are optimized for Multicolor+, you just have to upload them to our 3D printing platform to order your prints.
Remember to check that the colors are visible on the preview or make sure the color information is included in the upload. Read the textures section above to make sure.
We look forward to seeing your design on social media with the hashtag #imaterialise.