Wall Thickness
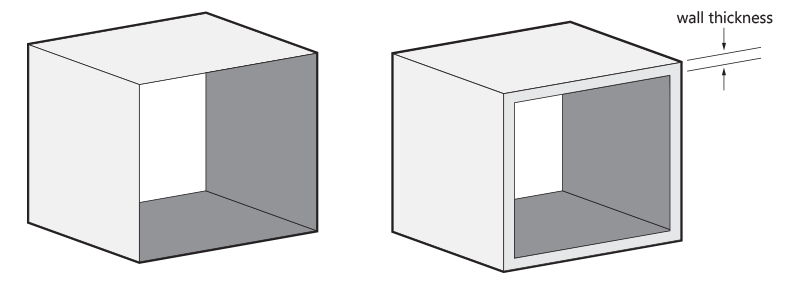
In 3D printing, wall thickness refers to the distance between one surface of your model and the opposite sheer surface. For the minimum wall thickness you can use is 1mm. However, if you plan on making larger sections, the wall thickness should be increased to at least 1.5 mm.
Please note that our production team will hollow out models with walls that are more than 15 mm thick by default to prevent deformation. The support material will stay trapped inside.
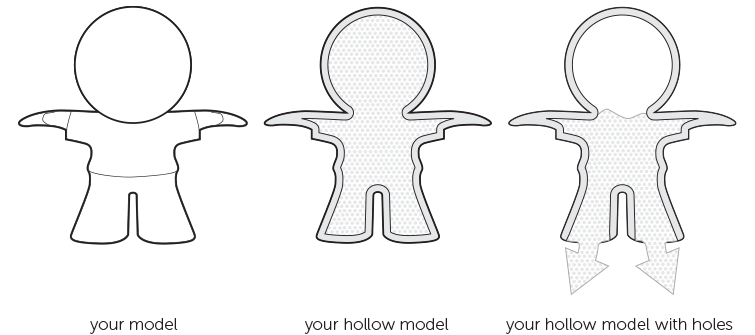
Hollow out Your Model
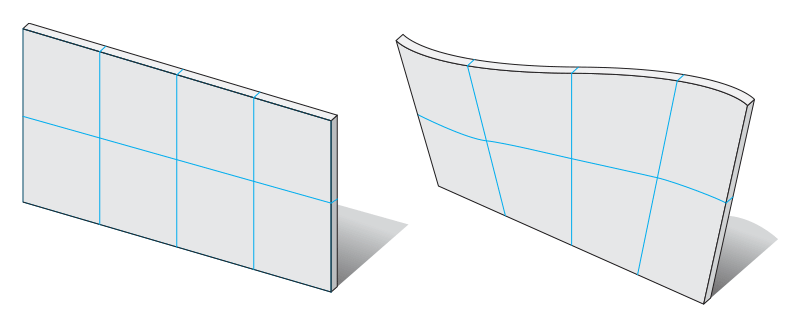
Flat Planes Can Cause Warping
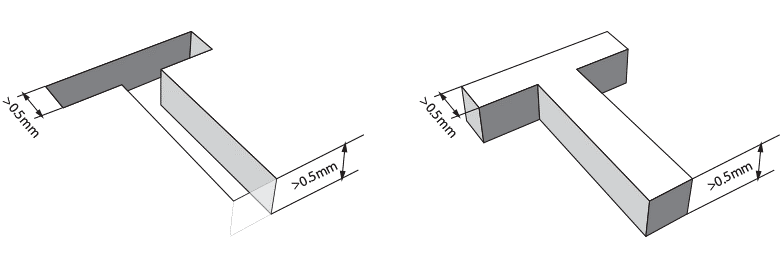
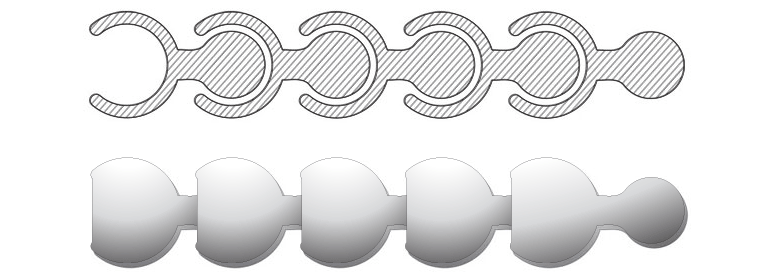
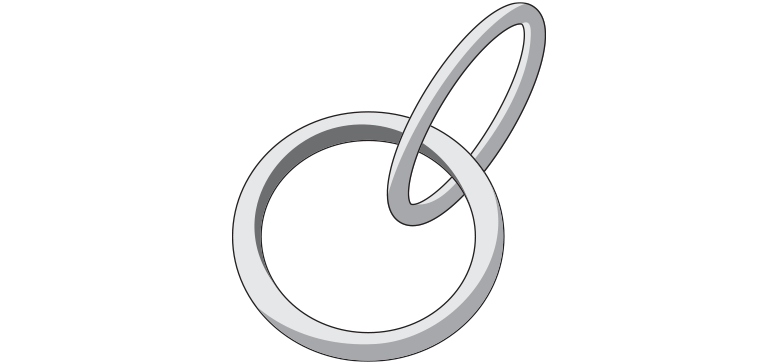
The Right Space between Your (Moving) Parts
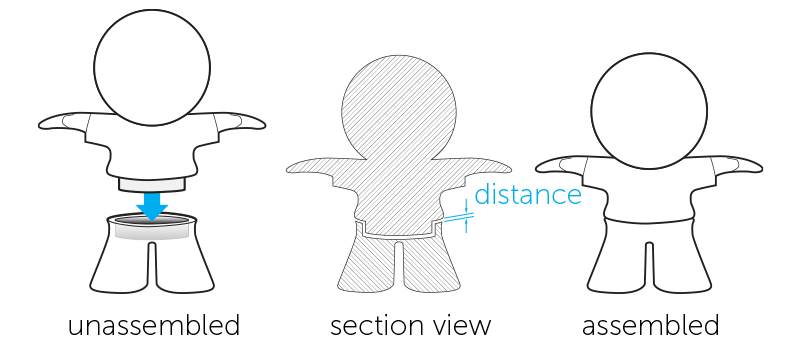
Assembly
Textures
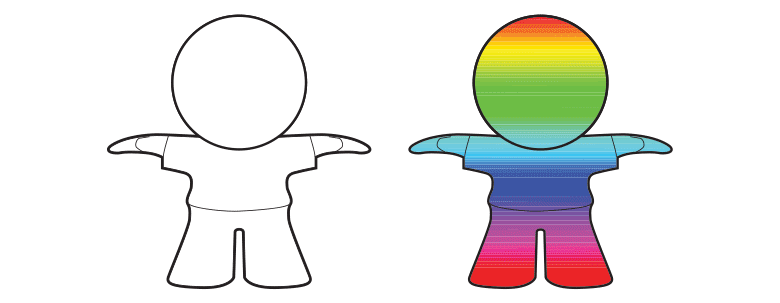
If your model has textures, make sure you upload all info to our site. How to check? Well, if you see your texture in the 3D print lab preview, then we have the info. However, if you see a mono-colored or un-textured model, it’s possible there is some info missing. If this happens, check your export settings and the file format used.
Some file formats are able to include textures in the file (e.g. colored STL, VRML, SKP, X3D, and DAE), while others store the texture in a separate image file and map file (OBJ). In the latter case, group all files related to the model into a zip file and upload it to our 3D print lab. To show and handle the textures correctly the archive should not contain any additional folders, this way we will be able to process all necessary info to print it the way you want.
Improving Colors
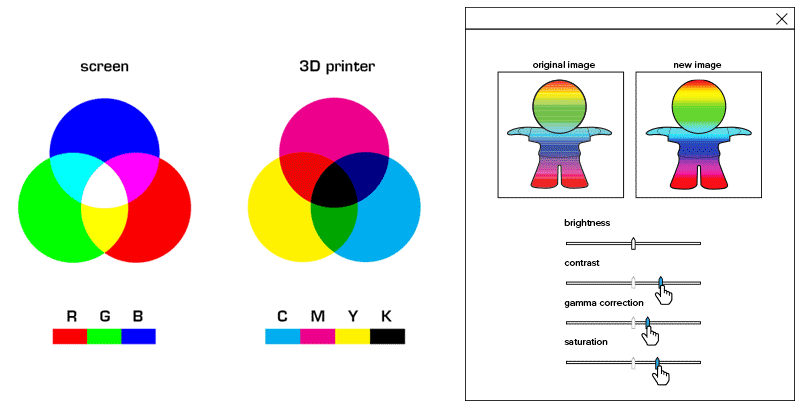
A short physics lesson in colors will help you get the best possible hue on your print, because the color you see on your screen can differ slightly from the printer’s colors. A pixel on your screen is composed of Red, Green, and Blue (RGB), while multicolor printers use Cyan, Magenta, Yellow, and Key (Black). Since your screen and our printers do not use the same color system, the set of colors might shift slightly. In both CMYK and RGB, mixing these basic colors creates new color options. CMYK works pretty much like the box of paints you used back in school. If you don’t have the painting color you’re looking for, you need to mix two existing colors together. Adding colors together usually means that the new color will be slightly darker. That’s why this system is called a ‘subtractive color model’. It will lead to a somewhat darker color. Adding all colors together produces black. Screens, however, do not work like our box of paints. Instead of using paint or ink, they use light. The colors of light are red, blue, and green (RBG). When the colors are added together, the result gets brighter. When all three colors overlap, the color becomes white. That’s why this system is called an ‘additive color model’.
When colors are converted from RGB to CMYK, the color intensity changes a bit. So, what you see on your screen and what comes out of the printer might look slightly different. Bright colors on a screen tend to look duller and darker in CMYK. Generally, the brighter, more vivid and vibrant the colors on your screen are, the bigger the difference between your 3D model and your 3D print will be. We advise you to make the contrast, gamma correction and saturation higher. This can be achieved in Photoshop, IrfanView, GIMP or other photo editing software.
Another problem is that computer screens have adjustable settings – so factors like brightness, gamma and color temperature can make a huge difference. Monitors also can vary greatly in color accuracy, depending on the technology (TN, PVA, IPS, OLED) and the calibration setting. Besides, the color gamut or complete subset of colors on the printer is lower compared to the screen. Does this color difference make a huge difference? In most cases, it really doesn’t. But if you need a really precise color that must not change even slightly – let’s say for a 3D model that features skin color – you might want to order a smaller test print first and experiment a little to get the color exactly the way you want it.
Embossed and Engraved Details