General Guidelines
Wall Thickness

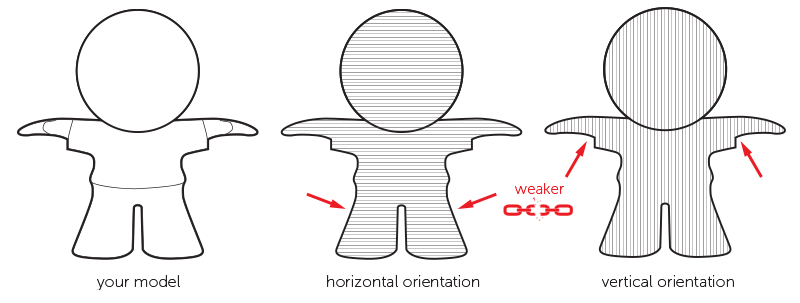
In general, we recommend a wall thickness of at least 1 mm. Large parts may require larger wall thicknesses or added ribs or fillets for reinforcement. It is possible to have thinner features with walls of only 0.5 mm for living hinges, but here the length needs to be limited to 10 mm when they are only attached at one end or 25 mm when attached from two sides. Although hinges can be positioned differently without the risk of breaking (thanks to the isotropic mechanical characteristics of the material), it is advisable to avoid making the thinnest sections of your living hinges parallel to the Z plane.
Hollow models & holes
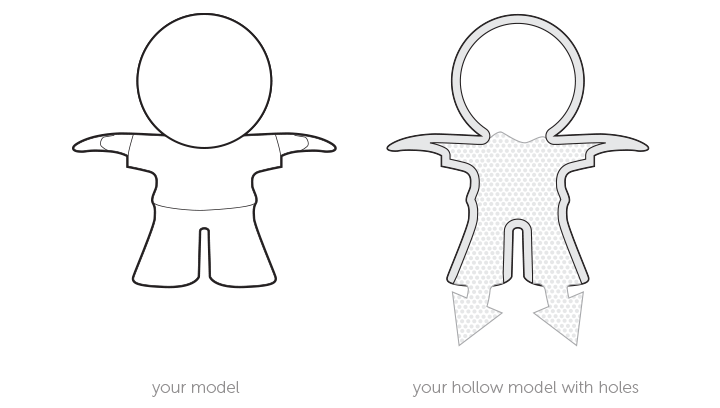
We advise hollowing out a solid model as much as possible, and when the wall thickness exceeds 20 mm. This will save material and prevent sink marks. We recommend a wall thickness of 2-3 mm and the inclusion of at least two holes with a minimum diameter of 2 mm for powder removal.
It is possible to create holes or perforations and ducts. The recommended diameter size of these holes is 2 mm, with a minimum of 1 mm, but some post-production will be needed to remove excess powder. Some residual powder may be stuck on the inside of complex ducts. It is advised to design a strip or chain through the duct to help in dislodging the powder once the part has been printed. In general, complex holes or ducts require larger diameters in order to achieve thorough removal of the unfused powder.
It is possible to create holes or perforations and ducts. The recommended diameter size of these holes is 2 mm, with a minimum of 1 mm, but some post-production will be needed to remove excess powder. Some residual powder may be stuck on the inside of complex ducts. It is advised to design a strip or chain through the duct to help in dislodging the powder once the part has been printed. In general, complex holes or ducts require larger diameters in order to achieve thorough removal of the unfused powder.
Interlocking parts

It is possible to print interlocking parts and assemblies in a single build. Parts that are printed together should have a minimum clearance of 0.5 mm.
Engraved Text and Surface Details
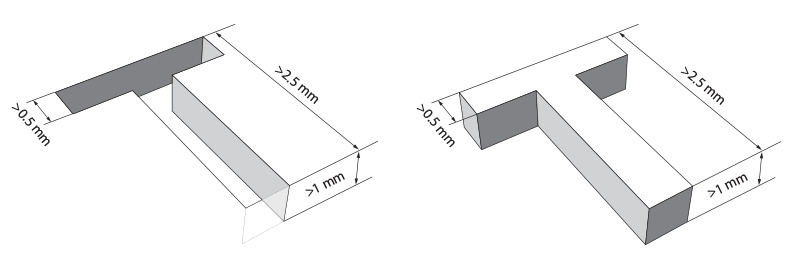
For embossed or engraved textures, we advise a minimum thickness of 0.25 mm. For legible engraved or embossed text, we recommend letters with a minimum line thickness of 0.5 mm, a depth of 1 mm, and an overall height of at least 2.5 mm.
Big Flat Planes Can Cause Warping
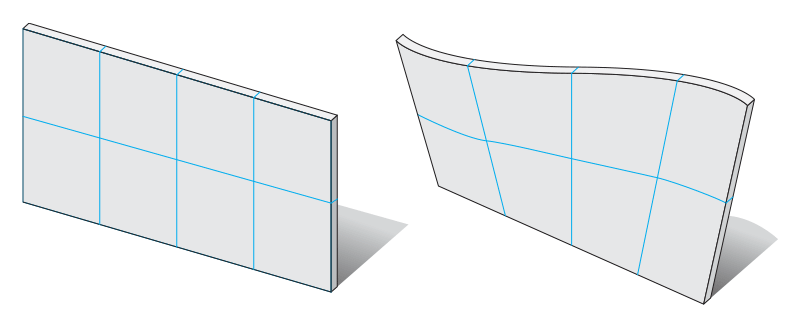
We strongly recommend that you do not design large, flat plains in dimensions like an A4 page. In most cases, your model will deform. This process is called “warping”. Even if you create support ribs under your plane, it doesn’t solve the problem. It increases the chance of deformation even more. The key here is to avoid big flat planes.
Guidelines for Polished Models
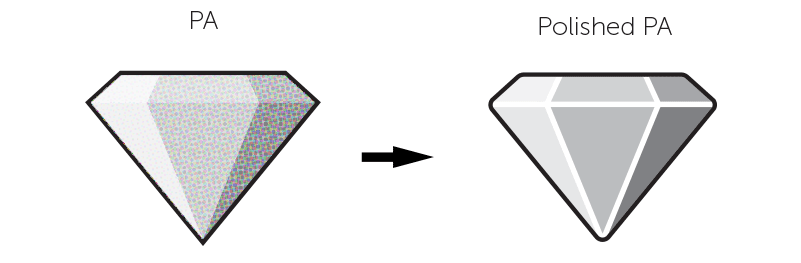
Polishing, also referred to as mechanical smoothing, is a special finishing process for Polyamide. To achieve a polished finish, your model is put into a tumbler with small stones that vibrate at a high frequency to smooth the surface of your model.
Only the Strong Survive
Several factors make it hard to fully predict the outcome of the polishing process. One of them is the geometry of your model, which can act differently each time it is put in the tumbling machine. In general, you should have wall thicknesses of at least 1 mm throughout your model. Although we carefully place and orientate your models in our printers to minimize “weak points” created by the layered buildup of your model, certain elements of your design may be more sensitive to the impacts of the polishing stones than others. Therefore, we suggest adding some extra wall thickness if your design can allow for it. Polishing is not advised when your model has tiny details like pins because they will break off during the polishing process.
Polishing on the Inside
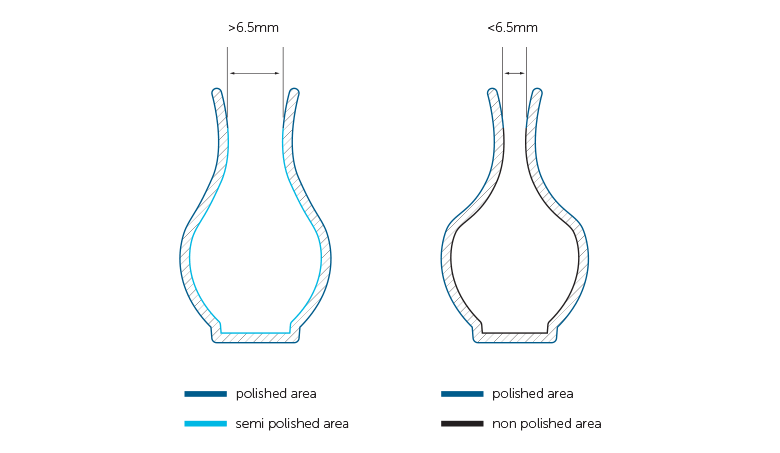
As already mentioned, small polishing stones are used to make the surface of your model smoother. However, because of the size of the stones, they can easily get stuck inside small holes. Therefore, we recommend that any openings that need polishing be larger than 6.5 mm in diameter. This helps avoid the problem of the stones getting stuck inside your model. Also, note that the inside of your model will always be less polished than the outside - in fact, your model will not be polished at all on the inside if the holes are smaller than 6.5 mm because the stones won't be able to enter.
Rounded Edges
If your model contains sharp edges, these will be rounded off. Rounded corners and smooth transitions between surfaces will have a higher degree of polishing than sharp edges. Polishing will take 0.1 mm of material off your model, so add extra wall thickness to avoid any problems.
Embossed and Engraved Details
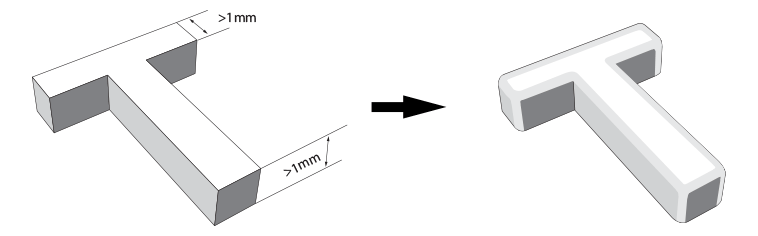
Embossed details on your model tend to be worn away by the polishing stones. Make sure to raise these details by at least 1 mm, otherwise they may disappear when your model is polished. Engraved details are less of a problem because, in most cases, the stones won’t be able to reach the inside of the engraving; however, the edges may still be affected. To be on the safe side, make sure your engravings are deeper than 1 mm.
Design Specifications
Minimum Wall Thickness
1 mm
Minimum Details
0.25 mm
Accuracy
±0.3% (with a lower limit of ±0.3 mm)
Maximum Size
370 x 274 x 375 mm
Clearance
0.5 mm
Enclosed Parts?
Yes
Interlocking Parts?
Yes