How to Get Your Perfect Sterling Silver 3D Print
Are you thinking about 3D printing in Sterling Silver? Do you wonder how we create a real physical Sterling Silver object from your 3D design? Would you like some tips and tricks for your next Silver 3D print? In this case, this blog post is for you.
The Material: 3D-Printed & Casted Sterling Silver
A question that we get often is whether our Silver is comparable to silver items that you can find at jewelry stores. The answer is, yes. Models made in Sterling Silver are made from an alloy based on 92.5% pure silver and 7.5% other metals (usually copper). This Sterling Silver alloy is the standard alloy used to produce jewelry and, therefore, is safe for skin.
Since we use a mix of 3D printing and casting (learn more about this in the technology section below), your Sterling Silver item will have the material density and ultimate tensile strength of any traditionally produced sterling silver object. As a result of casting and polishing, you will not see any printing layers – the object surface will be smooth. The exact smoothness and color/shine of your object will depend on which finish you have in mind.

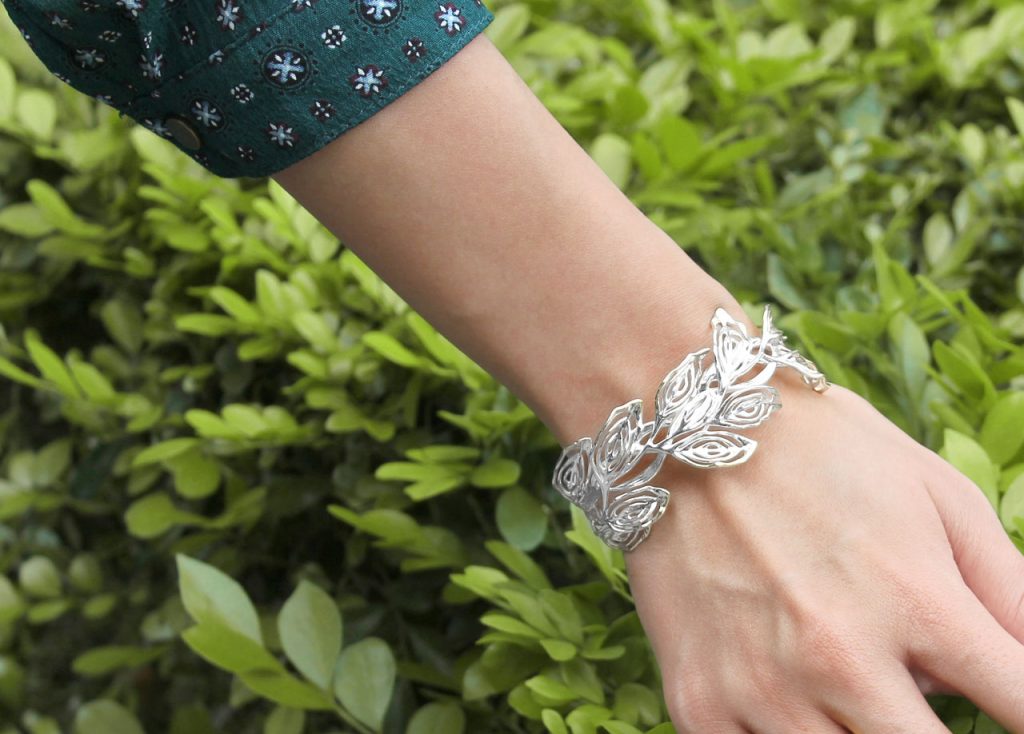
Learn to create a stunning Silver 3D print such as the ‘Gardon Ring’ by StudioSinth.
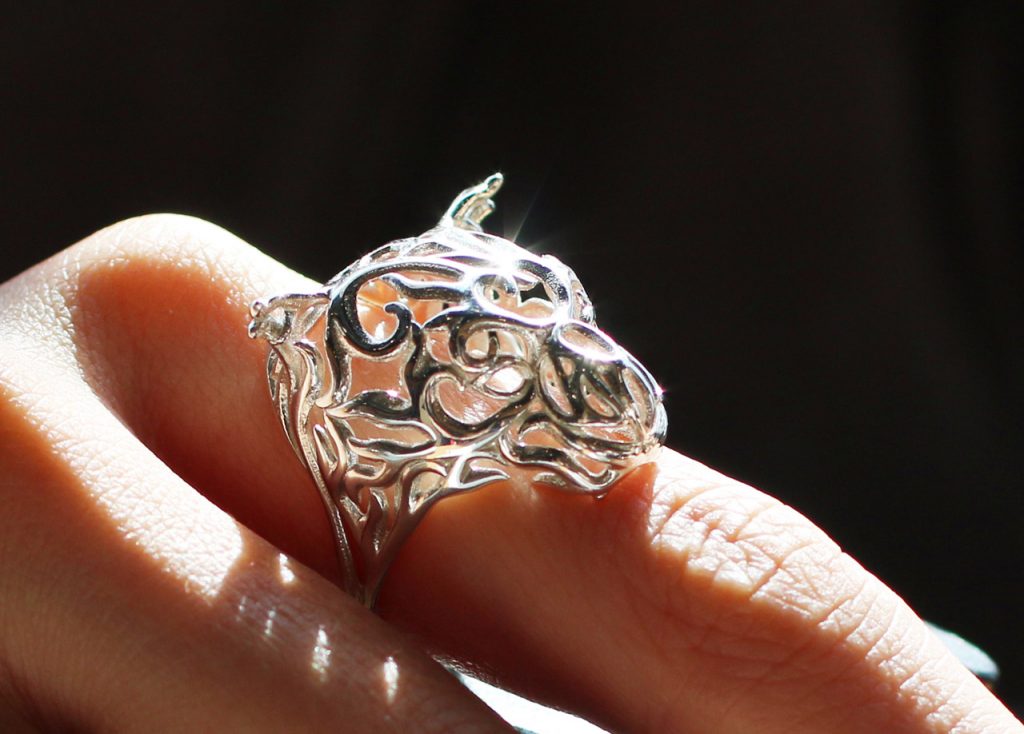
Desmond Chan’s 3D-printed Silver ring ‘Zodiac Tiger’.
The Finishes: 5 Silver Choices
Silver is available in five different finishes, as depicted below:
- Gloss models are post-processed in a magnetic tumbler. This technique is the least aggressive process for silver. This finish is ideal for maintaining a high level of detail; however, surfaces will be left uneven and not as smooth as high-gloss models.
- High Gloss models undergo a particularly vigorous mechanical polishing process that will round off sharp corners. As a result of this technique, the silver will have the lowest level of detail, but the highest level of smoothness and shine.
- Satin models are manually post-treated with a wire brush to obtain the effect of lines on the metal.
- Sandblasted models are post-treated with an abrasive blasting operation. The surfaces of your model will get even and a smooth, matted look.
- Antique Silver features very shiny and smooth outer surfaces, while deeper areas remain darker and unsmoothed.
From top left to bottom right:
Gloss, High Gloss, Satin, Sandblasted, and Antique Silver Finishes
The Technology: 3D Printing & Casting Silver
To enhance the quality of the item, your model is not 3D printed directly. Instead, the 3D printing part is only the first of several steps.
Step 1 – 3D Printing: To begin with, your 3D model will be printed in wax. A stereolithography 3D printer uses wax-like resin to create a 3D print of your design. Click here to learn more about the stereolithography 3D printing technology. Support structures will then be printed along with the model to make sure your model does not fall apart. These support structures will be automatically generated and manually removed after the printing process. After support structures are removed and your model is cleaned, the model can be prepared for casting.
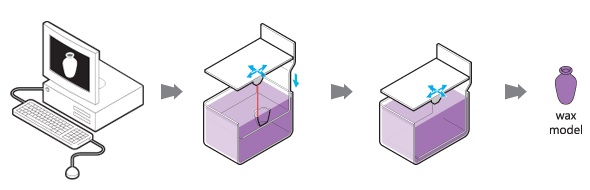
Step 2 – Casting: In order to make casting possible, one or more wax sprues will be attached to your model. Next, it will be connected with the sprue to a wax ‘tree’, together with a bunch of other models. The tree will then be placed in a flask and covered in a fine plaster. When the plaster solidifies, it will form the mold for casting the silver. The plaster mold will then be put in an oven and heated for several hours until the wax is completely burned out.
Then, the molten silver will be poured in to fill the cavities left by the wax. Once the silver has cooled and solidified, the plaster mold will be broken and the silver models removed by hand. Finally, your model will be filed and sanded to get rid of the sprues.

Step 3 – Finishing: At the end of this process, your model will manually be sanded, polished, or sandblasted for the finish you desire.
The Design: How to Get a Great Silver 3D Print/3D Model
In order to make sure that you get the perfect Silver 3D print, we have put together a short list of six basic tips and tricks to keep in mind for your 3D design. You can find more information about this in our ‘Silver Design Guide’.
1. Wall Thickness: The minimum wall thickness for Silver is 0.5 mm – for breakable parts, it is better to add some extra strength and choose a minimum wall thickness of 1 mm.
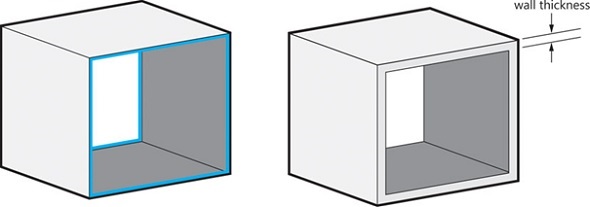
Getting the right wall thickness is crucial for a successful print.
2. Hollowing: If you decide to print a hollow model, you need to include several (!) escape holes in your design, each with a minimum diameter of 1.5mm.
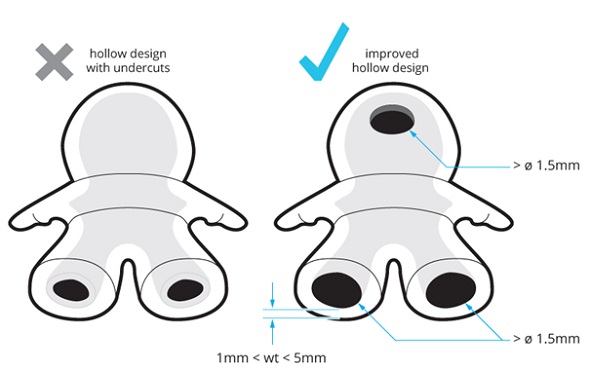
Hollow silver prints require several escape holes.
3. Feature Size: The smallest features of your design need to be at least 0.3 mm in diameter and 0.4 mm in height. For breakable details, however, it is better to choose a diameter of 0.8 mm.
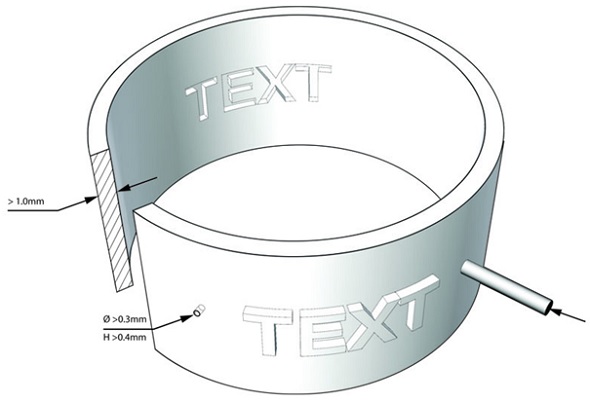
Make sure that the features of your 3D model are printable.
4. Polishing & Post-Processing: Post-processing steps (finishes) will have different effects on your model. The gloss finish will erode your model by 0.05–0.075 mm, whereas sandblasted and satin models will erode by 0.1–0.15 mm. High gloss and antique models will also erode by 0.1–0.15 mm. Additionally, sharp corners will be rounded with these two finishes.
5. Interlinking Parts: Keep in mind that it is not possible to print nested objects, hinged, and interlinking parts (such as chains).
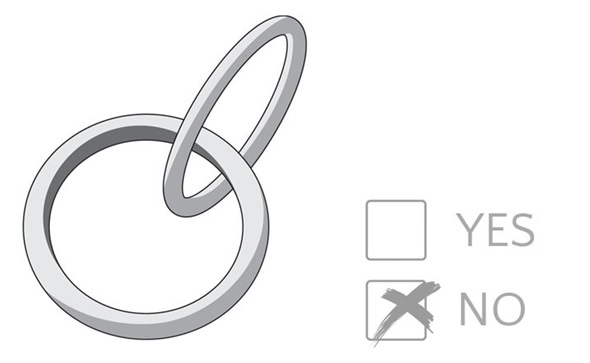
It’s not possible to create Silver items with interlinking parts.
6. Antique: To get a good ‘antique effect’, make sure that sunken, darker parts of your design have a minimum area of 0.4 x 0.4 mm and that they lie at least 0.4 mm deep.
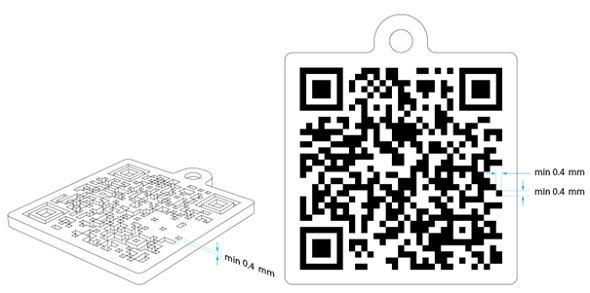
Make sure to keep darker parts at least 0.4 mm deeper than the surface.
Turn Your 3D Model Into a Real Silver Object
Learn more about 3D-printed (and casted) Silver on our dedicated material page. Do you have a 3D file that is ready to be transformed into a Sterling Silver object? Then, it is time to upload it here, where you will be able to choose between five different Silver finishes or discover 18 other 3D printing materials such as Gold, Brass, or Bronze. Do you need some inspiration first? We compiled a list of our 10 most outstanding silver 3D prints here.