Create Your Own 3D Printed Ring in Minutes with This Free Online Design App
Update: On demand manufacturing from the Jweel app is now closed, but the applications have been opened and they are now accessible for free. You can save design files, and export to 3D standard format for manufacturing, enjoy!
Creating and 3D printing your own ring is now really easy thanks to free online apps like Jweel. All you need is an internet browser, a few minutes of your time, and some creativity. Here is our tutorial on how to 3D model and print your own ring in four easy steps. No software, installation, 3D printer, or prior 3D modeling or 3D printing experience is required!
Before starting your jewelry designs, it’s important to decide which is the perfect jewelry material for your 3D prints. Maybe you go for a precious metal like gold, silver, bronze or brass, or you prefer an alternative material for your 3D printed jewelry. Learn more about all the 3D printing materials we offer on the i.materialise website.
1. Start the App
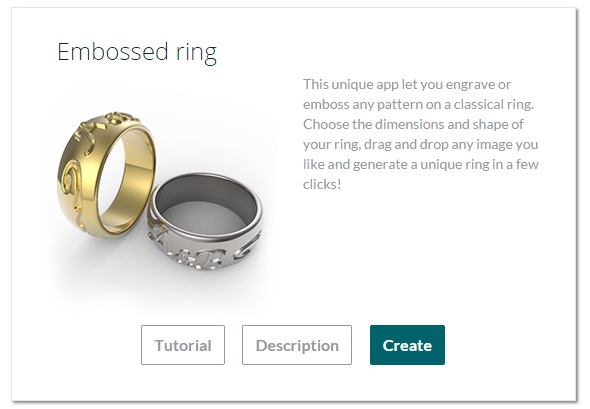
First, go to the Jweel website. Jweel is a place where anyone can create custom jewelry. No installation or registration is required. Simply click on their “Create” tab at the top of the page and choose the jewelry you want to design. In this tutorial, we will focus on their newest item – the Embossed Ring – but make sure to also take a look at their other options. To create your own embossed ring, simply click “Create”.
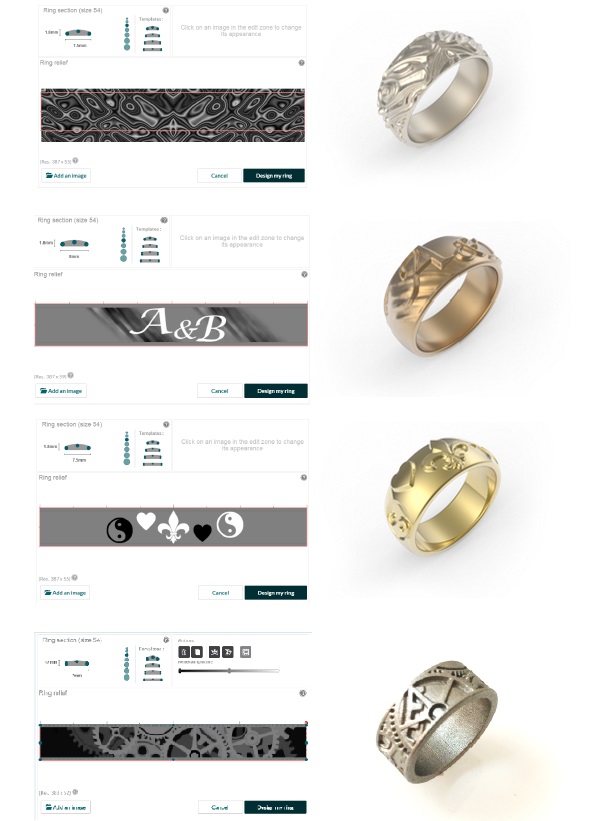
The interface of the modeling app will pop up; it is split into two sections. The upper part is called the “Ring section”, where you can change the general shape of your ring in terms of width, height, and the beveled edges. The lower part is the “Ring relief”. Here you can change the relief of the ring by adding elements that will be embossed or engraved. Let’s start by taking a closer look at the upper part (“Ring section”) first.
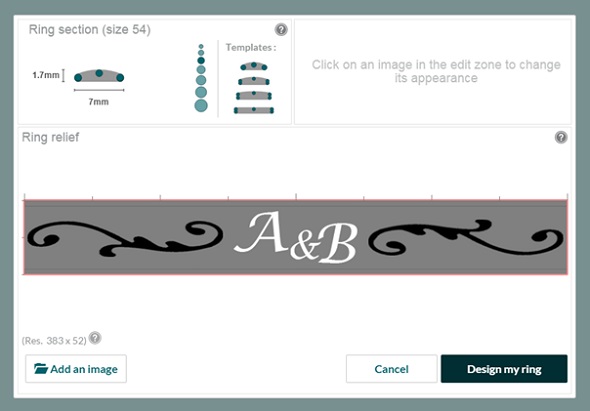
2. Ring Section
The ring section lets you define the shape of your ring: width, height, and the beveled edges. To change the shape of your ring, click on the little circles and move them to your liking. Take a look at the following examples to get a better understanding of how this tool works, but the key to understanding it lies in simply playing around.
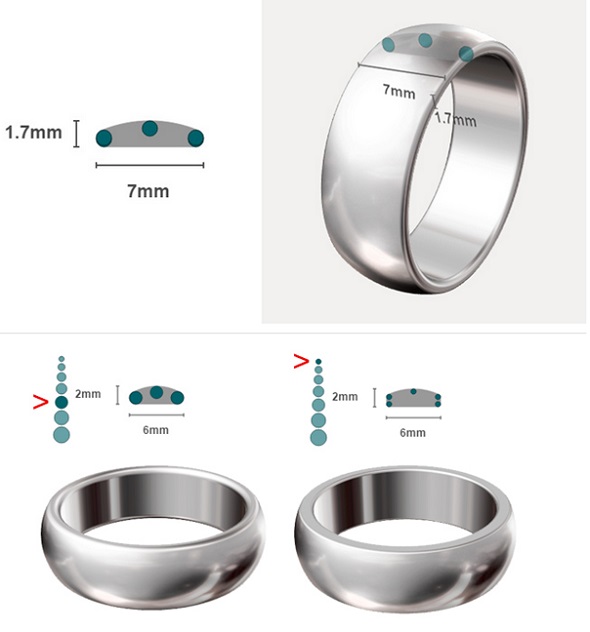
One important thing to keep in mind is that the default ring size of this editing tool is 54. All the changes made here will be created based on this default size. Later in the process (see below) Jweel will let you choose the actual ring size you desire. If you choose a smaller size, the dimensions of the shape will be scaled down, and likewise, if you choose a bigger size, the shape will be scaled up.
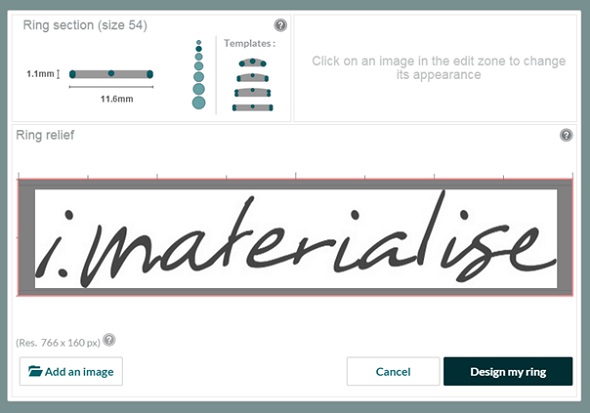
3. Relief Section
Once you are satisfied with the shape of the ring, you can continue with the relief of the ring (but don’t worry, you can always go back and re-edit each of the previous steps if you want to make changes later). The relief section is based on images that you upload. This could be images of text, symbols, patterns, etc.
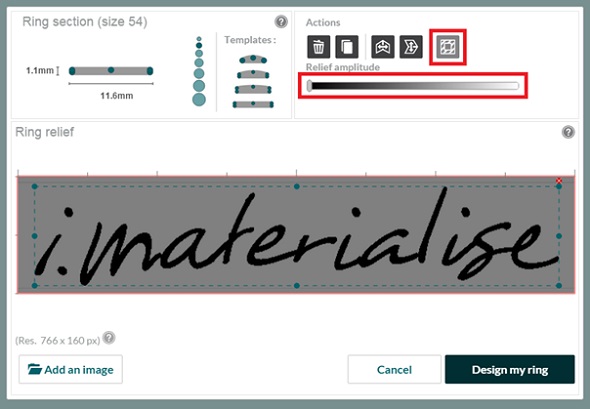
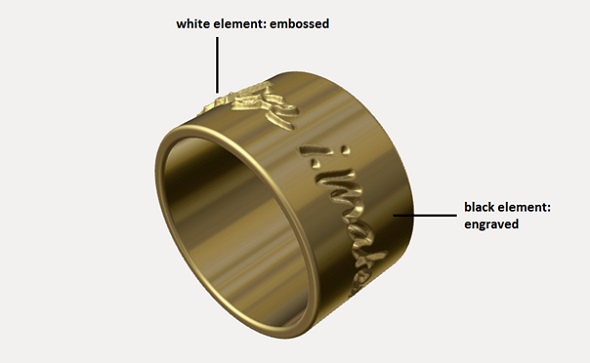
Before we upload our own image, it is important to understand the meaning of the colors in this tool. Gray (to be technically precise: Gray 50%, RBG 128,128,128, #808080) means that these parts of the ring will neither be embossed nor engraved.
The more black a color tends to be, the more engraved it will be. Complete black means an engraving 0.5 mm deep. White, on the other hand, means that these parts of the ring will be embossed. Complete white means an embossing 0.5 mm high.
Jweel has three default images. Click on them and change their size and color to get to know the tool better. Once you understand how this works, delete these three images and upload your own image. In the example below, we uploaded the i.materialise logo.
Our blue logo is automatically turned into a gray-scale image. However, it features a white background, which we want to get rid of. Click on your uploaded image and select “Clear the selection from all white pixels” and change the relief amplitude (see screenshot below for both tools) to your desired effect.
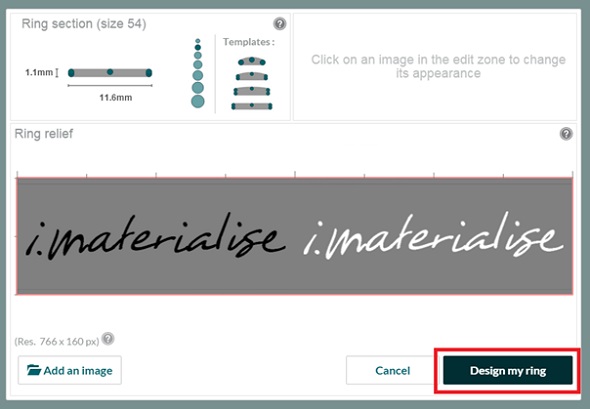
We repeated the process and added a second logo and changed its color to white this time for embossing. We also changed the size of both images. Once you are done with your own relief, click on “Design my ring” to take a look at a preview of your ring.
4. Choose material, finish, and size
Jweel offers many different materials and lets you choose from brass, bronze, silver, gold, steel, and titanium. Once you’ve found your material of choice, you can select a color or finish. Jweel’s material page offers examples and further information for each material and finish.
Once you are satisfied with your choice, it is time to define the size of the ring. If you are unsure about the size, Jweel also shows you ways to find your perfect ring size. Simply click “Size explanations” to get there.
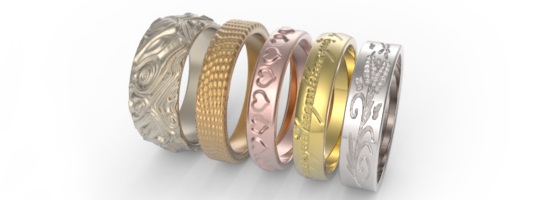
And that’s it! You have just created your own personalized ring! Make sure to upload several images and explore the power of this design tool by trying out different things. Here are some examples for inspiration:
Did you enjoy this tutorial? On our blog, you can also find another beginner-friendly tutorial about how to create your own necklace with Jweel. If you are still in need of some inspiration before creating your own jewelry, we have the ultimate style guide for you here. If you created a 3D model of a ring or any other object without Jweel, simply upload it here and see how much it costs as a 3D printed item in gold, silver, brass, bronze, or 14 other materials.