The #1 Hack To Make Your 3D Print Cheaper
Cutting down costs for 3D prints is the number one concern for many customers. In order to achieve this, we need to understand how costs for 3D prints are calculated. Probably the most important variable is the amount of material that is needed for printing your object. So all we need to do is to make sure to use as little material as possible. Down-sizing the object? Nope, hollowing it out like a pro!
Save money: don’t use material where you don’t need it!
The pricing for most 3D printing materials is volume-based. The less material you use, the less it will cost you. This means a hollow model will be cheaper than a solid one. For some 3D printing materials, hollowing your object will also avoid deformations.

Hollow 3D print. Save money using less 3D printing material
However, creating a 3D model with an empty interior can be a bit tricky: you need to know how to hollow your model in the 3D modeling software you’re using, you need to define a wall thickness that is strong enough for your model not to break, and it probably makes sense to add so-called ‘escape holes’ to your model. So let’s take a look at these things a step at a time.
Reduce costs: create a hollow 3D model & 3D print.
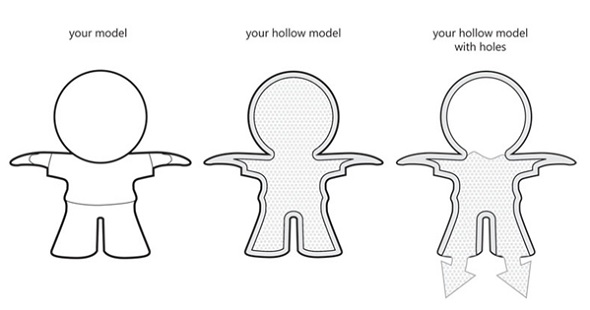
A hollow model means that the interior of your object will not be solid. Solid designs are not necessarily a problem — depending on the material they will be stronger and harder to break, but they will also be more expensive as more 3D printing material will be used.
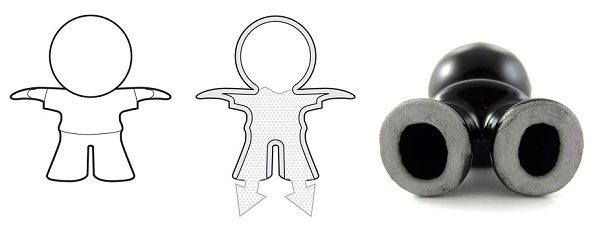
With a hollow model the interior of your print will be empty. However, since our printers print layer by layer, 3D printing material can get trapped in the interior of your model as you can see in the image in the middle below. If you would like to avoid this, you can add ‘escape holes’ to your design. Material that is not used for building your 3D print can then be removed.
Are the walls thick enough for a hollow model?
Creating a hollow model means that you need to design your object with ‘walls.’ A printer needs to know how thick the walls of your objects (the ‘outer shell’ if you will) are supposed to be. We don’t have a single, ‘one-size-fits-all’ wall thickness to recommend for each and every 3D printing material. Some, like High-Detail Stainless Steel and Titanium, can go quite fine with minimum wall thicknesses of 0.3 mm and 0.4 mm, while most of our materials range somewhere between 1 and 3 mm.

Maybe you are thinking about saving some money by pushing the wall thickness to the minimum. That’s only logical since this means that less material will be used and the print will be cheaper. However, think about the fact that making walls too thin can make your model too fragile and might cause parts of it to break off.
Read our guide on how to get the perfect wall thickness for your 3D print and make sure to read the guidelines for your 3D printing material first.
How do I create a hollow model in my 3D modeling software?
Each and every 3D modeling software works differently, so hollowing a 3D model is easier in some programs than in others. We’ll take a look at some examples here nevertheless.
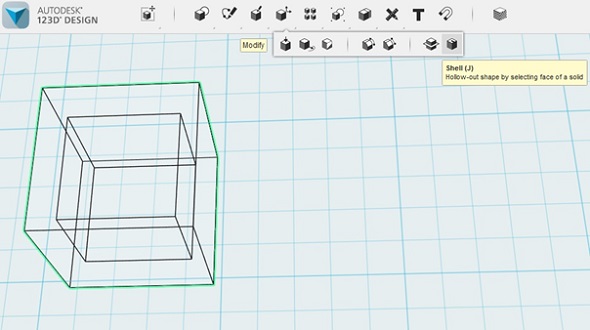
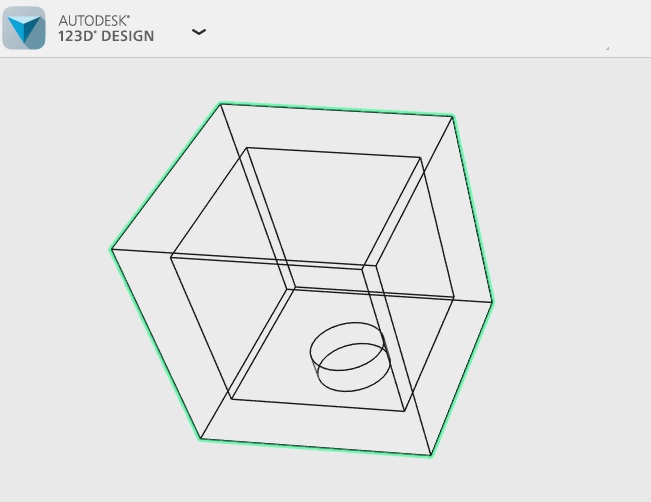
One program with an easy-to-use hollowing function is 123D Design. It can hollow any shape by clicking on ‘modify’ and ‘shell.’ You can then select how big the hollowed space will be and how thick the walls will remain.
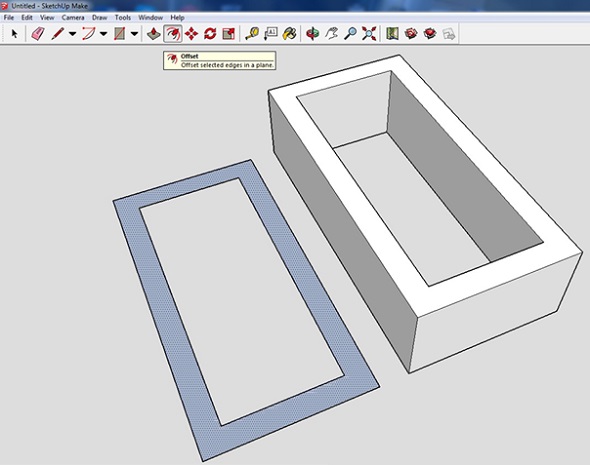
In other programs, like SketchUp, it’s a bit more complicated. An easy way is to start with a 2-dimensional rectangle and use the ‘offset’ function. This will create a rectangle within the rectangle. Delete this space and you’ll have an empty space in your rectangle (left-hand side in the image below). You can then ‘pull’ this 2D shape into a 3D object (right-hand side in the image below). In a final step, you can add ‘walls’ at the top and bottom of the design.
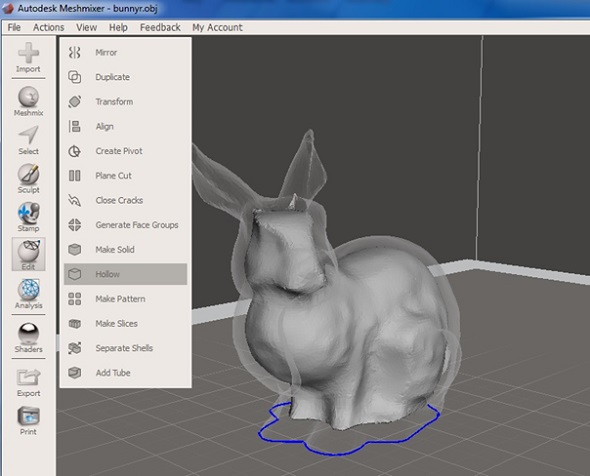
Probably the easiest way to get a hollow model is by downloading the free Autodesk software Meshmixer. Insert your 3D file, select ‘edit’ and ‘hollow’ and you will have immediate results.
Why do I need escape holes?
As already pointed out, our 3D prints are created layer by layer. With a hollow interior, this means that 3D printing materials can get trapped inside the object. A hollow model full of trapped powder is in danger of deforming. Escape holes are recommended for getting ‘trapped’ 3D printing material out of your 3D print. We typically use pressurized air to clean the excess powder off.
Now the questions remain how many escape holes a print needs and how big they need to be. And once again there is no universal answer to this: it all depends on the 3D printing material and the size of your print.
Let’s take a look at some examples: while we recommend at least two escape holes for Multicolor+ prints, you should design more holes than that for Gold, Silver, Brass, and Bronze prints. Once again, taking a look at the individual design guides will provide you with all the answers.
How do I design escape holes?
The exact procedure depends on your software but the idea is often the same: create a cylinder at the bottom of your model and extrude or subtract from its wall (see image below). Meshmixer’s hollowing tools even come with a function that lets you create escape holes automatically.
Now that you know how to create hollow models and cut 3D printing costs, what’s holding you back from uploading your 3D file here and creating a stunning 3D print? You might also be interested in learning more about the 5 mistakes to avoid when designing a 3D model for 3D printing.