3D Printing with Cinema 4D: A Tutorial with 10 Essential Tips and Tricks
In this Cinema 4D 3D printing tutorial you will learn how to transform your Cinema 4D models into real, physical, 3D printed objects. We will take a look at 10 essential tips and tricks to create clean, smooth, watertight, high-quality models that are ready for 3D printing.
1: Size Settings and Scaling
Some simple clicks before you get started will make your life much easier: you may want to set your Project Settings to millimeters. This way, you won’t need to re-scale the printing size of your model later. Go to Edit – Project Setting and set Project Scale to 1 millimeter.
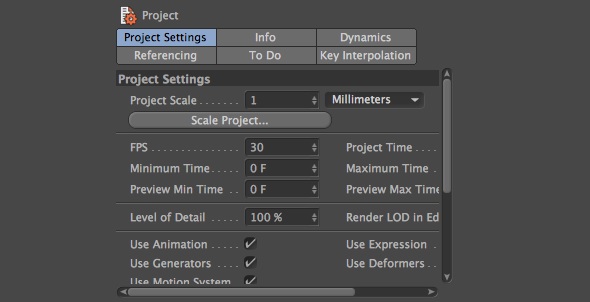
Project scale of 1 millimeter.
It also makes sense to change your general preferences in Cinema 4D to millimeters. For doing so, go to General Preferences – Units – Change Unit Display and choose Millimeters
2: Disable Phong Shading
Cinema 4D uses Phong Shading to make an object look perfectly smooth on your screen. Even though circles, spheres or other round shapes might look perfectly smooth in Cinema 4D, they are actually made of square polygons. This is the “real” shape of the object that a printer will use. In order to see the polygons, you need to select all the Phong Tags on your objects and delete them.

Phong Shading on (top) vs. off (below).
3: Increase Segments – Smoothening Your Model
In order to avoid a pixelated 3D print, it might make sense to increase the number of Segments. To do so, select your objects and adjust the Segments counter. In the example below, we increased it from 24 (left) to 96 (right). As you can see, the higher value leads to a much smoother surface. Finding the perfect value depends on the printing size and material you have in mind. Just a word of advice: you don’t need to go over the top with this. There is no need for polygons smaller than 0.01 millimeters because 3D printers currently cannot print beyond this level of detail.
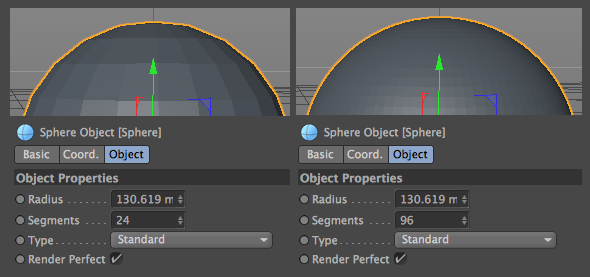
24 segments (left) vs. 96 segments (right).
4: Section View – Looking Inside Your Model
While your 3D model might look stunning from the outside, the inside is a whole different story. Intersections and walls within your design can make your life difficult since your model needs to have one continuous ‘outer shell’ and no other internal structures.
The best way to get a better understanding of this is by looking into your model. Go to Edit – Project Settings and change the options for View Clipping. Increasing this setting and changing the zoom will give you the cross section view that suits your need best.
The screenshot below by Nick Lievendag shows that there is a problem with his model. Several objects were “connected” together, which led them to overlap in the interior of the model. Unfortunately, a 3D printer might process such a model incorrectly. But there’s a simple solution (see next step).
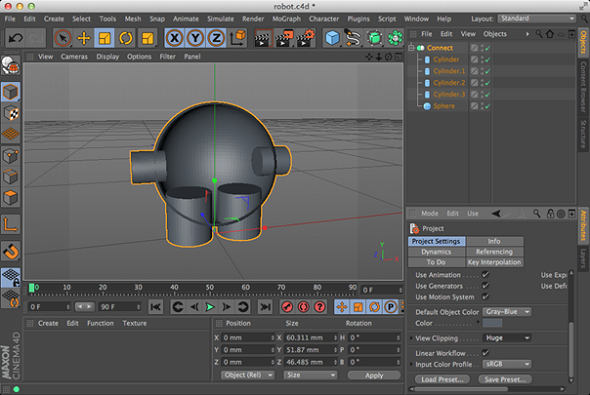
The objects are intersecting each other. Screenshot by Nick Lievendag
5: Merging Objects and Avoiding Intersections
A 3D printer needs to know if and how you want to merge different objects together. As you saw in the previous step, things that look great from the outside might be a little messy inside the 3D model.
Luckily for us, there is a great free plugin for Cinema 4D that is really handy: Magic Merge. This plugin by Nitro4D can be downloaded here and should then be unzipped in the following folder: maxon/cinema4d/plugins. Save your design and restart Cinema 4D to continue. In case you “connected” parts before, make sure to disconnect them. Now select all separate objects, go to Plugins in the top menu and click on Magic Merge. This should give you a perfectly clean merged object!

Merging unprintable objects (left) together for 3D printing (right) with Magic Merge. Screenshot by Nick Lievendag.
6: Making your Model Watertight & Manifold
Creating a design for 3D printing means that your Cinema 4D model has to be able to exist in the real world. This is where key geometry issues come into play. For example, your model needs to be watertight. Ask yourself the question: if I were to put water inside my model, would it flow out? If that’s the case then you need to find those holes and close them.
The design below is an example of a model that is not watertight. You can clearly see that there is a big gap in its surface.
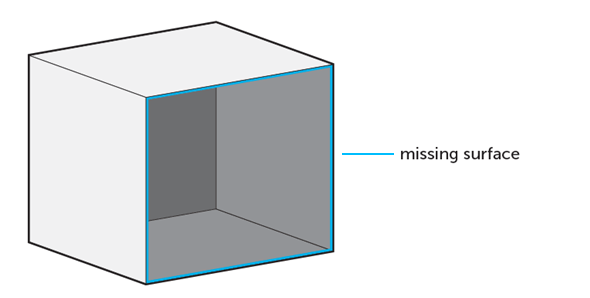
Luckily for us, Cinema 4D has a tool that shows us exactly where those holes are. You can identify issues with watertightness by using Mesh Checking. Open the Attribute Manager and then choose Mode – Modeling – Mesh Checking Tab. Enable “Mesh Check” and “Boundary Edges” and uncheck all other options. This will show you the “holes” in the mesh of your models, which keep them from being watertight.
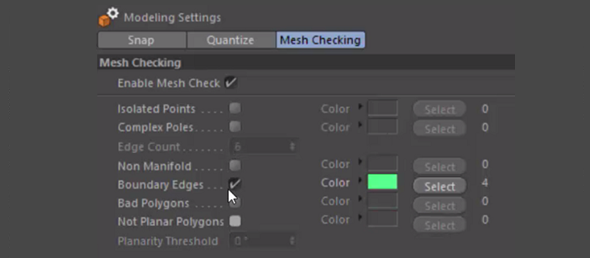
Check if your model will be 3D printable.
Next thing you should do is check the “Non Manifold” box. This will highlight any unwanted extra faces or edges that might cause problems. Sometimes this extra geometry is hard to spot since it is located inside the model (see step 5 of this tutorial).
7: Wall Thickness – Making Sure Your Walls Are Printable
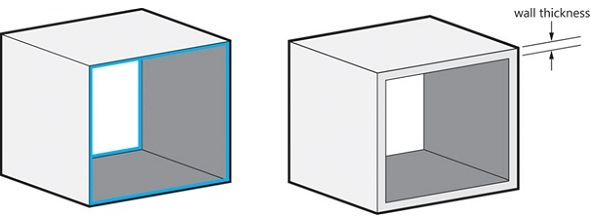
In order to make your Cinema 4D model printable, you need to ensure that each and every surface of your model has a wall thickness. Without setting a wall thickness, a 3D printer has no information about how thick or how thin it is supposed to print your part.
The picture below shows a model with paper-thin surfaces (not printable, left) and a solid object with thick walls (printable, right). If you want to learn more about how thick your walls need to be exactly, make sure to read this blog post.
A quick and easy way to add wall thickness is to select the Extrude Tool, choose a Maximum Angle of 91° and check the “Preserve Groups” and “Create Caps” options.
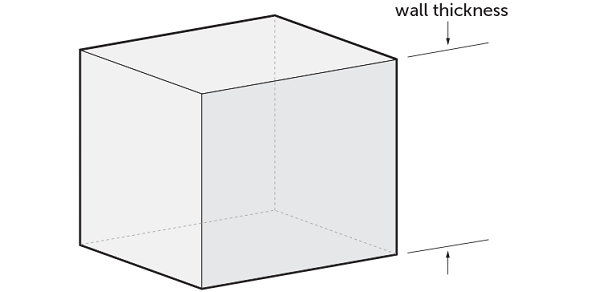
If you have one enclosed object (let’s say a solid cube) without any holes, your ‘wall’ will simply be your entire model. In this case, you don’t need to assign any wall thicknesses as your entire 3D print will be solid inside.
8: Inverted Normals – Fixing Reversed Faces
Another problem that can occur are so-called inward-facing or reversed faces. This means that a surface of your model is facing in the wrong direction (towards the inside of the object instead of the outside).
To fix this, visualize the normals by selecting the faces in Cinema 4D. Normals facing outwards will be shown in orange, whereas inverted normals will be shown in purple. Another way to find inverted normals is by selecting Options – Backface Culling. Inverted normals will then simply disappear from your view.
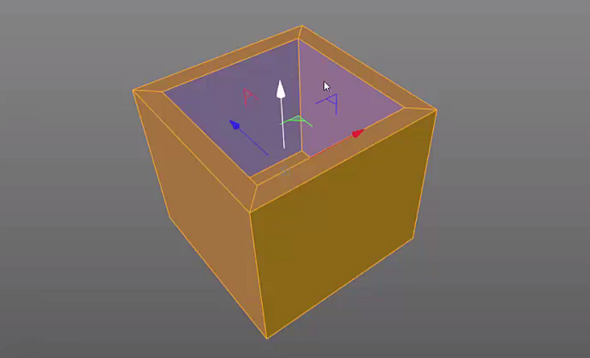
Normals facing outwards (orange) and inverted normals (purple). Screenshot by Rick Barrett.
Fixing this couldn’t be easier. Select all faces and click on “Align Normals”. Alternatively, you can just select a specific face and choose “Reverse Normals”.
9: Exporting your Design as a 3D Printable File
You made it! Now the last thing left for you to do is to save your model as a 3D printable file. Simply go to File – Export and choose STL (the standard file format used in 3D printing). Select an export scale of 1 millimeter to ensure that your object has the same size as you determined in step 1 of this tutorial.
If you are interested in a multicolor 3D print, export your textured or painted model as a VRML 2 file.
10: 3D Print Your Model in High Quality
Did you manage to follow our tips and tricks and create a printable Cinema 4D file? Then it’s about time to get your high-quality 3D print. Simply upload your model here and choose from hundreds of material options including metals, ceramics, or even wood. We’ll double-check your file, print your object on high-end industrial machines, and send it right to your doorstep.

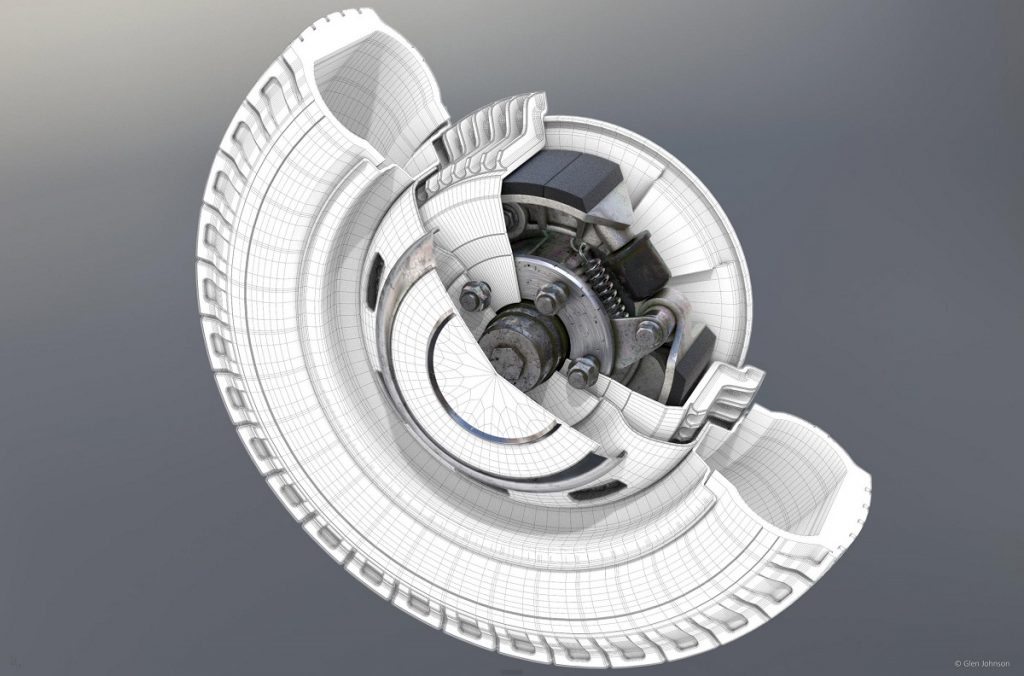
It’s now time to turn your Cinema 4D design into a high-quality 3D print.
This tutorial took some inspiration from Rick Barrett’s how-to video and Nick Lievendag’s Cinema 4D tips.