4 Essential Updates About the i.materialise Shop
In April, we completely redesigned our shop but have you noticed that we’ve been constantly improving it since then? With some major updates installed this Wednesday, we’re now proud to offer you a much wider variety of shop items in a range of materials and finishing options. There are too many new functions to list here, so here’s a summary of the key updates that you need know to fully enjoy our new 3D Printing shop!
1. Sell your designs in multiple materials and finishes
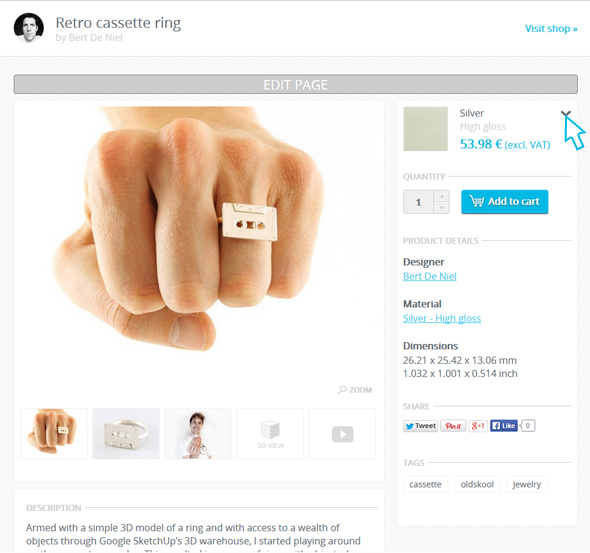
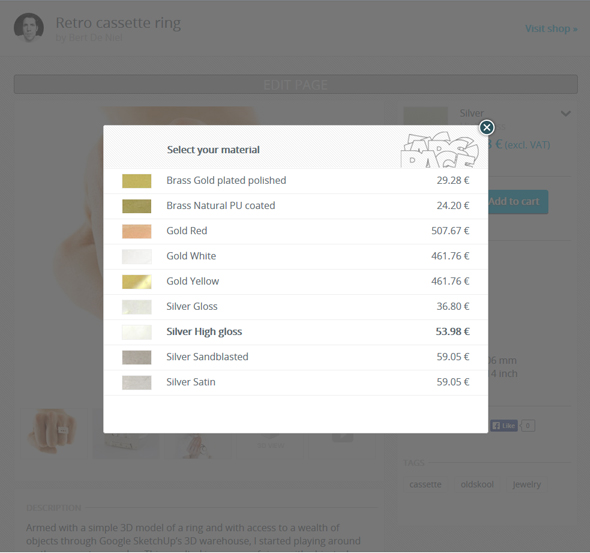
The biggest update first: vendors can now offer shop items in multiple materials or with different finishes, depending on the original material of the model! For example, if a silver ring is already listed on your shop, you’re now able to sell the same model in brass and vice versa. Or, if you have a ceramic item, it can be purchased in a different color even though the material would remain the same.
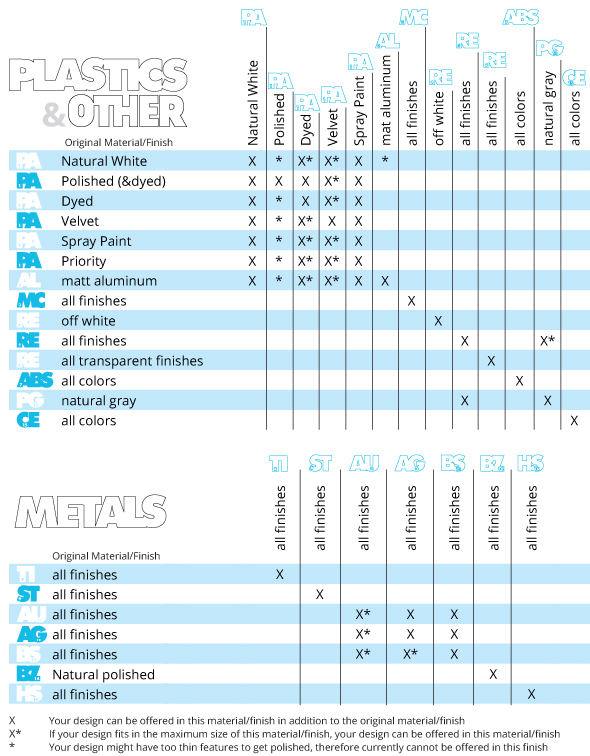
To check which other materials your item can be reproduced in, see the charts below or click the little arrow next to the material name for your shop item. Please be aware that your model has to be compatible with each material’s design rules to be re-3D printed.
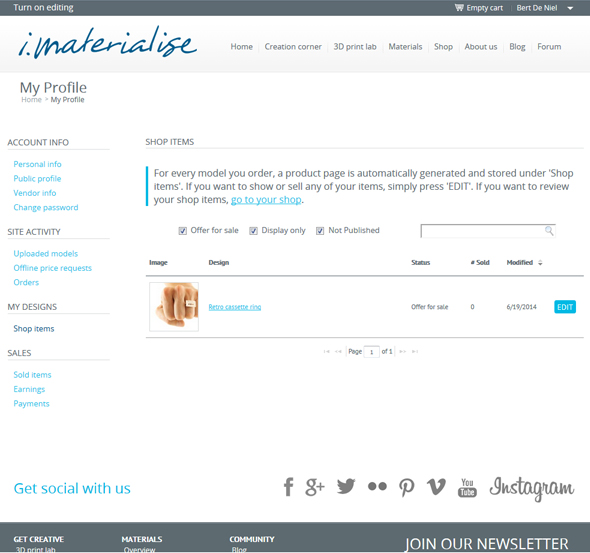
It is also important to know that this function is activated by default. If you’re a vendor and want to change the settings for your item, login to your account, go to the “Shop Items” page in the left column, then click the blue “Edit” button next to your shop item. On this page, you can change all the settings for your product, including material choices. If you don’t wish to sell your item in all of the available materials, just uncheck the ones you don’t want to include.
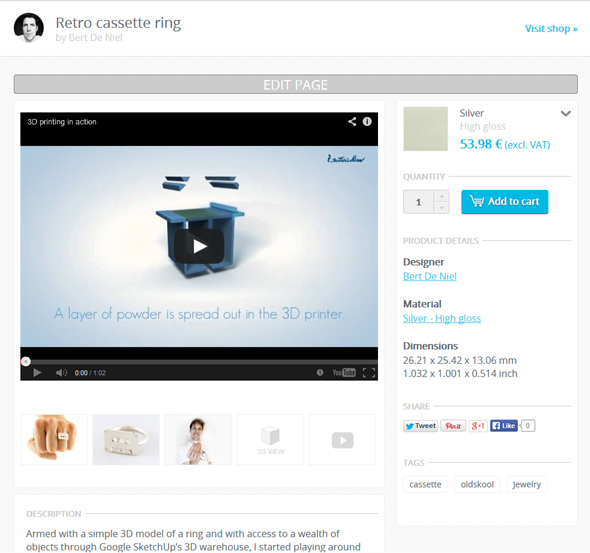
2. Add a video to your shop item page for enhanced branding
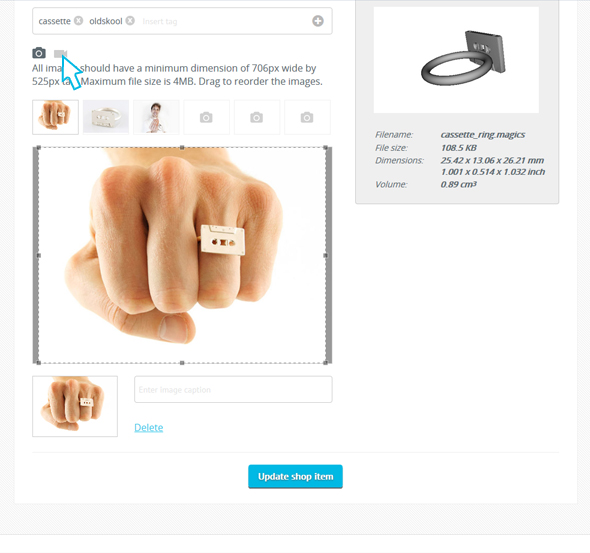
We installed an optional function to add a YouTube video to your shop item page so that you can further brand your shop and items. To insert a video link, go to the “Edit Shop Item” page from your profile and click the little video icon.
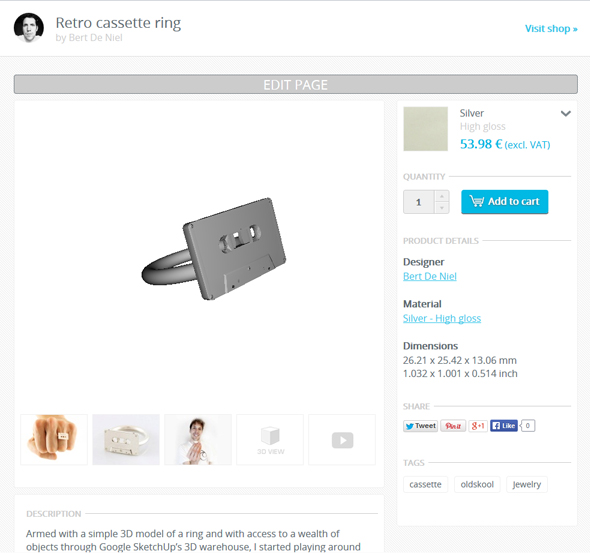
3. 3D rendering is now viewable within the shop
3D rendering of your item is already installed automatically in your shop, including a 360-degree view. If you’re browsing on a tablet, you can even move around a 3D item with your finger! We implemented this update mainly for shoppers who want to check out the products in more detail. This is not an optional function; therefore, there is no option to deactivate it.
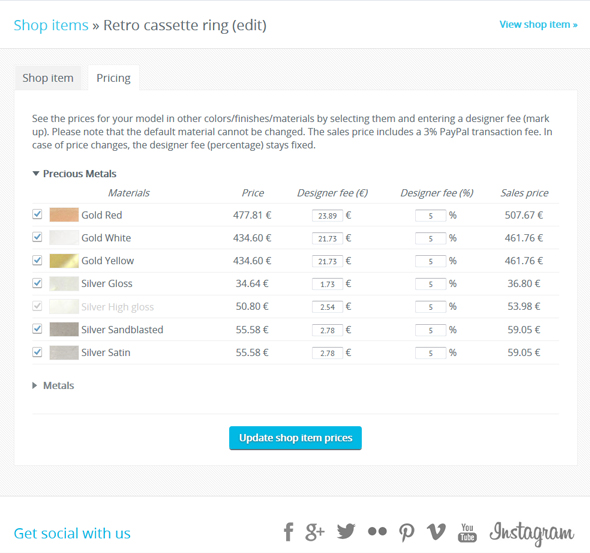
4. Set your designer fee for each material and finish option
With multiple materials and finishes available for your shop items, you can now set different designer fees for each combination. To access the price settings page, login to your i.materialise account, go to “Shop Items” under your profile, click the blue “Edit” button, and then make your adjustments under the pricing tab.
If you’re a newbie vendor, this guide might be a great help. Just follow the 5 easy steps and get started with your very own 3D Printing business on i.materialise!
The voices of our community are what matter most to our 3D Printing service. We’re anxious to hear your feedback on these updates, both from vendors and shoppers. New ideas for future updates are also welcome! Let us hear your voices in the comments below, by email or tweets!
Recommended Articles
No related posts.


