How to Get the Perfect Transparent Resin 3D Print
What is better than 3D printing in resin? 3D printing in transparent resin! This material from our family of resins is perfect for transparent 3D prints. The models are made using a 3D printing technology called Stereolithography.
Want to know more about 3D printing in transparent resin?
Read on and learn all our tips and tricks to get the perfect transparent 3D prints.
3D printing in transparent resin
This material is made with a liquid transparent resin which can have a slightly blue natural tinge. The 3D-printed models resulting from the 3D printing process will be hard, strong and transparent of course. The freedom of design is limited, so it’s a very good option for visual models.
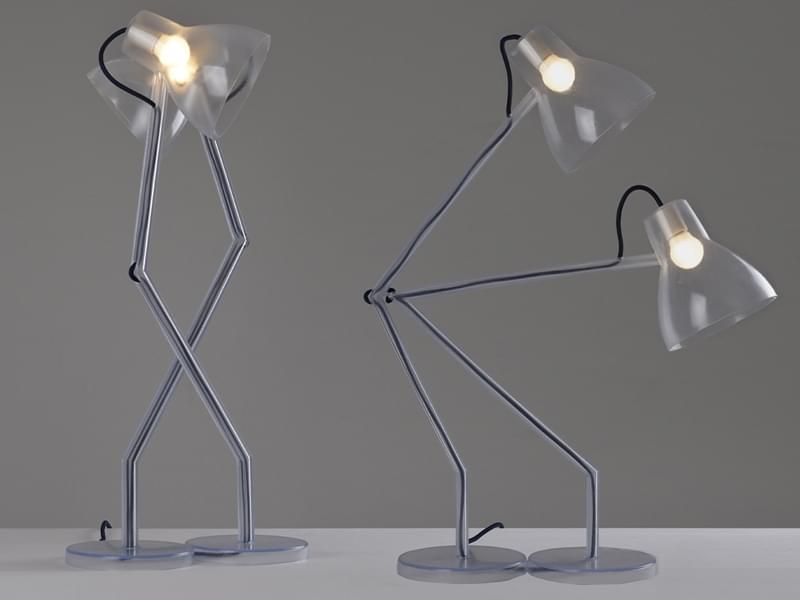
Love Lamps by Sandro Lominashvi in transparent resin
Apart from the natural finish, the resulting 3D models in transparent resin can be finished in different colors: white, yellow, red, green, blue, grey and black.
Just choose your favorite one when you upload your model to our 3D printing platform.
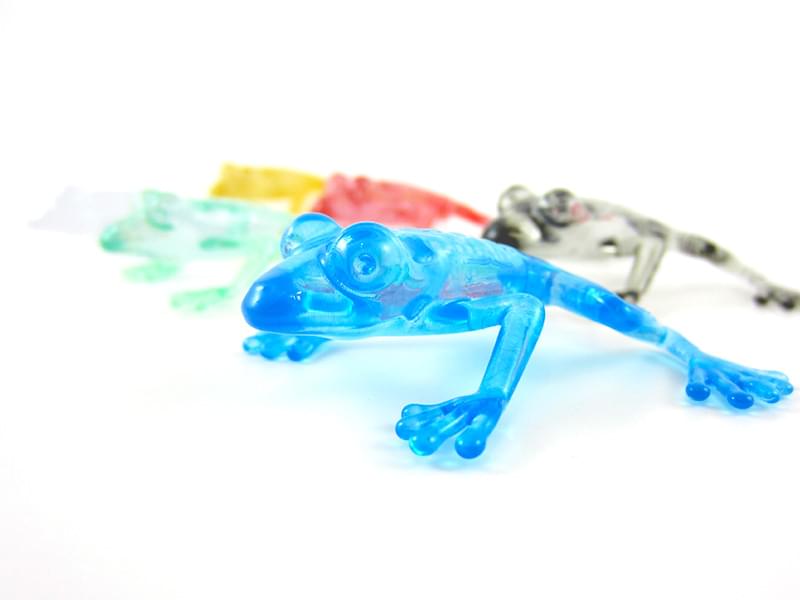
Transparent resin can be finished in different colors
How does 3D printing in Stereolithography work
If you want to achieve perfect 3D prints in transparent resin, it’s important to understand the technology behind resin printing: Stereolithography. This is a laser-based 3D technology which uses a UV-sensitive liquid resin.
The 3D printing process takes places in a large tank where a layer of liquid resin is spread over the build platform. Then, a UV laser beam draws the outline of the 3D design on the surface of the resin hardening the material where it strikes the resin.
The model is then lowered and the next layer is drawn directly on top of the previous one. In this way, the 3D model is built up layer by layer from the bottom to the top. A structure to hold the 3D-printed model in place will be automatically created where needed.
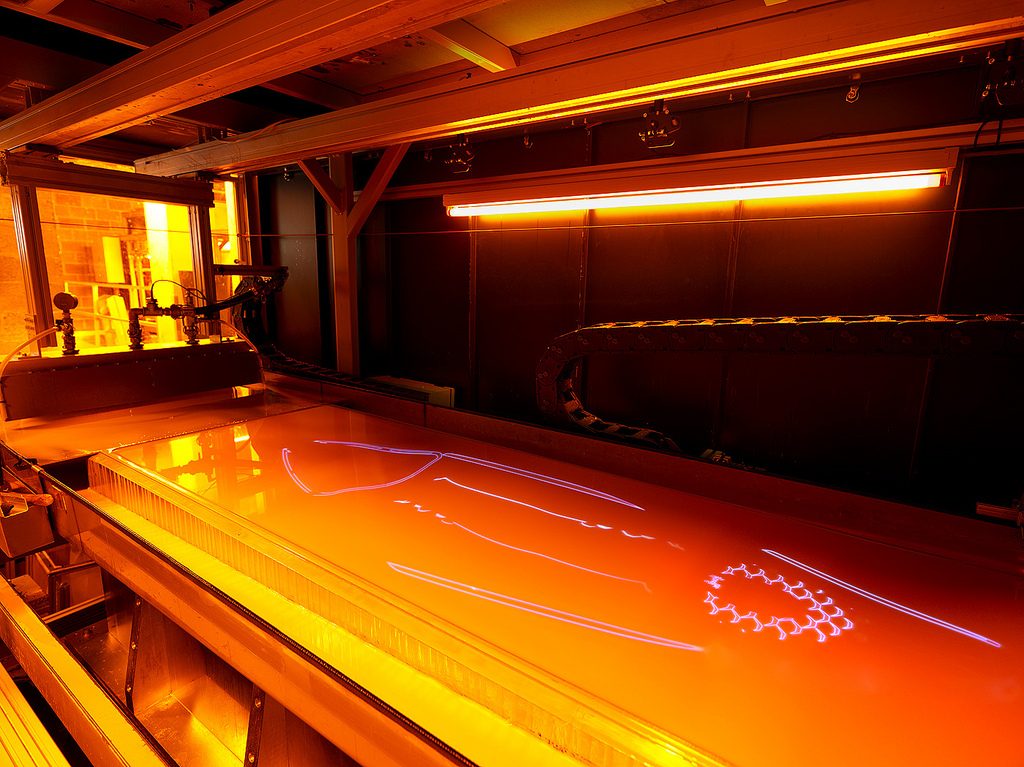
Stereolithography is the 3D printing technology behind transparent resin
Design tips for 3D printing in transparent resin
Obtaining the perfect 3D print in transparent resin is not always easy.
But it’s possible with these design tips:
1.Minimum wall thickness
For all 3D prints in Stereolithography, the minimum wall thickness depends on the overall size of the models. You should increase the wall thickness of your 3D print as your design becomes larger in scale. In general, you can follow these proportions:
- Small object (dimensions underneath 200mm) à 1mm wall thickness
- Medium-sized object (dimensions between 200mm and 400mm) à 2mm wall thickness
- Large object (dimensions over 400mm) à 3mm wall thickness
2. Surface quality and orientation
The process of 3D printing with Stereolithography is very important to understand the final result of your 3D prints. Your resin model will be printed layer by layer and this will influence the quality and strength of the surface.
Models printed horizontally will show signs of the “staircase” effect; models printed vertically will have a better surface quality. Our team will select the best orientation for surface quality and strength for each model.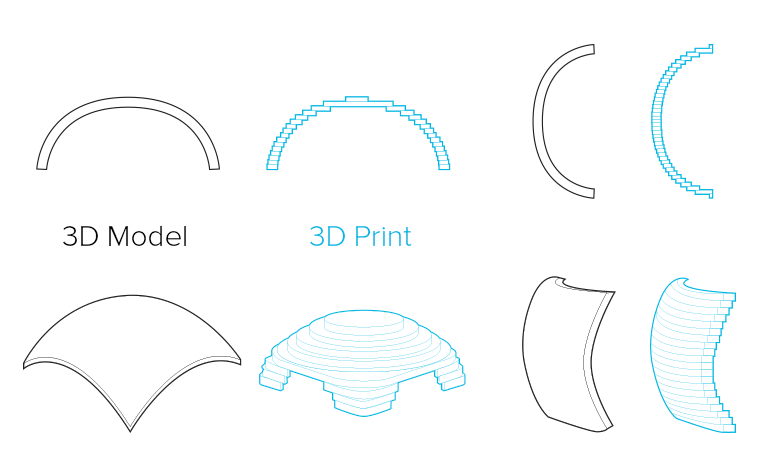
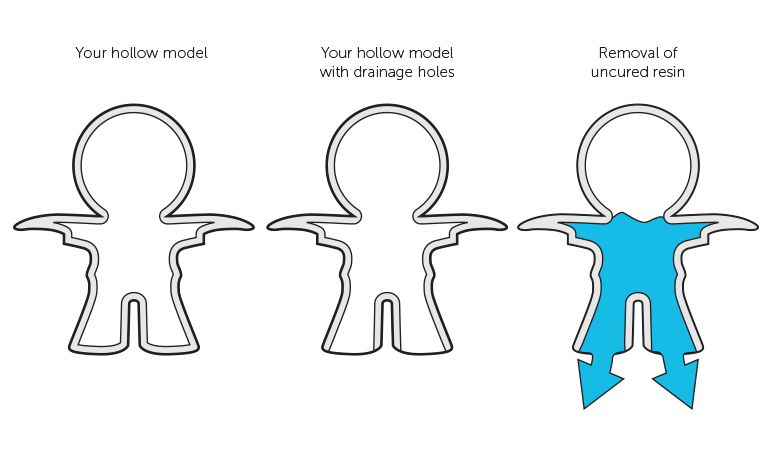
3. Hollow your model
Hollowing your model is the best way to get cheaper prints and avoid shrinkage issues in the thicker sections. When you hollow your model for 3D printing, our production team will integrate one or more drainage or escape holes that will keep the pressure of the liquid resin at the same level inside and outside your model to prevent deformation.
Afterwards, the holes will be used to remove excess resin from inside the model.
You can include holes in your design if you want them in a specific part of the model but it’s possible that our team will need to add extra holes depending on the print orientation of the model.
 4. Support
The process of 3D printing in SLA happens in a tank with liquid resin. For this reason, 3D models need to be attached to the build platform with support structure to prevent them from floating away.
This support structure also enables the construction of overhanging elements and is necessary for any model 3D-printed in Stereolithography.

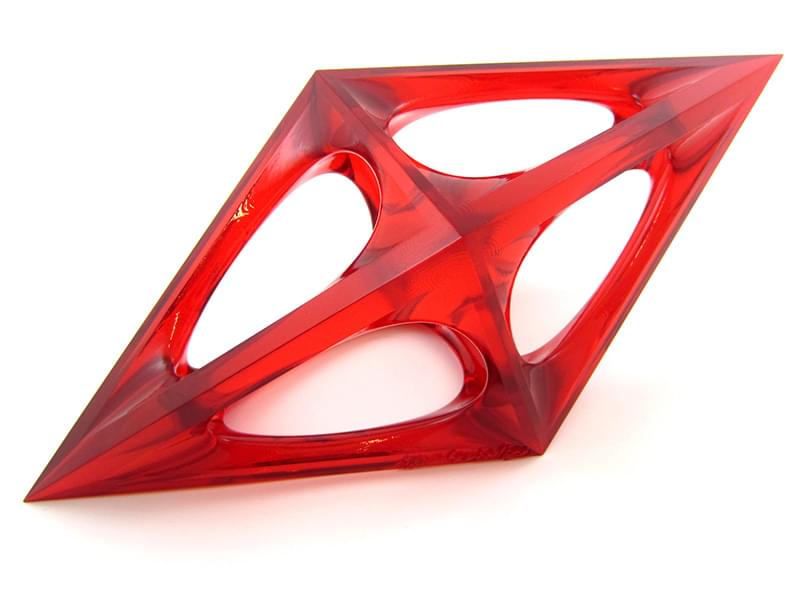
Example of support in 3D-printed transparent resin
Removing support
The support of your printed models will be added by our production department but there are some design tips that you can take into account if you want less support structure on your prints (less support ensures a smoother finish).
Rule of 30°
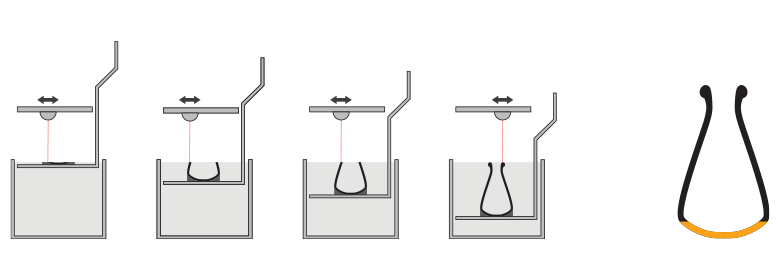
One good tip to take into account when designing for transparent resin is the rule of 30°. This means that to keep your model in place and prevent it from collapsing while it’s being printed, it will need to be supported if it has sections with angles narrower than 30°.
Look at the example on the picture: the bottom of the vase needs support because it has an angle of less than 30°.
It can get a bit more complicated:
The 30° rule also applies for the inside of 3D models. As you can see, when the interior parts are too narrow, they will also need interior support. As you can imagine, removing interior support is more complicated than removing external support.
Read more in our design guides about how we remove support and how you can avoid it for your 3D print in transparent resin.
5.Engraved and embossed details
For engraved or embossed details on your 3D prints in transparent resin, we recommend letters with a minimum thickness or depth of 0.5 mm.

Other things you should know about 3D printing resin:
- The maximum dimensions for transparent resin are 2100x700x800mm
- It’s not possible to print interlocking or enclosed parts
- The material is not always 100% clear, depending on the wall thickness and design
- Post-processing at i.materialise is called a “technical finish”. Some build layers and small imperfections might still be visible on the final print
- A clear varnish is also applied to your model to make it transparent, protecting it from dust and slowing down the discoloration process.

We hope that these tips will motivate you to design your first 3D prints in transparent resin. Once your models are ready, upload them to our 3D printing platform and choose the color you want for your prints.
Don’t be afraid of making mistakes in your models for 3D printing – our production team will find any issue and inform you about it.
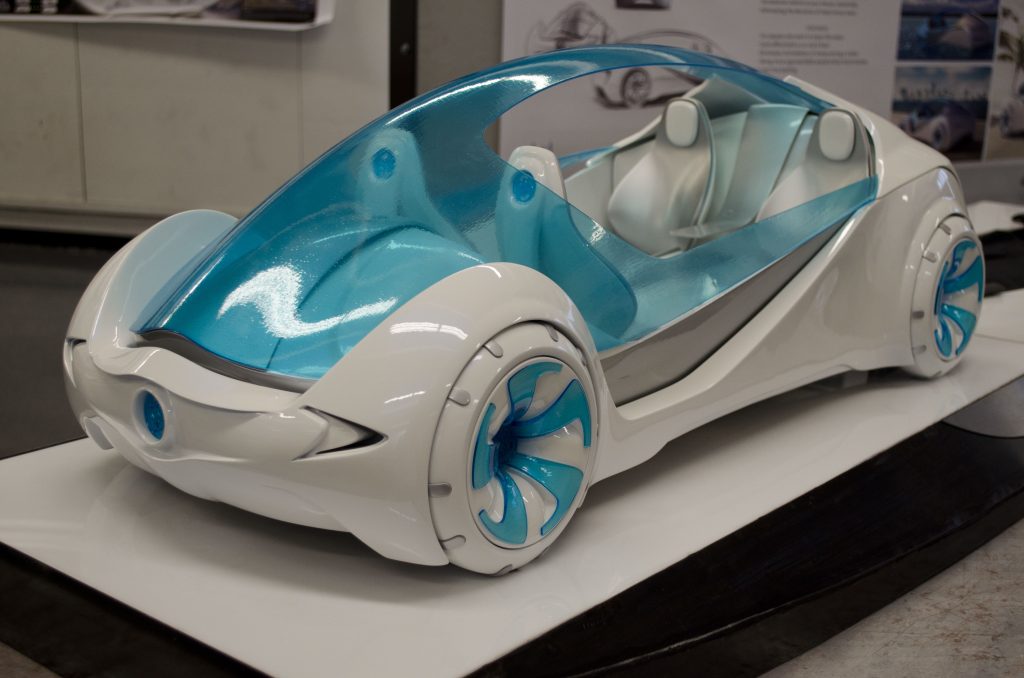
Featured image: Amphibious Vehicle Buick Ula Concept Car By Josh Henry