Tutorial: 3D Printing With Onshape
Onshape is currently making a buzz: it is the first and only complete cloud 3D CAD system that lets everyone on a design team simultaneously work together, using a web browser, phone or tablet. In this video and text tutorial, we will show you how to use this powerful app to create stunning 3D prints.
About Onshape
Onshape is a very powerful and professional 3D CAD system that provides teams with instant access to the same CAD system and data via a cloud-based platform. The 3D data can even be accessed and edited on mobile devices such as the iPhone, iPad and Android smartphones and tablets.
Onshape lets users directly draw, edit and shape new objects in its user-friendly interface. The app is especially suited for creating spare parts, technical parts, parts ready for manufacturing and assemblies.
Onshape is free for creating 3D models that can be viewed publically. Pricing for licenses that allow the creation of private 3D models start at USD 100/month. Follow this link to create your Onshape account and get started for free!
Professional 3D Printing with Onshape
If you want to get your Onshape 3D files printed on industrial machines, we’ve got you covered. You can simply add the free “i.materialise” plugin to your Onshape account and start printing in five simple steps:
- Go to the Onshape website and log into your account or register for free
- Subscribe to the i.materialise 3D printing app by visiting Onshape’s “App Store”, where you can search for “i.materialise” and add the plugin by clicking the “subscribe” button
- Open the Onshape file that you would like to print
- Click on the “+” symbol in the lower-right corner, select “Add application…” and then “i.materialise 3D printing app” from the menu
- Click on the button “Upload to i.materialise”. This will take you to the i.materialise 3D printing service where you can see instant price quotes for over 100 high-quality 3D printing materials and finishes
Onshape 3D Modeling Tips for 3D Printing
To make sure that your 3D file is perfectly printable, you need to take the following 3D printing issues into account when it comes to creating your 3D file:
- Wall Thickness: It’s very important that every surface of your 3D model has been assigned a wall thickness. When using Onshape it is possible to design a surface without a wall thickness or a wall that is far too thin for 3D printing (known as paper-thin walls). 3D printers, however, can only print walls that have a certain minimum thickness. For most materials, you should choose a minimum wall thickness of at least 1 mm for the essential parts of your design. You can learn how to choose the perfect wall thickness for your 3D print here
- Detail Size: The details, or the small decorative parts of the object such as embossed or engraved text, need to be of a certain size or they will not appear on the printed object. The exact minimum size of the smallest possible features of your design depend heavily on the material of your choice. That’s why you need to carefully read through the design guide of the material of your choice first. This is especially important if you intend to add embossed or engraved details such as text. Sticking to the minimum detail size will make sure that everything is as readable as you intended
- Grouped Models: Unfortunately, so-called grouped models are a common reason for us to cancel orders. For example, users that upload a single 3D file that consists of several, separated, unconnected shells will get a notification that their order cannot be processed. Interlocking and moving parts, on the other hand, are possible to 3D print (see next bullet point)
- Interlocking and Moving Parts: One of Onshape’s coolest features is the fact that you can create designs with interlocking and moving parts. Thanks to Laser Sintering technology our 3D printers can print these parts in Polyamide, Alumide, ABS, and Rubber-Like if you stick to the right space between your moving parts. We recommend choosing a gap of at least 0.4 mm (1 mm for Rubber-Like).
3D printing interlocking parts is possible with Polyamide, Alumide, ABS, and Rubber-Like
Creating and Printing Your First Onshape Model
Creating a new 3D design can seem like an intimidating task at first. However, keep in mind that any Onshape project actually starts out quite simply with a basic geometric shape. Onshape lets you add more and more features that make your sophisticated design come to life.
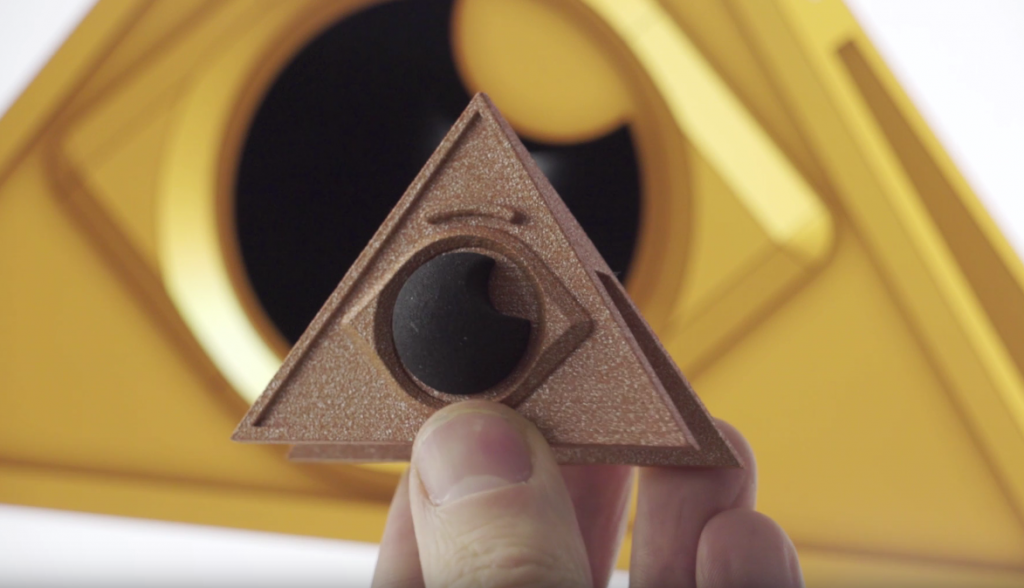
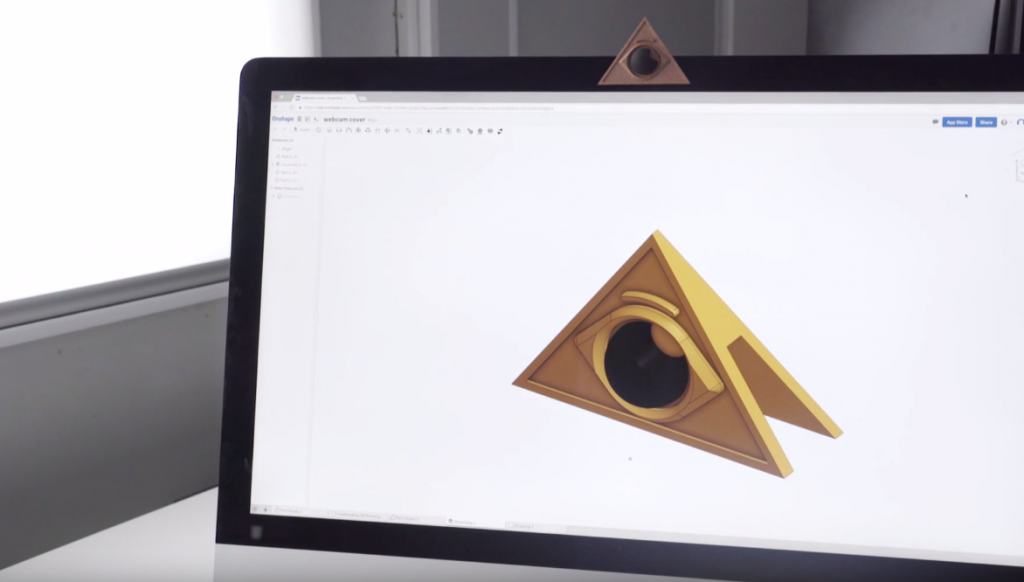
To experience this process, we created a 3D model of the following webcam cover that is publically accessible here.
When opening an existing file in Onshape you will notice the “features” list on the left-hand side. It’s a historical track of all edits and modifications that have been made to your model.
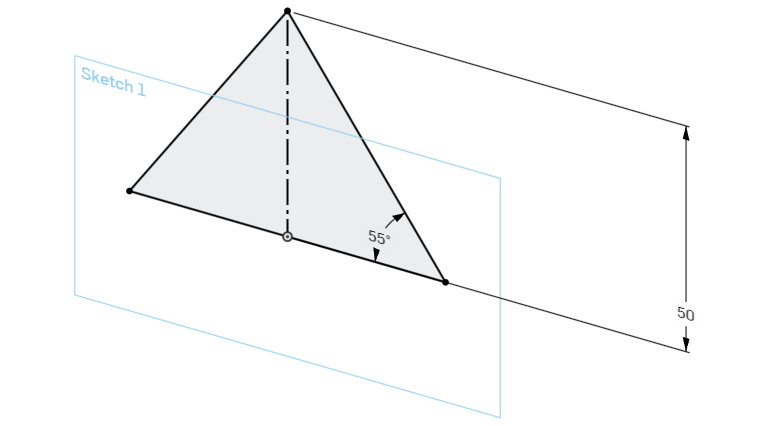
Double-clicking on the first feature in the “Sketch 1” list will show you the first step we took – creating a two-dimensional sketch of a triangle:
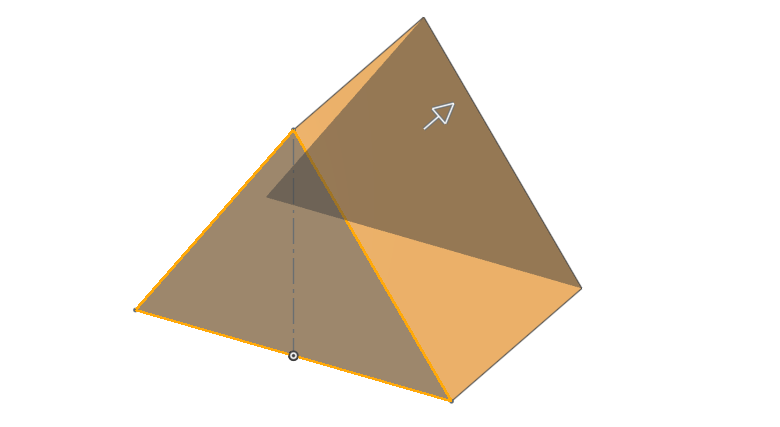
Double-clicking on “Extrude 1” will take you to the next step. We turned our sketch into a three-dimensional object.
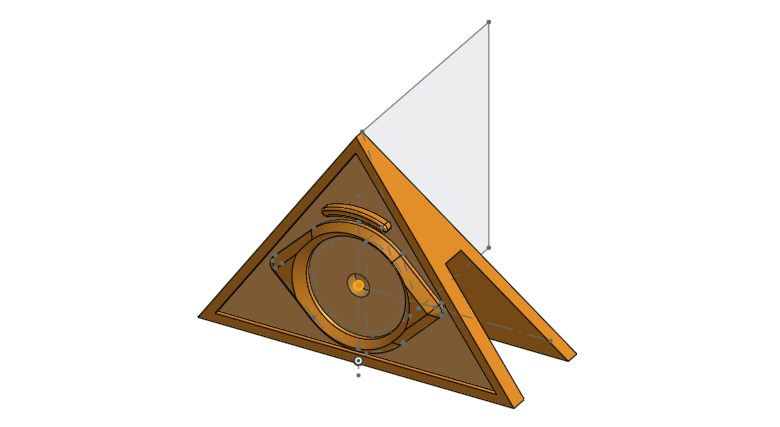
Now let’s jump to “Extrude 3”. You will see that the new sketches and extrusions give us the basic shape of the webcam cover.
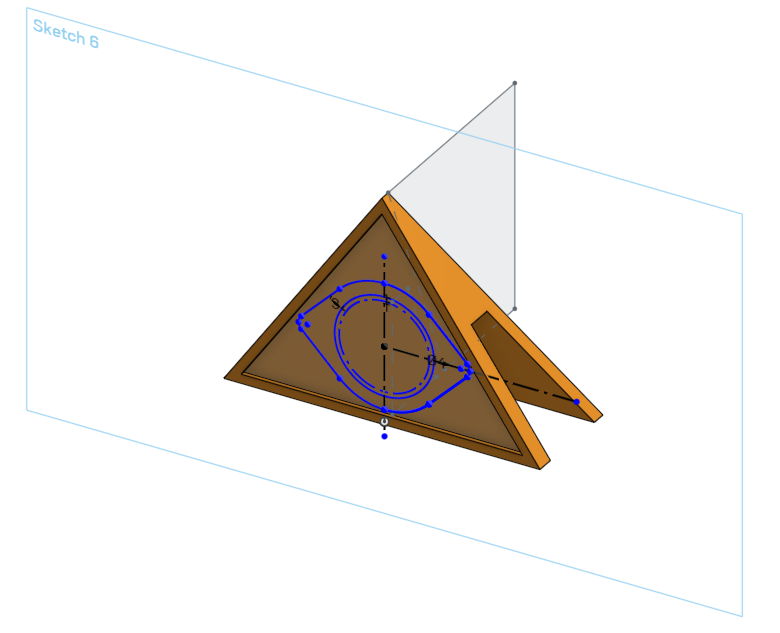
“Sketch 6” shows the basic shape of the eye that will be featured on the front side of the webcam cover.

Last but not least, we’ve arrived at the very last item. Going to “Hole 1” shows you the finished product.
With the help of the 3D printing plugin by i.materialise, we ordered our professional 3D print in Alumide, a mix of nylon plastics and sparkling Aluminum particles.
To get started with Onshape, create your free user account now and take a look at our webcam cover demo model. To print your designs in 3D, add our plugin to Onshape and start printing in 100+ high-quality materials and finishes.