
How To Make a 3D Model from Photos in 5 Easy Steps
The scanning app that is mentioned in this blog post is not available for download anymore.
Click here to learn about the top 20 3D scanners.
Looking for turning a photo into a 3D model? You can easily create 3D printable objects and 3D models from images and photos nowadays. In this tutorial, we will show you how you can turn ordinary 2D pictures of everyday objects into extraordinary 3D models. Turning 2D into 3D has never been easier as this project requires no coding experience and runs 100% on free software. If you think about 3D printing these 3D models, you don’t even have to buy a 3D printer and you can do it all without leaving your house. Let’s get started!
Let’s create a 3d model from photos!
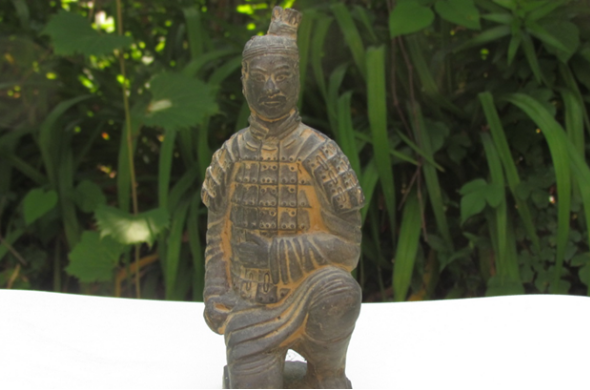
Step 1: Capture the object through Digital Photos.
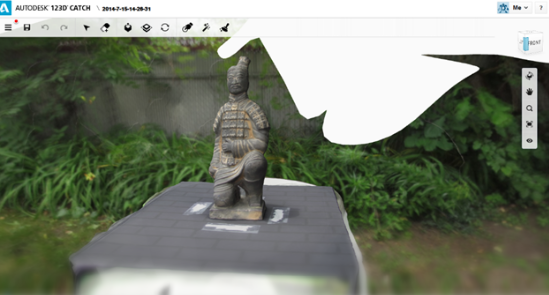
The first step is to capture your object by taking pictures of it. These images will serve as the foundation for the rest of your project and will later become a 3D model. You can do this step either with a digital camera or your mobile phone.
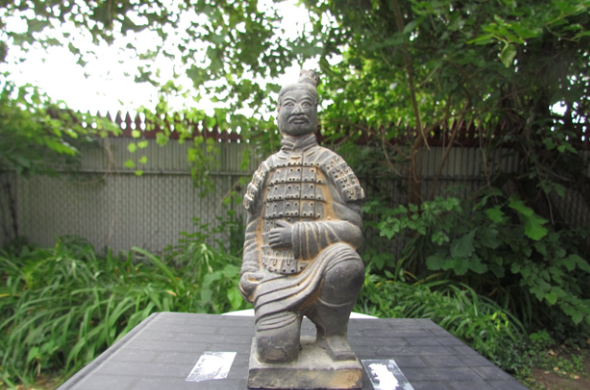
In order to make a 3D print based on photos, we first need to get the right images.
- Place your object in the middle and take photos in a loop, moving completely around the object.
- Shoot another loop from a different angle to make sure you cover the top of the object. Aim for 30-40 total sequential photos.
- For best results, add newspaper or sticky notes around your subject to help 3D building software distinguish where the bottom is.
- Try to maintain consistent lighting, object position and focus in all pictures.
- Avoid overexposed or underexposed photos.
- Avoid plain, reflective, transparent surfaces and objects. They don’t make good 3D models.
- For more help in setting up and taking pictures of your object, check out this tutorial.

This is how you should take your pictures in order to create a 3D model.
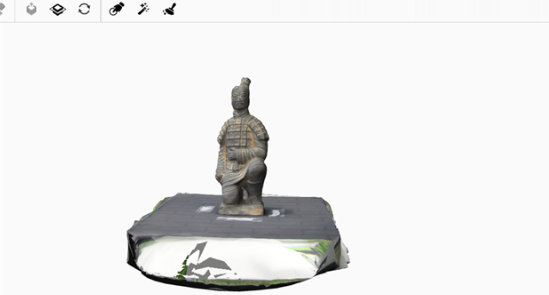
Step 2: Create a 3D Model from Photos: Upload your images to Autodesk 123D Catch
Autodesk’s 123D Catch is a free tool which will help you piece together your 3D model from the pictures you just took. 123D Catch will automatically identify common features from your photographs and convert them into a single 3D design. Your model will be uploaded and saved to Autodesk’s cloud storage.
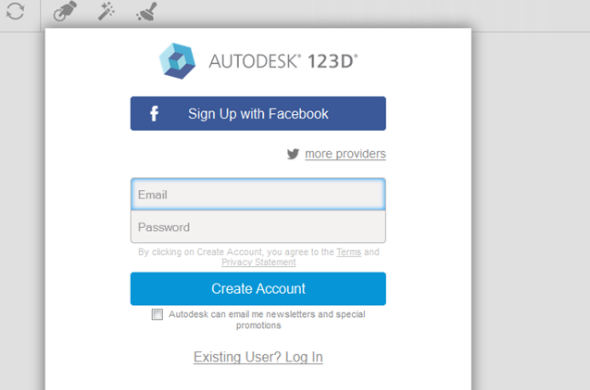
Sign up for a free account
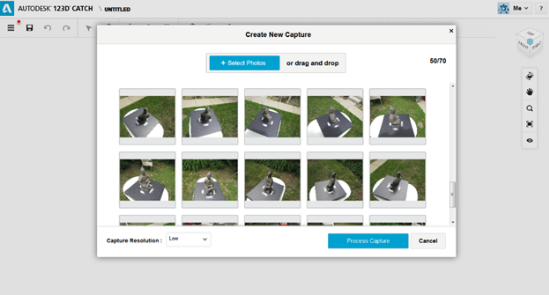
Upload the pictures
Stitched model from all of the pictures
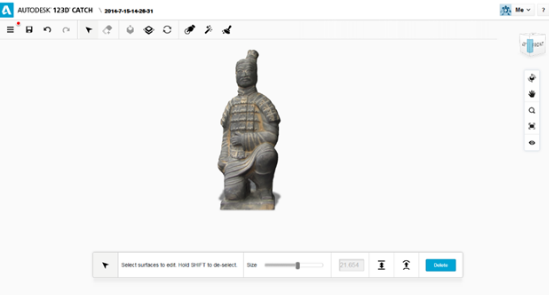
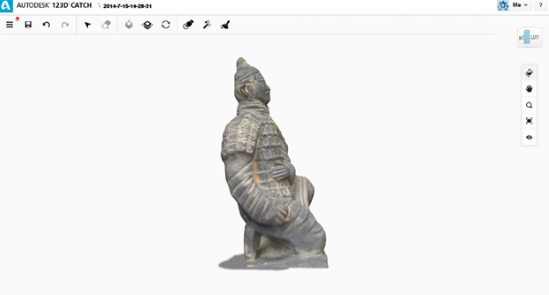
Step 3: Review and clean up your 3D model.
Give yourself a pat on the back for making it this far, you’re halfway through. The next step is to clean up and fix any errors your model might have in 123D Catch. Sometimes the pictures capture extra elements that you don’t want to be included in your model, but you can clean it up with the “lasso” and “heal” tools. The lasso tool will help you select and remove unwanted areas. The heal tool will help you fill in any holes in your model and fix them.
Step 4 (Bonus!): Edit your 3D Model and Tap into Your Creative Spark
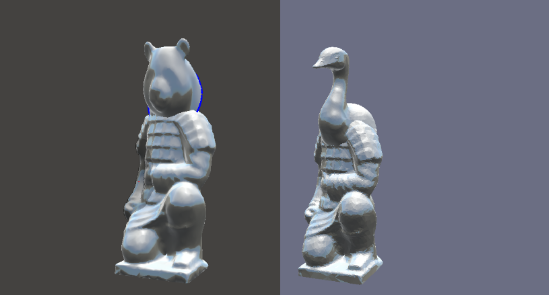
Is your model missing something? Want to add wings or robot arms? Take it to the next level with Autodesk sister app Meshmixer which allows you to mix , mash, mix, sculpt, stamp or paint 3D designs super easily, starting from over 10,000 models in the Gallery. Learn more about Meshmixer here. Below is an example of mashing the model we just created with the heads of a bear and a swan!
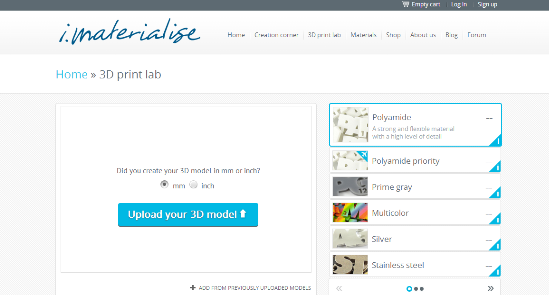
Step 5: 3D Printing Based on your Images: Print your 3D Model with i.materialise.
We are ready to print! When you’re happy with your model, click on the 123 Catch drop down menu in the top left and select “Export STL” which will generate your 3D model file in a format 3D printers understand. Upload your file to our 3D Print Lab.
Let us print your photo-based 3D model.
There you’ll be able to choose your materials, the size of your model. The price of your model will be automatically calculated according to its material and size. After following the checkout process your creation will be 3D printed and shipped to you!
Are you looking for more ways to turn your photos into 3D prints? Then you might want to check out our article about the free online app “Smoothie-3D” which lets you turn a single photo into a 3D print. If you want to learn more about our 3D printing materials, feel free to explore our material pages. If you’re struggling to turn pictures into 3D models find a designer on our 3D modeling service to help you out.