3D Scanning Tutorial for Microsoft Kinect and 3D Builder
Are you looking for ways to create color 3D scans of objects and turn them into high-quality 3D prints? Then this tutorial is for you! In this guide we will discuss how you can use Microsoft’s free 3D Scan app to turn your Kinect into a 3D Scanner. We will also take a look at how to import, edit and print these scans with the free 3D Builder app.
In order to use Microsoft’s 3D scanning solution, you will need a computer with Windows 10 or 8.1 and a Kinect. If you own an Xbox One with an integrated Kinect this cable will enable you to connect it to your PC. All that’s left for you to do is to download and install the 3D Scan and 3D Builder apps on your system.
Step 1: 3D Scan an Object or Person
Microsoft’s free 3D Scan app enables you to make color 3D scans in real time using the Kinect sensor and your PC. In this first step we will concentrate on the scanning process, and later we will tell you how to use 3D Builder to edit them.
You can use your Kinect either as a handheld or desktop 3D scanner.
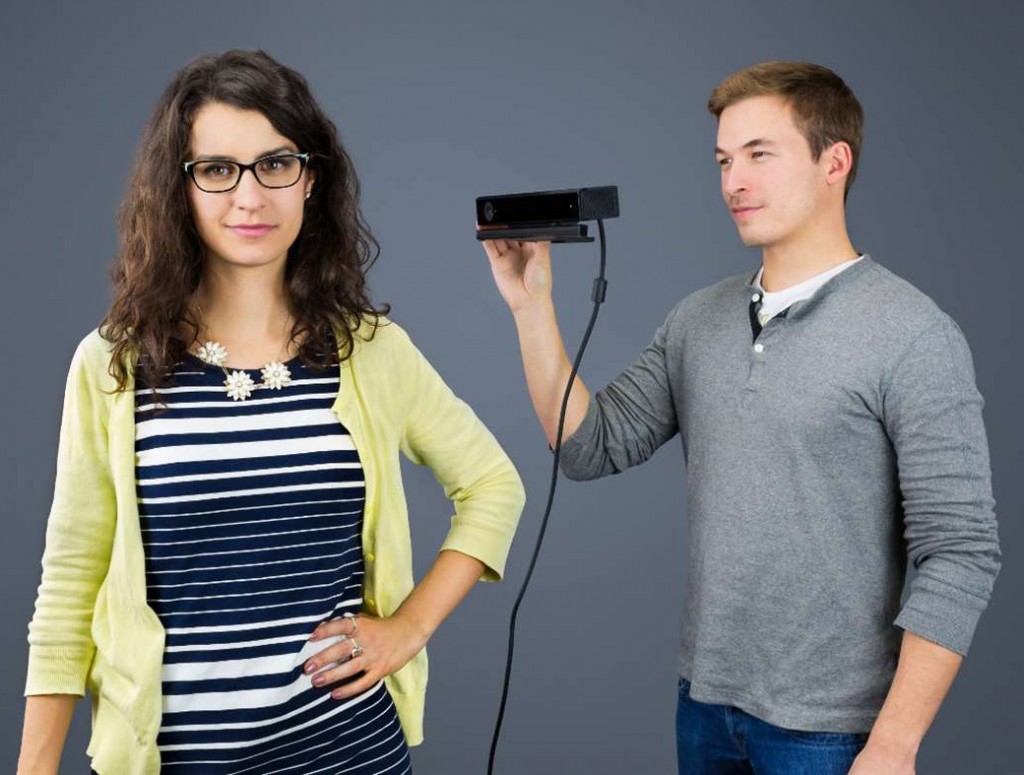
- If you choose to scan an item or person while holding the Kinect, make sure to enable the handheld mode and rotate around the objects you are scanning. Carefully pick the size of the area you want to scan and hold the Kinect sensor to “record” your object, just like you would use a normal camera. The app even lets you take 3D selfies using the one-click timer option
- You can also get great results by putting the Kinect on a tripod and placing the object you have in mind on a turntable in front of it. Don’t forget to switch off the handheld mode if you go for this option
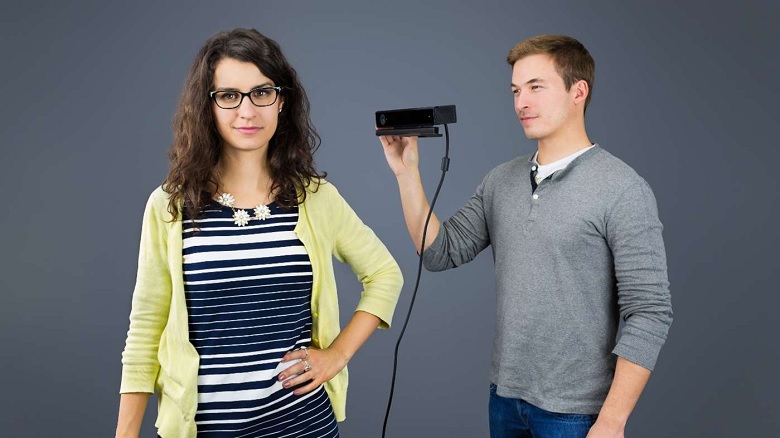
Using a Kinect sensor to scan a person. © Microsoft
Five major factors influence the quality of your 3D scan:
- The GPU quality (Graphics Processing Unit): A high-end GPU allows for higher frame rates and produces better scans. In order to get the best results, try to stick to at least 20 frames per second (fps)
- The lighting quality: Not surprisingly, a setting without any visible shadows produces the best results. The surface colors of your 3D scan will become better with more diffused light
- The distance from the background: Aim to maximize the distance between your background and the object you want to scan. This way the Kinect sensor will not mistakenly add artifacts from the background to your 3D scan
- Reflections: Try to scan in an environment with as little reflections as possible, since reflections in the background can create noise around the scan
- The distance from the object: You will get the best 3D scanning results when you place the object approximately an arm’s length away from the Kinect sensor (that’s 3 ft. or 90 cm)
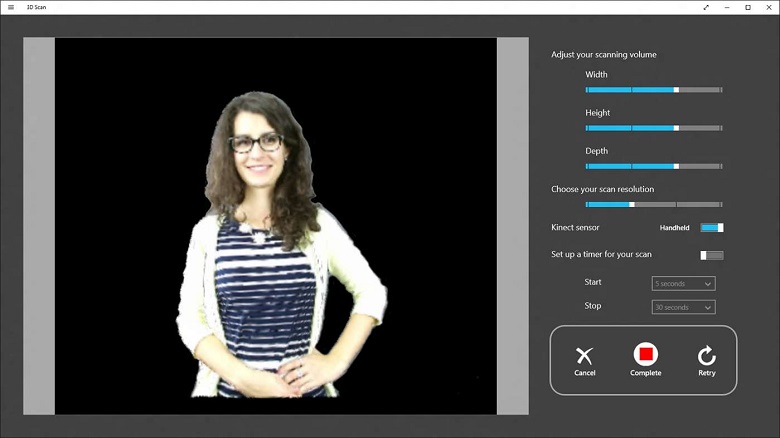
Microsoft’s 3D Scan app makes scanning user-friendly. © Microsoft
Step 2: Import and Edit Your 3D Model
Now that 3D Scan has captured your object, it’s about time to import and edit this 3D model. Microsoft’s free 3D Builder app does the trick. It allows you to import your 3D scan directly, to visualize it as a 3D model, to edit it and to 3D print it.
In order to import the 3D scan, start the 3D Builder app and choose “Scan” from the menu on the left-hand side. Once the scan has been imported, you can start editing the object. For example, you might want to create a base for your 3D scanned selfies.
If you want to learn more about the editing options of 3D Builder you can have a look at our beginner-friendly video tutorial here. We also recommend you to check out this practical user guide with detailed explanations of all the important editing tools in 3D Builder.
Step 3: 3D Print Your Object
Whether you are in need of a professional 3D print, don’t actually own a 3D printer or are looking for 3D printing solutions beyond plastic, there are many reasons for choosing an online 3D printing service. And 3D Builder makes this even easier: you can order a professional, high-quality print of your model with i.materialise from inside the app. We will then print it in awesome materials such as stainless steel, multicolor, silver, gold, ceramic and more!
In the top right corner of the screen you can find a 3D print button. Click it to prepare your model for 3D printing. In the ‘select printer’ dropdown menu, you can choose ‘3D printing service’. In the layout tap you can still double-check the size of your future 3D print.
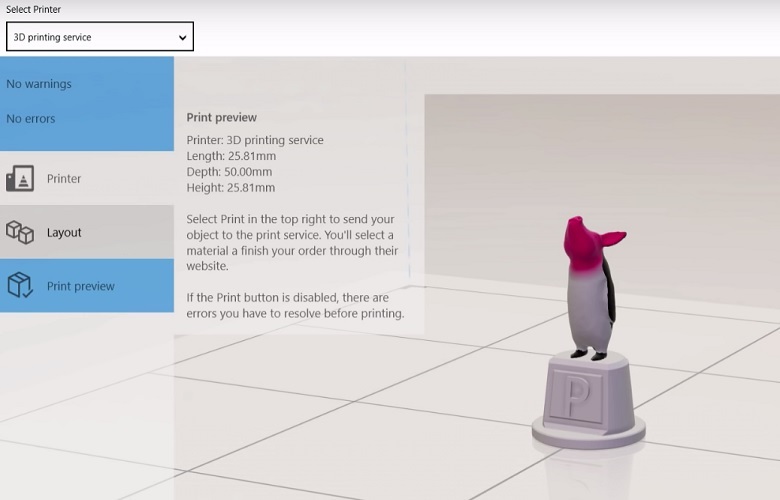
High-quality 3D prints can be ordered from within 3D Builder.
Click ‘order online’ to upload it to our online 3D printing service. You will immediately see the price for a high-quality 3D print of your model in 100+ materials and finishes. Now you are just a click away from turning your 3D scan in a physical 3D print.
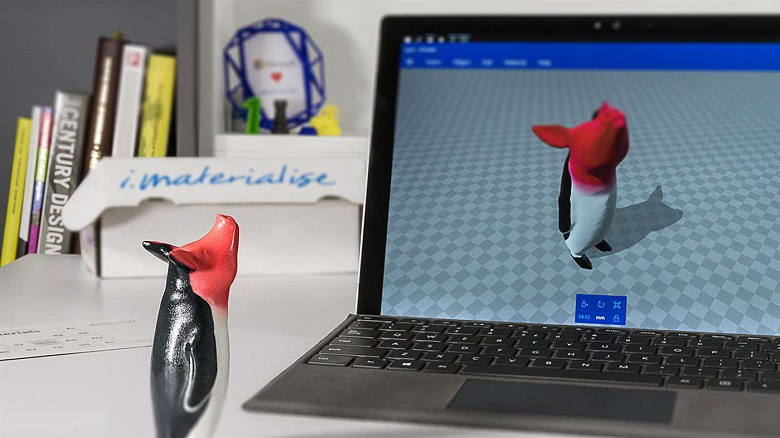
From 3D Builder model to reality: a multicolor 3D print.