
3D Builder Tutorial: How to Create Models for 3D Printing
In this tutorial you will learn how to use Microsoft’s beginner-friendly 3D modeling app 3D Builder for creating your first 3D models and professional 3D prints. This how-to article includes a tutorial video as well as a text version.
About 3D Builder
3D Builder is a free Windows app that lets you view, capture, personalize, repair, and print 3D models. Users either start from scratch by combining simple shapes, or download any kind of given 3D file from an online database. They can then edit these models using the 3D modeling space. 3D Builder even includes a feature to turn webcam photos into 3D, as well as easy-to-use personalization tools. The app supports all important 3D printing file formats including STL, OBJ, PLY, WRL (VRML), and 3MF files.
Getting Started with 3D Builder
As already pointed out you can either start from scratch or by importing existing models. 3D Builder gives you the following options:
- Choose ‘new model’ to start designing an object from scratch.
- Select ‘load model’ to open an existing model and start editing it.
- Click on ‘load image’ to important an image and create a 3D model based on it (works best for images with high color contrast like a black object on a white background).
- Choose ‘camera’ to import a photo and turn it into a 3D model.
- Select ‘scan’ to import a scan based on Microsoft’s Kinect device.
An easy starting point is to select a model from the library. You can browse through the different categories (like toys, trophies, household, miniatures, etc.) on the home screen and start editing them immediately.
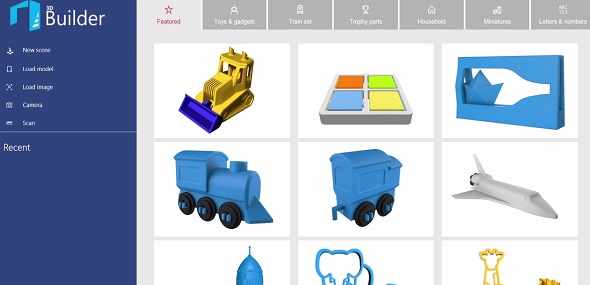
The 3D Builder start screen. Create a new 3D model or open existing ones.
Basic Settings and File Opening
If you choose to create a ‘new model’ you will see an empty three-dimensional workspace! This is where you will create your new object! But first, let’s get familiar with 3D Builder’s interface:
- On the right-hand side, you can choose options such as selecting objects, grouping them together, or changing the material.
- On the top left of the screen, you see the icon of the main menu. Click on it and select ‘settings’. Here you can choose the unit size that suits your needs best. The most used unit size in 3D modeling and 3D printing is millimeters (mm).
- Next to the main menu, you will see another menu that is called ‘insert’. From here you can add simple geometric shapes (like cubes, spheres, etc.) as well as previously created models.
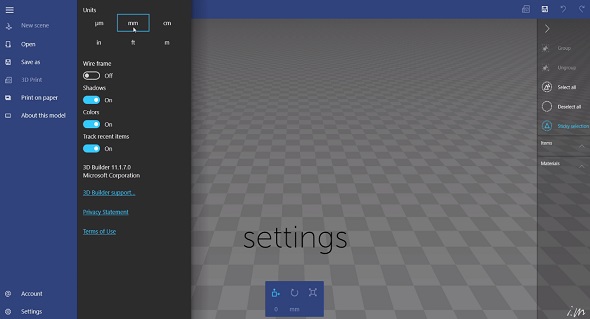
Choose the unit size that suits your needs in the settings.
Basic Navigation in 3D Builder
After importing a basic shape, let’s take a look at how to navigate in 3D Builder. This will change the view on your item, but will not affect the geometry of the object itself.
- Rotate: Click on your left mouse button and drag in order to rotate the view and see your object from different angles.
- Zoom: Use the wheel of your mouse to zoom in and out.
- Pad: Click on your right mouse button and drag in order to pad.
Basic Editing Tools
After selecting an object you will see several simple editing options at the bottom of your screen.
- Move: The first tool lets you move your parts in three dimensions by clicking and dragging one of the arrows. You can also click on the number below and enter a precise value.
- Rotate: With the second tool you can rotate your parts in all directions by clicking and dragging one of the arrows. Once again, you can also insert a value here.
- Scale: You can change the size of your model with the third tool. The little lock symbol shows that your model will be rescaled proportionally. If you only want to increase the size of your model in one dimension, uncheck the lock symbol first.
Basic editing options can be found at the bottom of the screen.
Intermediate Editing Tools
But there’s more. By clicking on the ‘Object’ menu at the top you will get further editing tools.
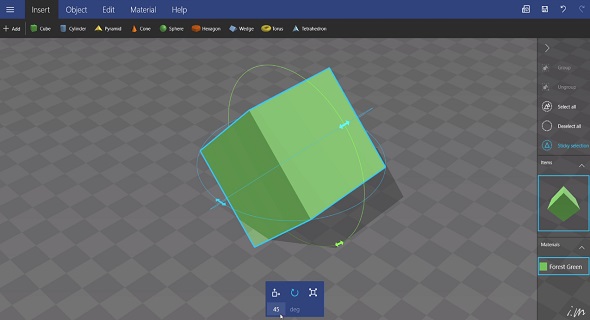
- Duplicate: The currently selected model will be copied and placed right next to the existing one. If you click on the copy, you will have selected both objects now. Double click on one of them to only select one of the two.
- Delete: The currently selected model will be deleted.
- Center View: If you get lost on your workspace this option gets you back to the right camera angle.
- Mirror: This mirrors your model. Mirroring comes in handy if you need the left and right version of something.
- Settle: With this tool, you can check the stability of your model. For example, it can show you if your future 3D print will stand upright or if it will fall over.

The cube was copied with the duplication tool.
Advanced Editing Tools
Now that you know the basics let’s hop on to the more advanced editing tools. Click on the ‘Edit’ menu on the top to get here.
- Split: This lets you cut your object into two pieces. You can freely choose the angle and height in which the cut will take place.
- Merge: This tool is very helpful if you want to merge several items together to a single new object.
- Subtract: Instead of adding items together, you can also subtract them. This way you will cut away the overlapping parts of two models.
- Intersect: This option will only show the overlapping areas of several items. All other parts of these models will be cut away.
- Smooth: This tool turns edges into round corners. Click it several times to get an even smoother result.
- Simplify: This option reduces the amount of triangles of your 3D model and will thus lead to sharper edges.
- Emboss: This tool enables you to add text, signs or symbols to your 3D model.
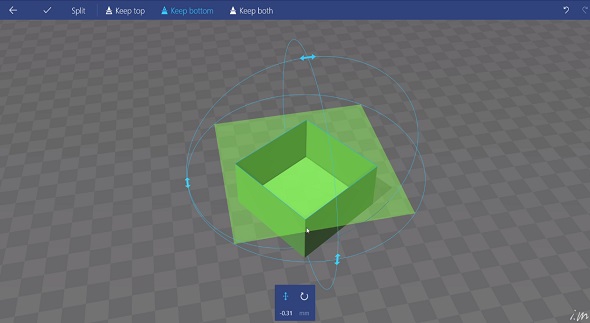
The cube will be cut in half with the split tool.
Importing an Image
As we already pointed out, you can also import images. Click on ‘insert’ and select ‘image’ to do so. Try a black and white silhouette image for the best results.
Click on ‘inverse’ to change between a positive and negative representation. Also, make sure to play around with the ‘levels’ and ‘smooth’ bars to get the perfect result.
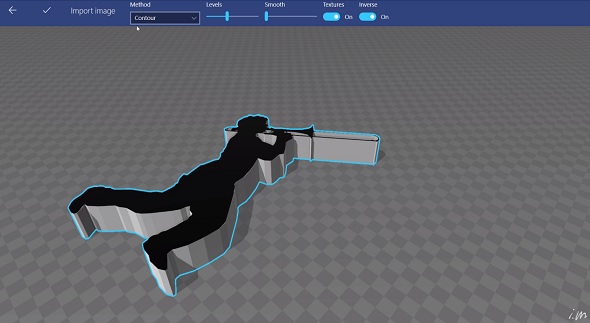
Black and white scenes work best for importing an image.
3D Printing your Model
Whether you are in need of a professional 3D print, don’t actually own a 3D printer or are looking for 3D printing solutions beyond plastic, there are many reasons for choosing an online 3D printing service. And 3D Builder makes this even easier: You can order a professional, high-quality print of your model with i.materialise from inside the app. We will then print it in awesome materials like stainless steel, titanium, silver, gold, ceramic and more!
In the top right corner of the screen, you can find a 3D print button. Click it to prepare your model for 3D printing. In the drop-down menu called ‘select printer’ you can choose ‘3D printing service’. In the layout tab you can still double-check the size of your future 3D print.
Click ‘order online’ to upload it to our online 3D printing service. You will immediately see the price for a high-quality 3D print of your model in 100+ materials and finishes.

Choose ‘3D printing service’ for ordering a 3D print of your model.
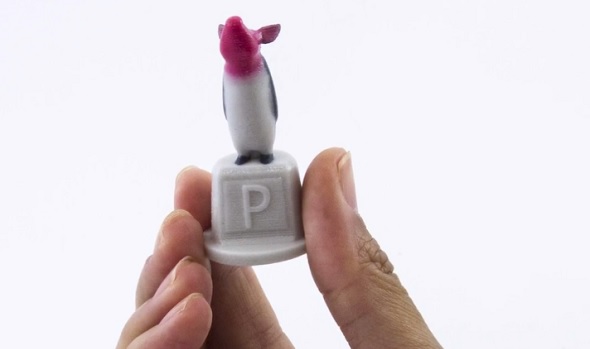
We printed our 3D model in multicolor.
You can download the 3D Builder app here and learn more about Microsoft’s 3D printing activities here. Once your 3D model is ready to go to the printers, all you need to do is choose between our 20 different 3D printing materials and over 100 possible color and finish combinations.