How to Paint Polyamide 3D Prints: Master Artist Shares His Knowledge
Master 3D Artist Danny van Ryswyk sat down with us for a tutorial about his world-class sculpting and painting techniques. In this article you will learn how to prepare and hand-paint your polyamide (nylon plastic) 3D prints like a pro!
Every so often, an artist comes along who pushes the boundaries of what we believe is possible. Danny van Ryswyk is an acclaimed Amsterdam-based digital painter and sculptor who creates surreal, paranormal sculptures using 3D CAD (computer assisted design) sculpting software and hand-painting techniques. His sculptures and two-dimensional render-based paintings join childlike fantasy with the macabre and fantastical world of nightmares. His work is dark, brooding, and admired all over the world. His sculptures are 3D paintings, instantly recognizable by their smooth surface, dark colors, and minute level of detail.
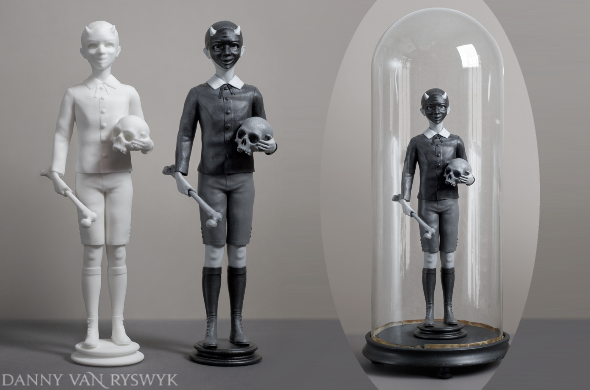
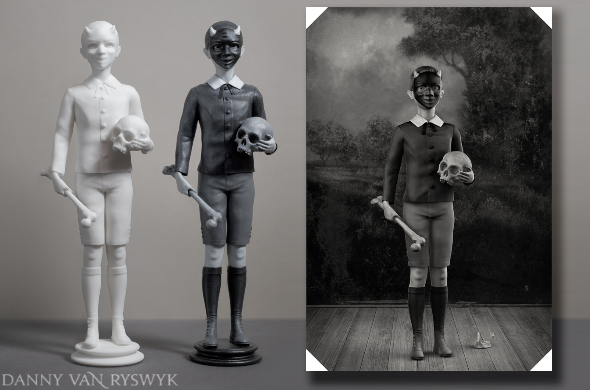
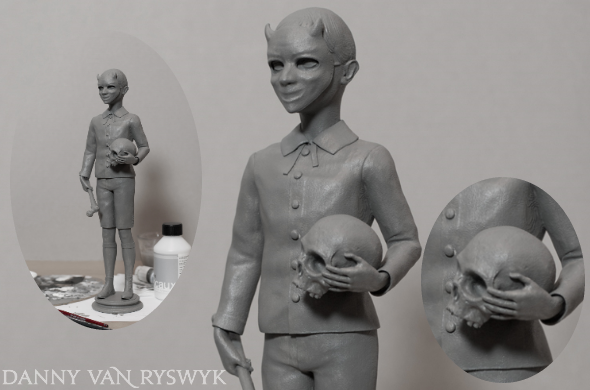
“The Untitled Figure” is a Polyamide print hand-painted with acrylic paints by Danny Van Ryswyk.
1. Where do you derive inspiration from?
The examination of a reality that exist outside the range of science’s ability to explain or measure.
2. How did you become interested in sculptures/figurines?
When I first started painting 3D-printed sculptures, I envisioned classic polychrome-painted religious sculptures made from wood. I wanted to create hand-painted objects with an authentic feel and look. Traditional methods involve covering the sculpture with plaster first, and then applying oil or tempera paint to its surface. In my case, I use a modern approach because my sculptures are 3D printed in Polyamide, a material which requires different painting methods.

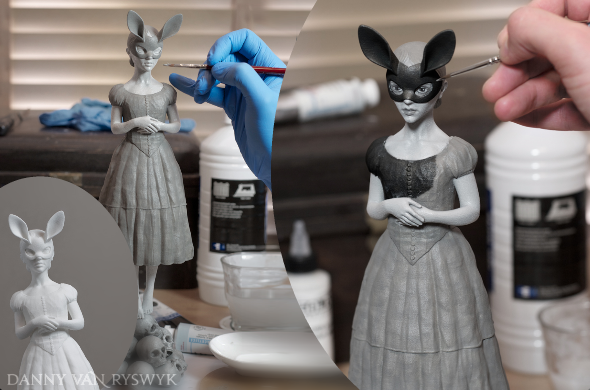
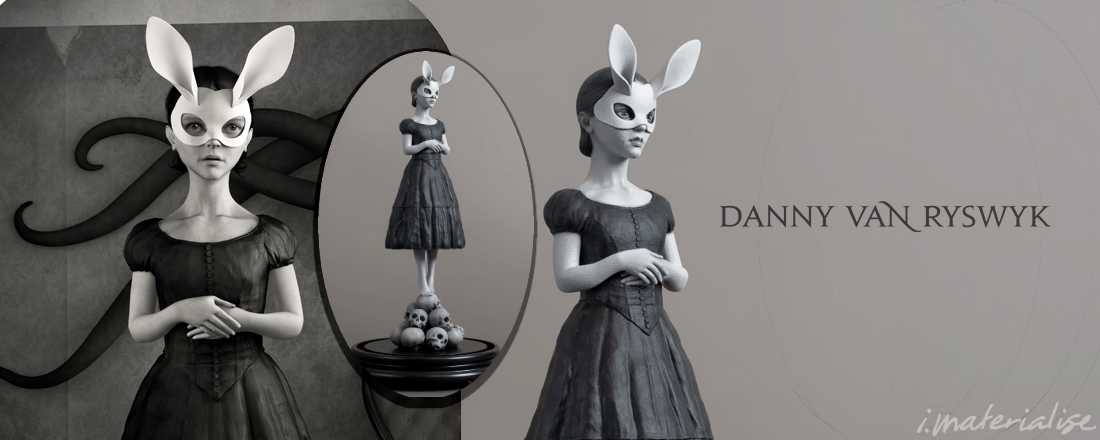
“White Rabbit” is printed in Polyamide, a white plastic with a slight grain to its surface.
3. When did you start using 3D printing technology? Which tool or software do you use most?
Half a year ago, I started using 3D printing technology. I create my sculptures in Zbrush, a 3D software specifically used for high-poly sculpting. As an artist, high-poly sculpting software allows me to work with digital objects as if they where made of clay, and to sculpt with utmost attention to detail. This gives me unlimited freedom to create whatever I have in mind.
4. Why did you choose 3D printing over other options (such as traditional casting)?
Because my work is made in a digital environment, 3D printing is an interesting new method to get my work out of the computer. You know… I do not consider it important that it is made of polymer, clay, or porcelain. What is important are the final results, the realization of the idea, not the 3D printing technology itself. That is just a way to get there.
5. Which material is your favorite to 3D print in, and why?
So far I prefer Polyamide, because it is the only material that can print in the highest detail level for the sizes I want. I have considered muliticolor sandstone material, but the colors used in this printing process are based on dye inks that are sensitive to UV-light. This makes them unsuitable for my artwork. Furthermore, there is no color profile system for this type of printing.
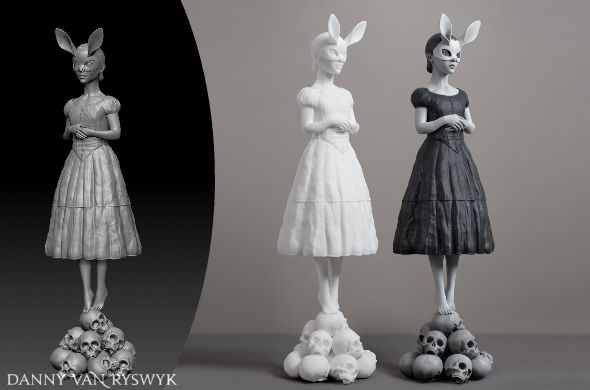
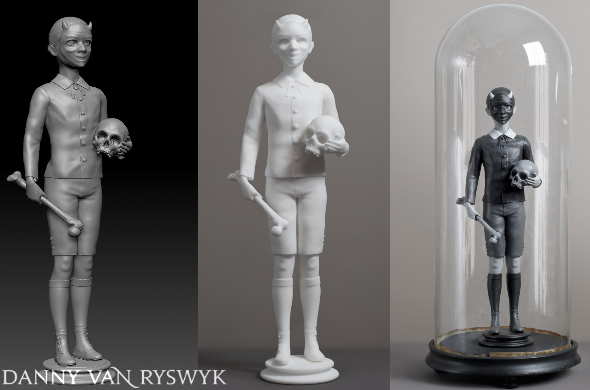
From left to right: the transition from digital image to Polyamide print to painted art.
6. Describe your workflow.
The moment I visualize an idea, the real work begins. I never make a sketch, so nothing is written in stone at this stage. Instead, I make a mental projection of the idea and work from there. I can spend weeks, even months, working in 3D software on a sculpture that might contain many layers and parts. From there I can go two directions, namely: creating a digital painting, or letting i.materialise create a 3D-printed sculpture of my model.
7. And how do you work with your 3D-printed designs?
My 3D-printed sculptures are an adaption of its existing digital painting I made of the sculpted 3D model. The digital painting serves me as an example of how the hue/values on the 3D-printed sculpture should be like. I choose to work in a monochrome color scheme for all my works.
8. What are your tips and suggestions for painting a 3D-printed figurine? Do you use special paints, brushes, techniques, or materials that you would like to share with our readers?
The first thing I do when I receive my sculpture from i.materialise is thoroughly clean it with water. This washes off any powder that is left on the sculpture from the printing process. After that, I leave the sculpture to dry for several days.
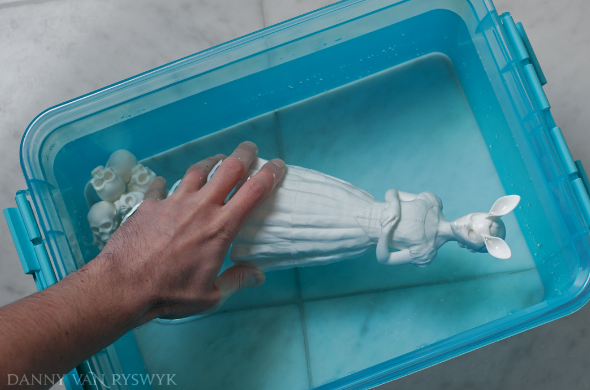
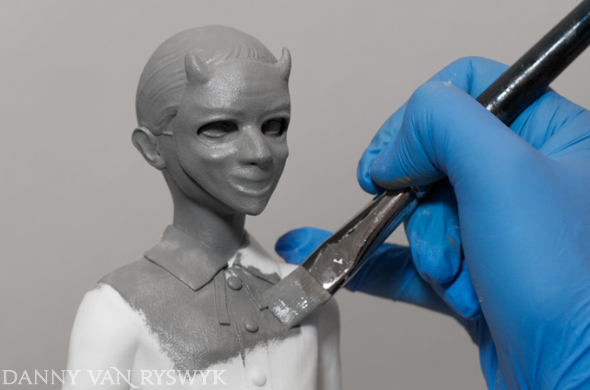
Danny van Ryswyk cleans the plastic dust from his figure, and thoroughly dries it before painting.
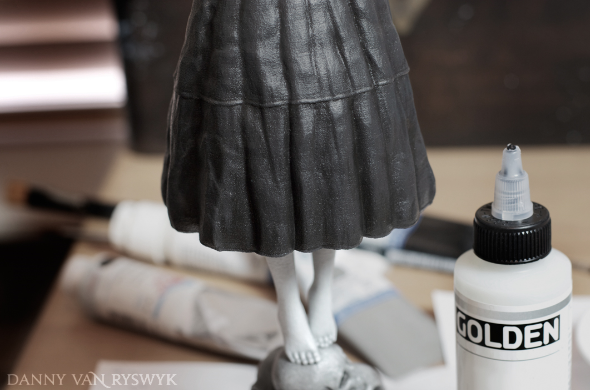
Then, I prepare my paints and brushes. I only work with high-grade paints and materials which are tested for their durability and fade-resistance. I make use of several brush sizes, since it is often hard to reach the small corners and places with just a normal paintbrush. One trick I use is bending the metal ferrule of an old brush, so that I can paint these impossible-to-reach corners!
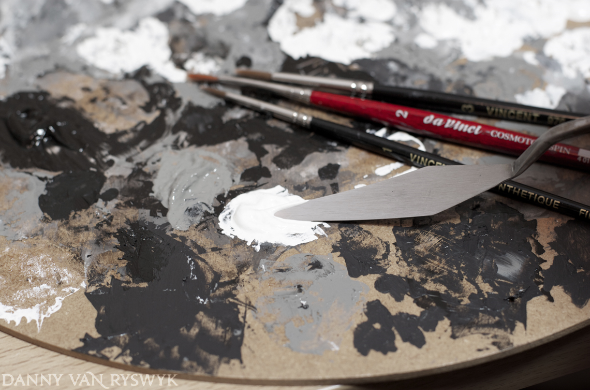
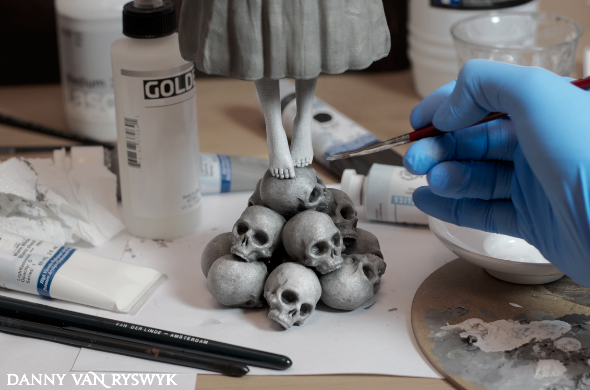
Painting a figure takes several layers of paint, and many brushes to reach tight, narrow areas.
When needed, I also use a few other unconventional methods. For example, using a toothbrush to splatter paint on parts of the surface to create texture. I might also cover the surface with a transparent wash of paint and wipe it away to highlight the focus on parts and bring out the details. There are no rules, I invent and take risks and see where it goes from there. This is how I make my art.
When I start I painting, I give the whole sculpture a warm mid-tone grey under-painting color. This serves as a good base for later hues and values.
After I lay the base, I start painting all the elements. I do not start in any particular order. Instead, I just start with what feels right: flesh, clothes, masks, skulls, and bones. From studying the old masters, I became experienced painting layer upon layer until I reached that high level of perfection. The same methods are applied here, except with acrylic paints instead of oil or watercolor.
The smaller the scale of a sculpture, the more details need to be painted onto it. For instance, the folds in clothing. I paint the higher parts of a fold lighter, and the lower parts darker. Depending on natural light and shadows is not enough, they need to be added and accentuated as well to raise the dynamic of the form. This is very important, or else it will become flat and lifeless. The illusion of depth is the key.
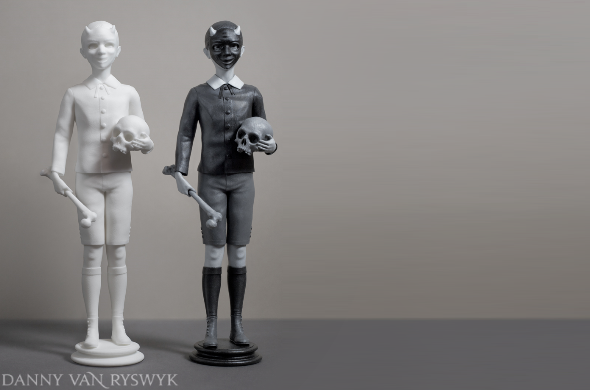
“The Untitled Figure” by Danny van Ryswyk.
Many hours go into painting a sculpture. Every detail takes time and dedication. The eyes can take up to several hours of work just to get the right expression. The texture of the skulls are painted in many layers as well. The surface of an old bone or skull is covered with little specks, dirt and discoloration. It is a meticulous job to paint this effect. When the sculpture is finished I sign it and place it under an antique glass dome.
9. What advice would you give to new sculptors and 3D designers?
Art is all about finding your own style and methods. I do things my way and you should do things your way. If you want to start making art with 3D printing because you think that 3D printing technology is cool, then you are thinking the wrong way. See if the method and material can give you what you are looking for. That is what truly matters.
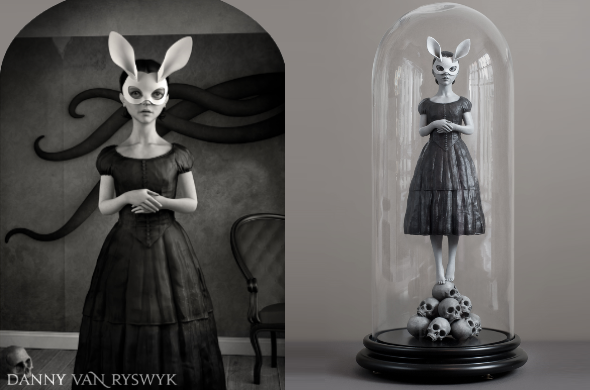
Danny’s 2D render-based drawing of “White Rabbit” is at left, and his painted Polyamide sculpture is at right.
10. For readers who prefer 2D animation, can you tell us how you use 3D sculpting software to create 2D digital paintings? Are your paintings renders, or do you also paint over those?
To create a digital painting, I import my 3D model into rendering software. That’s where I apply textures, lights, and camera. I use the rendering software to create a complex scene with intricate backgrounds and atmosphere. This scene is then rendered into a 2D image, which I further refine with digital paint. The final results of this process are 2D printed using pigment inks on museum quality cotton paper, and then framed.
Do you need a new 3D print? Simply upload your 3D model here and choose from 100+ materials and finishes from our online 3D printing service.
Recommended Articles
No related posts.


