Blender Tutorial: Creating a Chess Piece for 3D Printing
Learn to model for 3D printing with this beginner-friendly Blender tutorial: creating a realistic looking chess piece can seem like a simple task but it poses a few fun challenges that can be tackled with basic Blender techniques. CG Cookie’s Blender expert Jonathan Williamson will show you what you need to know when creating a simple model and getting it ready for print. He’ll show you how to create a 3D model and use Blender for 3D printing in an interactive video tutorial.
Even users with minimal Blender experience will be able to follow along as Jonathan takes you through the simple workflow, focusing on ways to make the model 3D printer-friendly. Without going into advanced tools, Jonathan’s tutorial shows several handy techniques you will find useful for modeling an endless variety of simple objects in Blender.
3D modeling with Blender
Jonathan uses free 3D modeling software Blender for this tutorial. You can download via Blender’s official website.
The techniques Jonathan demonstrates include basic mesh creation and editing, object scaling to real-world size, subdivision surface modifiers and adding detail with the Boolean modifier.
If you have never used Blender before, we recommend checking out Blender Basics, a free CG Cookie series covering the software’s interface and main features.
Setting a reference image in Blender
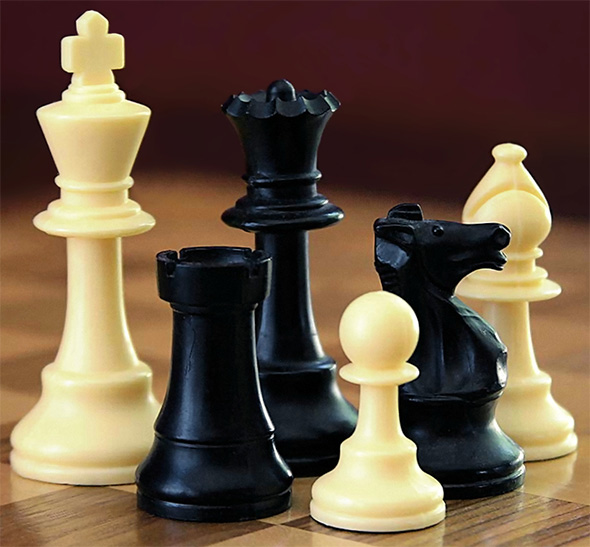
Photo Credit © WikiPedia
To begin with, I selected a reference image featuring a chess rook (or tower) which has a fairly basic shape but several interesting features like overhangs, curvatures, and protruding elements as well as insects and notches in the head part. Learning how to model these elements is extremely useful as you will encounter them in endless other objects you might choose to create in the future.
Blender tutorial basics: getting started with your mesh
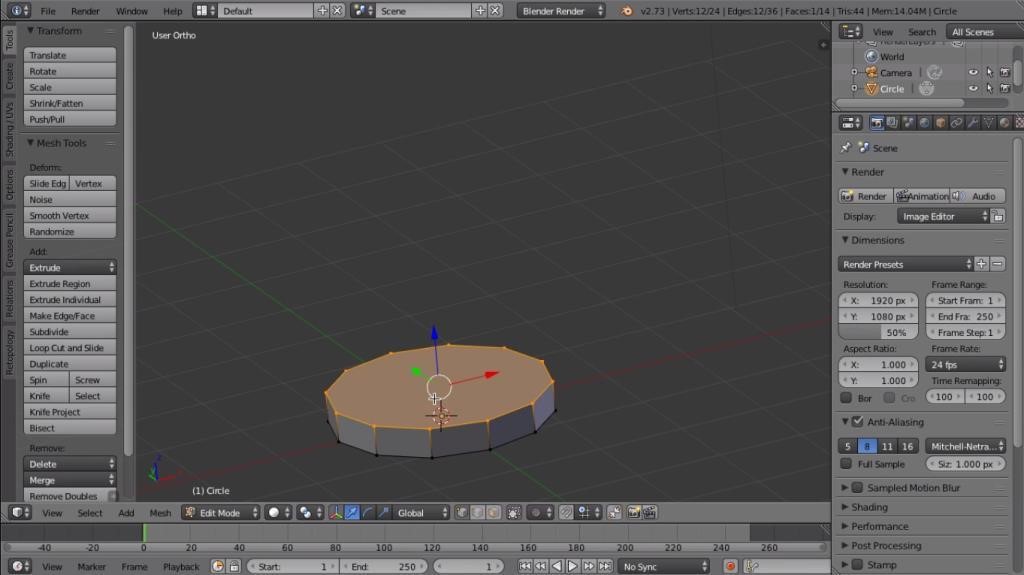
Starting my mesh, I created a circle representing the basis of my rook. It is good to know that by default, circles in Blender have 32 vertices. In our case, this is more than we need since we will be smoothing our object later on using the subdivision surface modifier. Before starting the extrusion, I made sure my model is kept non-manifold. What does this mean? For the sake of simplicity, you can imagine the mesh as being watertight or hole-free which is important since we are preparing the model for 3D print.

Using Blender hotkeys to extrude (hitting “E”), scale (“S”), rotate (“R”) and translate (“G”) the mesh, I went on to replicate the approximate shape of the rook from the reference image. For now, I focused on getting the core shape in place without any details.
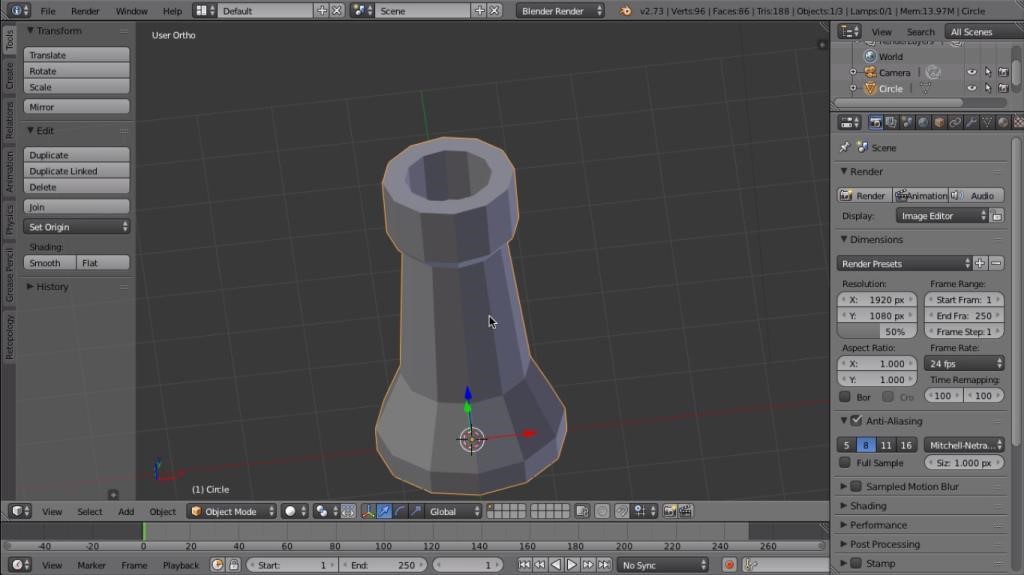
Creating a high-res 3D model in Blender
After finalizing the extrusion and inserting the head of the rook, I ended up with a complete model of the solid object. If I wanted to, I could go ahead and print this right away, however, as you can see it is very low-res. To achieve a more polished look, I used the Subdivision Surface Modifier, subdividing the mesh to make it denser. Next, I got rid of its undesirable clay-like appearance by sharpening the angles.
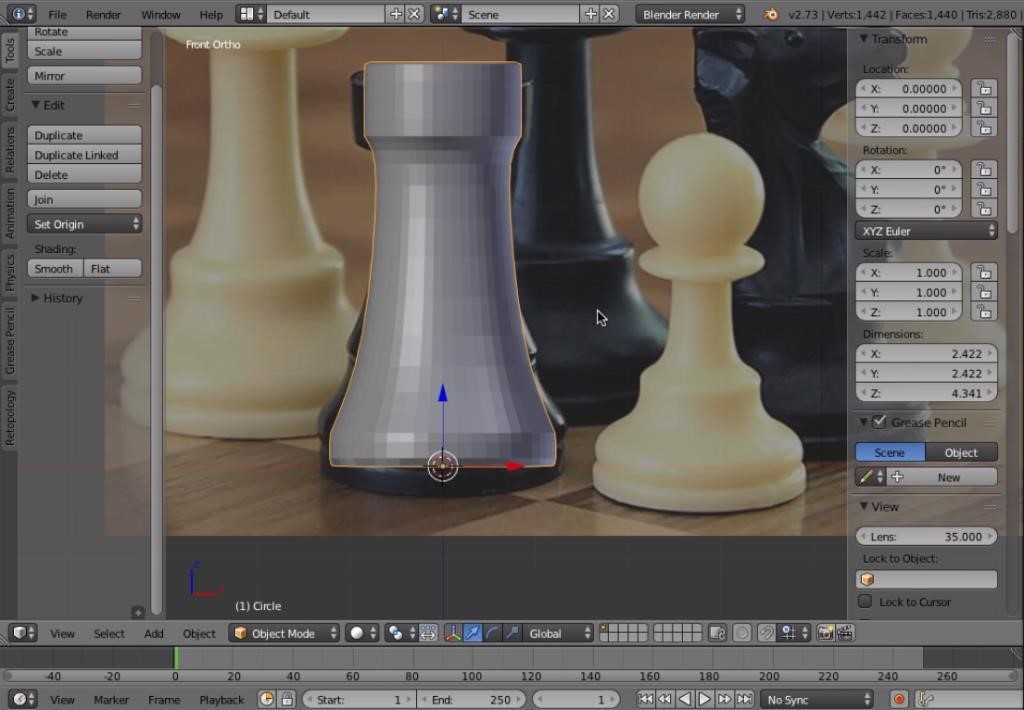
Much better! My model now has the right shape and level of smoothness, but we are still lacking detail. Using the Loop Cut and Slide tool, I went on to add further edge loops adjusting our profile to achieve some nice curves and creases. At this point, it is important to watch out for perfectly sharp edges as those can give a 3D printer a hard time. In this Blender tutorial for 3D printing, I mention some tips on how to make the edges easier on the printer and then demonstrate how to create a nice base of the rook with clean edges to make sure it is perfectly stable.
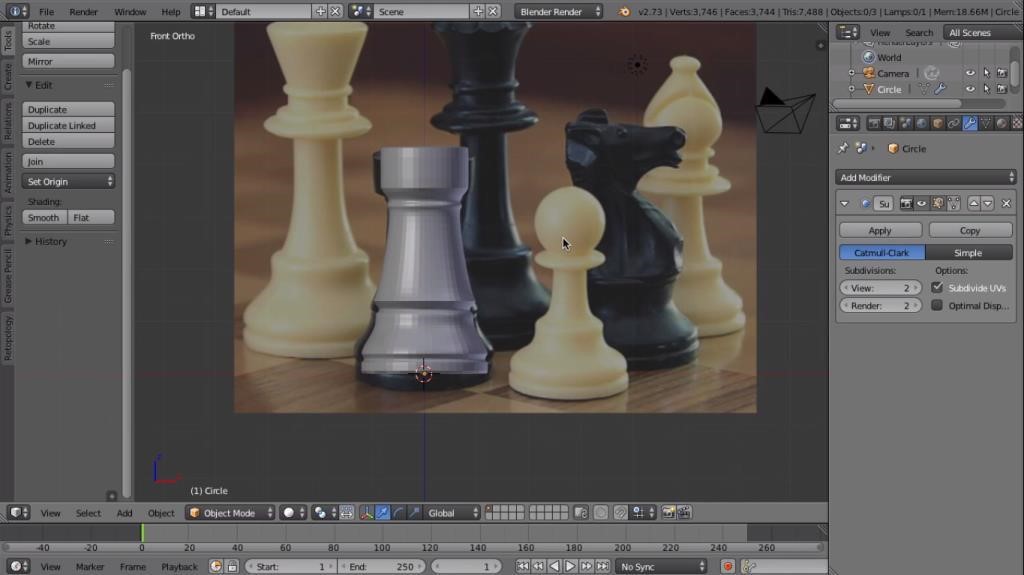
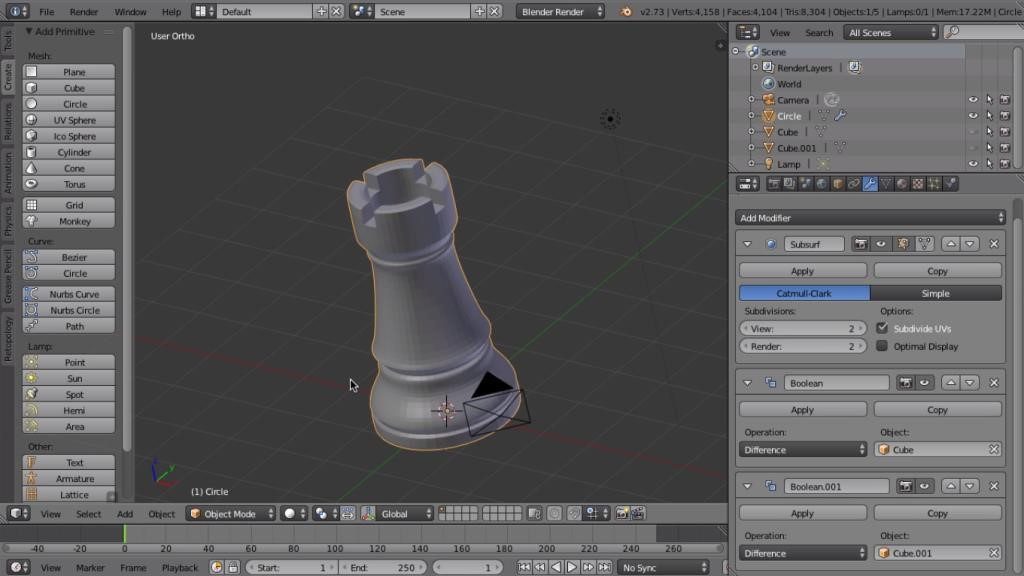
Using the Boolean modifier in Blender
As you see, our rook is nearly complete after extruding, scaling, subdividing and adding detail. What are we still missing? The notches or indentations in the top of the rook. This is where our Boolean modifier comes in, allowing us to cut out the areas we don’t need.
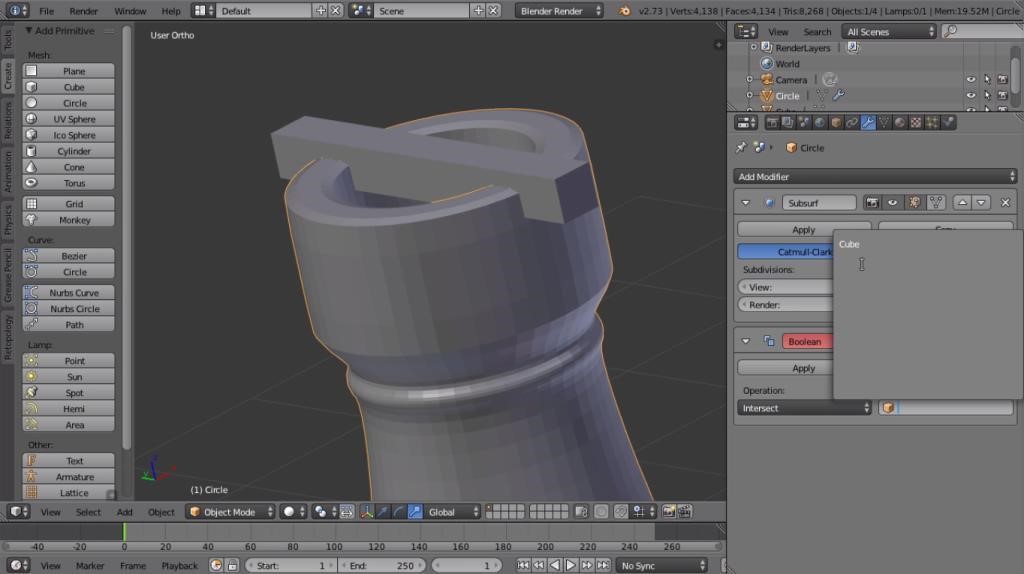
To create the notches, I added a cube object into the top of the rook, then used the Boolean modifier to hide it together with any areas it intersects. I replicated this process by rotating the cube and creating all four notches in the head of the rook.

Voilá! I have now achieved the desired level of detail, curving, and notches. In the tutorial, I talk about what to keep in mind when giving the model a final look and touch up on some common issues you may run into when 3D printing a similar object. In particular, overhangs can be tricky if your printer does not support them so you may need to reduce the amount of curvature in your model.
Finally, I scaled the object to make sure I didn’t up with a 10-foot rook! My final product is a beautiful looking rook that is ready to go. The final step is exporting it into an .stl file (including the modifiers used) and uploading to i.materialise’s online 3D printing service. Checkmate!
Watch the entire Blender tutorial video:
Download the 3D model of the chess piece
The result: A 3D printed chess piece created in Blender
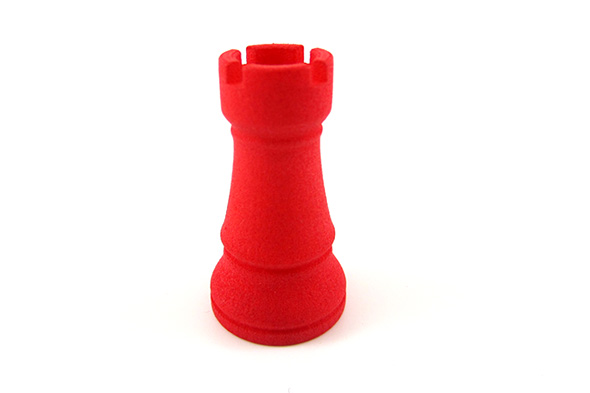
3D printed in Polyamide – Dyed & Polished Red

Tutorial by Jonathan Williams
Did you enjoy the tutorial? Tell us in the comments. To take your Blender skills to the next level, check out CG Cookie tutorials on modeling more complex objects like a shipping container or a detailed M4 rifle. CGCookie is an online learning hub for digital artists, hosting several sub-sites including Blender Cookie which is dedicated to all things Blender. Tutorials, courses and short exercises are tailored for all experience levels from first-time users to advanced Blender wizards.

Is your (Blender) 3D design ready for the printer? Then upload it to our website and let us print it in 19 materials and in more than 100 different finishes and color options. If you’re facing troubles to make your model 3D printable, check out our blog post about the 5 most common modeling mistakes to avoid for 3D printing.