Better, bolder, brighter! Improved Multicolor+ for your designs
Many of you will already be familiar with (and smitten by) Multicolor+, our 3D printing material that lets your designs shine in full color. As of now, we’re tickled to be able to offer even smoother, sleeker finishes – and faster lead time! – for your Multicolor+ 3D prints!
Multicolor+ is a 3D printing material that enables you to print models directly in more than one color. And here’s the kicker: you can print 500,000 different colors!
3D prints created with Multicolor+ are made using UV inkjet printers to produce full color strong parts that are on par with injection molded parts. 3D printed Multicolor+ has a layered buildup which is visible when looking closely.
What’s new with Multicolor+
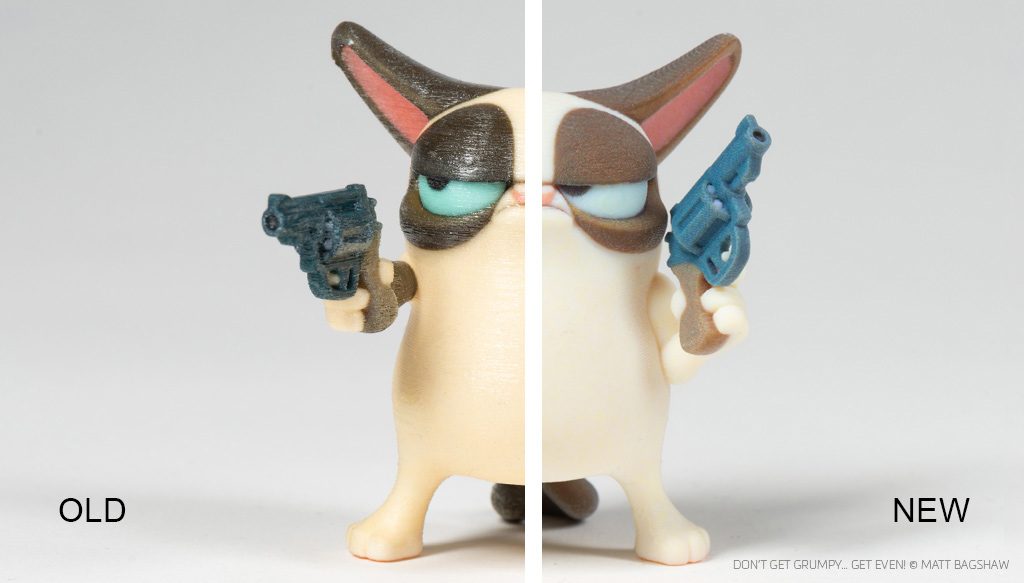
Everything you love about Multicolor+ remains the same, but what we’ve done is add a cherry on top in the form of improved color quality. This is due to a change in ink formulation—while still using CMYK inks and whites, the finish is now matt rather than glossy. You’ll love the result: it has the appearance of a high quality material—less plasticky, if you will. Furthermore, individual layers are slightly finer (32 micron vs. 42 micron), resulting in a smoother surface.
To make your technicolor dreams come true faster, we’ve shortened the lead time from 15 days to only 10.
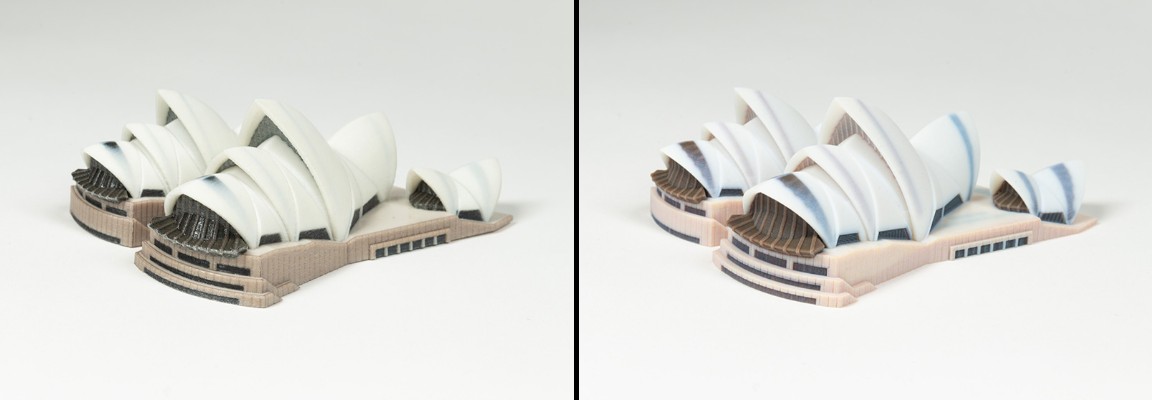
Before (left) and after (right). Sydney Opera House by Matthias Flück in Multicolor+
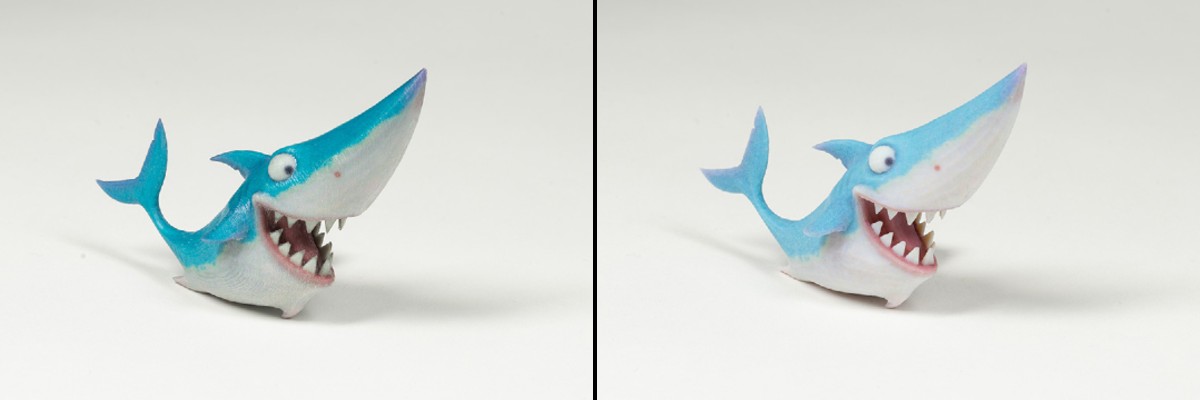
Before (left) and after (right ). Shark © Microsoft 3D Builder
What colors should you expect from your Multicolor+ 3D print?
A short physics lesson on colors will help you get the best possible color on your print, because the color you see on your screen can differ slightly from the printer’s colors. The pixels on your screen are all composed of red, green, and blue (RGB), whereas multicolor printers use cyan, magenta, yellow, and key (black).
Since your screen and our printers do not use the same color system, the set of colors might shift slightly.
In both CMYK and RGB, mixing these basic colors leads to new color options.
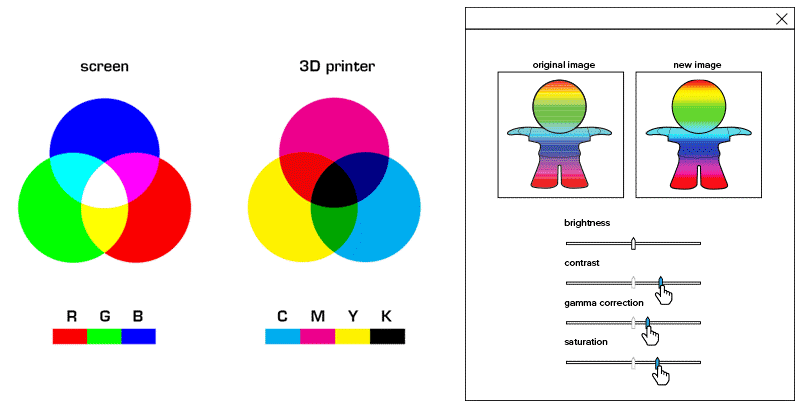
CMYK works pretty much like the box of paints you used back in school. If you don’t have the color you’re looking for, you need to mix two existing colors together. Adding colors together usually means that the new color will be slightly darker (when you mix yellow and black, the resulting color simply cannot be brighter than yellow, can it?). That’s why this system is called a ‘subtractive color model’. Adding all colors together produces black.
Screens, however, do not work like our box of paints. Instead of using paint or ink, they use light. The colors of light are red, blue and green (RBG). When the colors are added together, the result becomes brighter. When all three colors overlap, the color becomes white. That’s why this system is called an ‘additive color model’.
When colors are converted from RGB to CMYK, the color intensity changes a bit. So, what you see on your screen and what comes out of the printer might look slightly different.
Bright colors on a screen tend to look duller and darker in CMYK. Generally, the brighter, more vivid and vibrant the colors on your screen are, the bigger the difference between your 3D model and your 3D print will be.
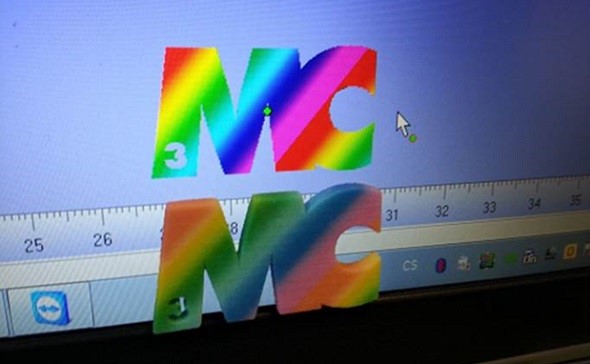
Example of a 3D print in multicolor and a bright computer screen
Another problem is that computer screens have adjustable settings – so things like brightness, gamma and color temperature can make a huge difference. Monitors can also vary greatly in color accuracy, depending on the technology (TN, PVA, IPS, OLED) and the calibration setting.
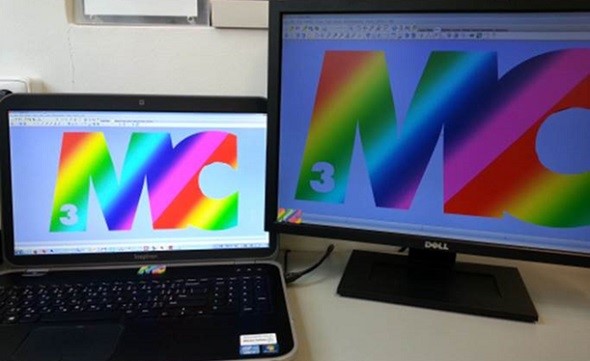
Example of two monitors with two very different color and brightness settings
Does this color variation make a huge difference? In most cases, it really doesn’t. But if you need a really precise color that must not change even slightly – let’s say for a 3D model that features skin color – you might want to order a smaller test print first and experiment a little to get the color exactly the way you want it.
Keep in mind:
- If your 3D file doesn’t contain any color information, it will result in a white print
- For multicolor, you must either upload a file that already includes the textures (e.g. 3MF, colored STL, VRML, SKP, X3D, and DAE) or a ZIP file containing all the necessary color information (e.g. an OBJ file with a texture map and an MTL file)
For full design guidelines you should follow to get perfect Multicolor+ prints, as well as more insights into the technology, read this article.
Curious about Multicolor+ but not yet sure what kind of things you can 3D print using it? Check here for lots of inspiration.
Take a look at the design guide and get cracking by uploading the 3D file of your model to our online 3D printing platform. Go forth and be colorful!