How To Create a 3D Printed Ring – An Easy Step-by-Step Tutorial For RhinoGold
Thinking about designing and 3D printing your own jewelry? Haven’t found a software that suits your needs entirely? Then this easy introduction to RhinoGold might just be what you are looking for. In this beginner-friendly tutorial, we will show you how you can create and 3D print three types of rings in a few easy steps: basic rings, rings with textures, and more sophisticated rings with overlapping elements.
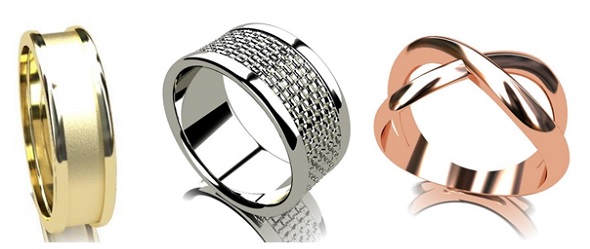
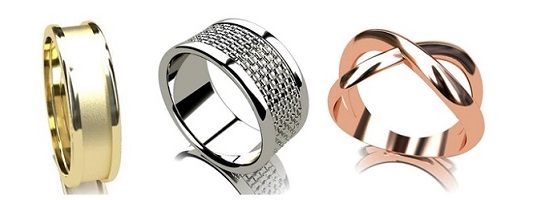
In this tutorial we will learn to 3D model and 3D print these three rings.
Jewelry CAD software RhinoGold
RhinoGold is a payable extension to the popular 3D modeling software Rhino, developed by Spain-based company TDM Solutions. Its aim is to deliver a software that makes the life of jewelry designers easier. The clearly structured interface and fast editing tools make designing rings, earrings, necklaces, and any other pieces of jewelry simple and fun. It also makes designing them more accessible for people who have been struggling with clumsy software that isn’t specialized for the needs of jewelry designers. If you want to give RhinoGold a try, you can get a free 15-day trial version here.
Enough of the talking, let’s get started and design our first rings with this powerful software! In this tutorial, we will design three rings: a basic ring, a ring with a texture, and an overlapping ring. At the end, we will show you how to turn these designs into a 3D Print with i.materialise.
1. Creating Basic Rings
Let’s start by creating a basic, simple ring. To do so, we will mostly rely on one of the most useful commands in RhinoGold: the powerful Ring Wizard.
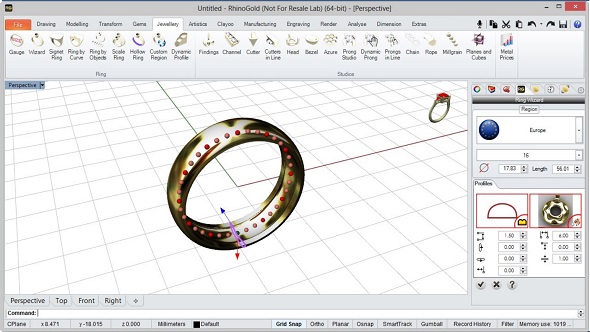
Start RhinoGold and click on the Jewelry tab. Then select the Ring Wizard tool and choose your ring size on the right side of the screen. In this example, we chose European size 16. We then allocate a profile and define its measurements. For this ring we selected a 6-mm width, a 1.5-mm height and a 1-mm thickness.
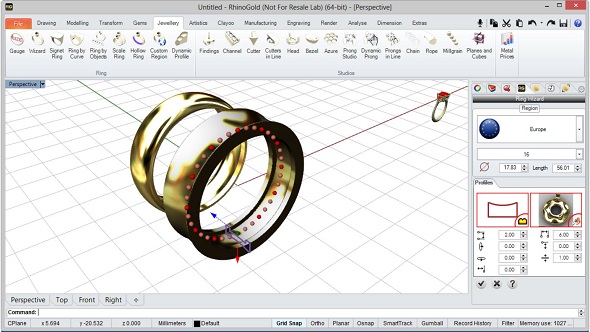
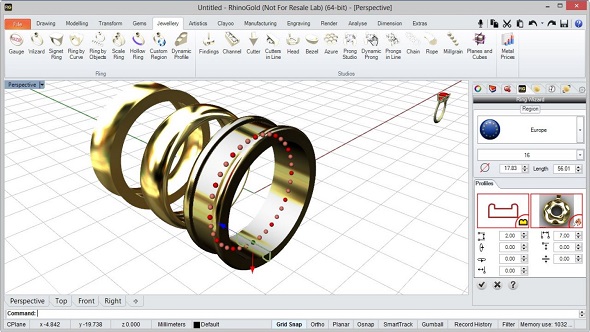
Move this ring anywhere else and repeat the process again with another profile and measurement. Play around with the options and see how it affects the ring. In the example below, we activated the thickness option and defined the value to remove the interior.
Repeat the previous steps using different parameters – the idea is to explore this powerful tool and to learn more about its many possibilities.
Did this to go too fast for you? Don’t worry, you can learn more about the powerful and easy-to-use Ring Wizard in this video:
2. Creating Rings with Texture
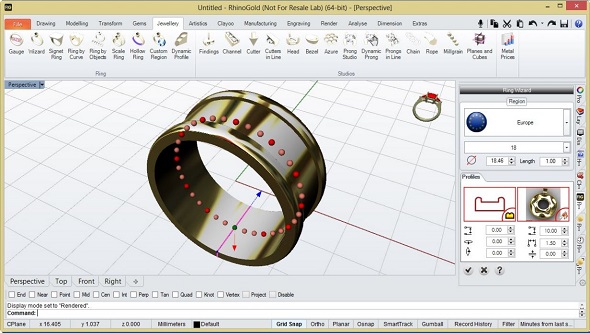
Ready to move on? Good, because now we will take a look at how to create rings with texture. But first, we will start with the Ring Wizard again. As before, you can find this wizard in the Jewelry tab. We chose a ring of European size 18 and a profile that we liked, and defined the measurements to be 10 mm in width and 1.5 mm in height.
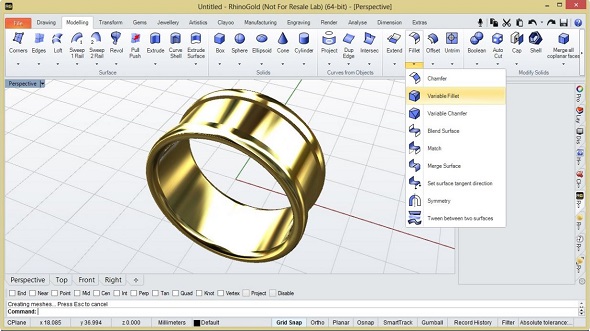
In this case, some edges of the ring might be too sharp – let’s try to make them smoother. Switch to the Modeling tab, click on the Fillet tool and choose the Variable Fillet option. For defining the angle, we chose 1 mm.
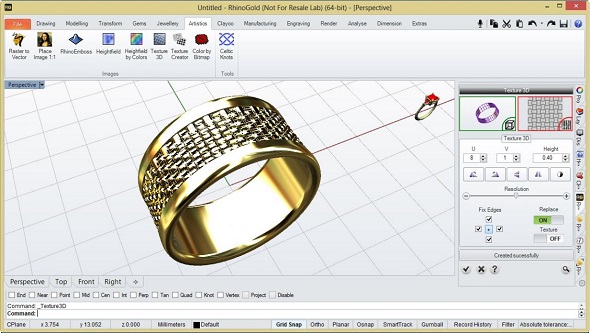
This looks good already, but the texture is still missing! For this last step we will go into the Artistics tab and click on the Texture 3D tool. Select the surface where you want to apply the texture, then choose the desired effect and define the parameters until you are happy with the result. Make sure to play around with the parameters in order to get a good understanding of the range of effects of this tool.
Easy and straightforward, right? Do you want to see the process again and learn some extra tricks? Here’s a video about creating rings with textures:
3. Creating Overlapping Rings
Now let’s try something a little bit more difficult this time: a ring with overlapping elements. In addition to the Ring Wizard (which we already saw), we will be using the Auto Cut and Boolean tools here.
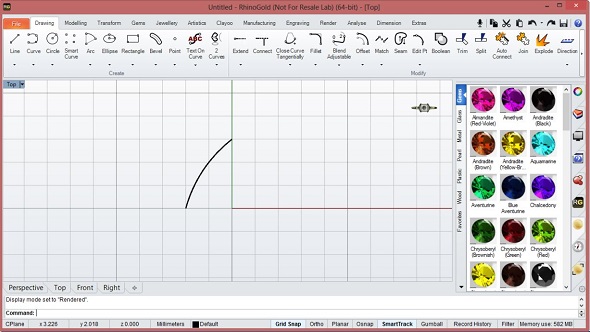
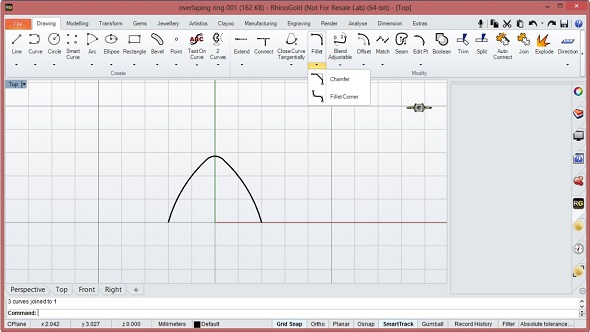
Instead of starting with a ring and applying a predefined profile later, we will now start by first creating our own profile. To do so, click on the Drawing tab and select the Arc tool. In the picture below, you can see that we used this tool to draw a little arc with a height of 3mm and a width of 2 mm.
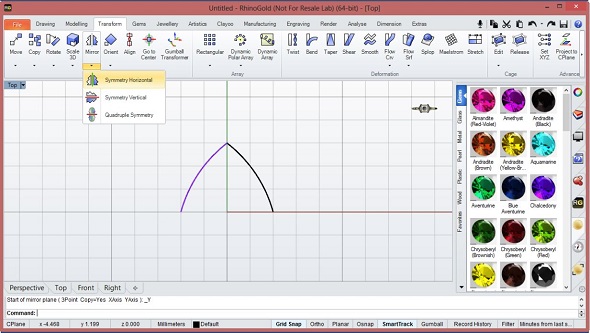
Now turn this half arch into a full arch: select the Transform tab, click on the Mirror tool, then finally click on Symmetry Horizontal.
The arch is still somewhat pointy. Let’s make the edge smoother: go to the Drawing tab and select the Fillet tool to create a round angle between the two arcs. Stay in the Drawing tab and click on the Auto Connect tool to join the curves into one single curve.
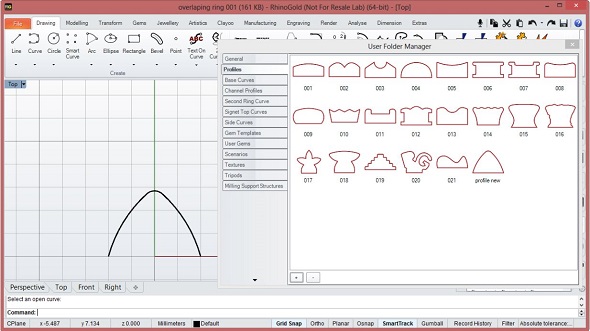
The profile is complete: time to save it! Go to the File tab and open User Folder Manager. Go to Profiles, click on the little plus sign (+), and give your first personally created profile a name. From now on it will be available in your profiles library.
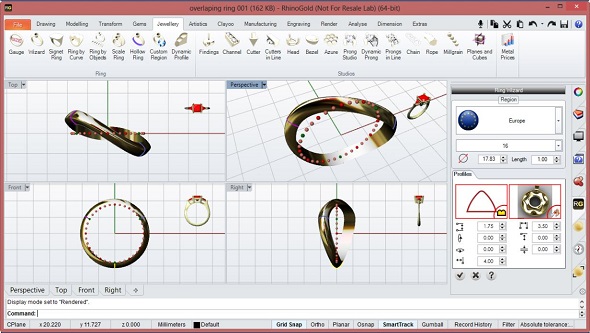
Now that the profile has been created, we can finally use the Ring Wizard that can be found in the Jewelry tab. Select the profile that you just created. Define it with a 3.50-mm width and a 1.75-mm height and choose European size 16. Do you see the line of red dots inside of your ring? You will also be able to make out three green dots amongst them. Click on one of the green points and change its position 4 mm to one side. Then click on another green dot and change its position 4 mm in the other direction.
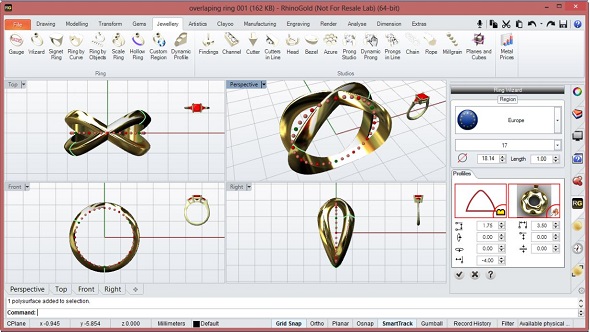
Repeat the Ring Wizard tool. Input the same parameters as before but invert the values of the two green dots.
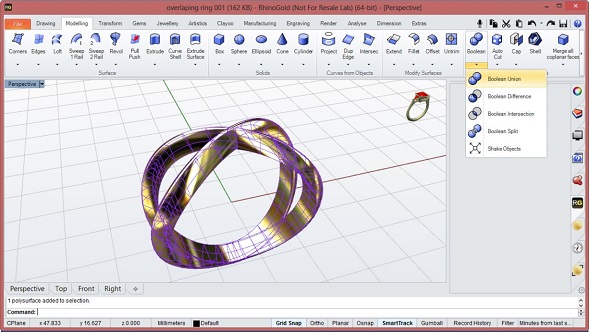
There you go! Last thing we need to do is to unite both rings into a single object. To do so, click on the Modeling tab, select the Boolean tool, click on Boolean Union, and select both parts of the ring.
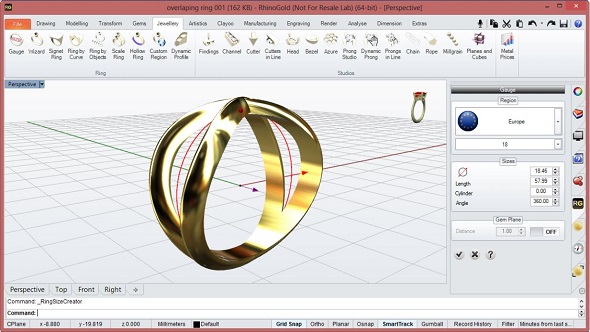
Because of the bending of the rings, the desired size may have been affected. Go back to the Jewelry tab, select the Gauge tool and set your desired ring size. In this case, we chose European size 18. A red circle will appear.
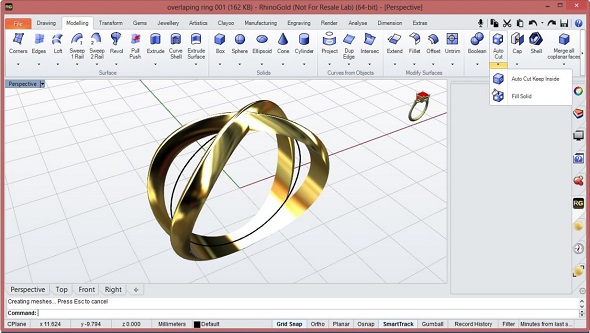
To get your ring to the desired size (here, 18), switch to the Modeling tab, click on Auto Cut, and select the ring and the red circle that was created in the previous step. This function will bring the ring to the desired ring size.
Did you get lost along the way? No problem. The videos below explain how to create profiles and how the Boolean tool works.
4. 3D Print Your Ring
Once you’ve finished designing your ring, it’s time to turn your ideas into 3D Printed reality. The easiest way to do that is to export it as an STL file (File – Save as – Export to STL) with the “High” or “Very High” resolution option.
The last thing left for you to do is to upload your file to i.materialise’s online 3D printing service and select the material of your choice. It’s that simple to 3D print your own ring! Want to know more about which material to 3D print your jewelry in? Check out our materials overview here to learn more about 3D printing in gold, silver, brass, or bronze.
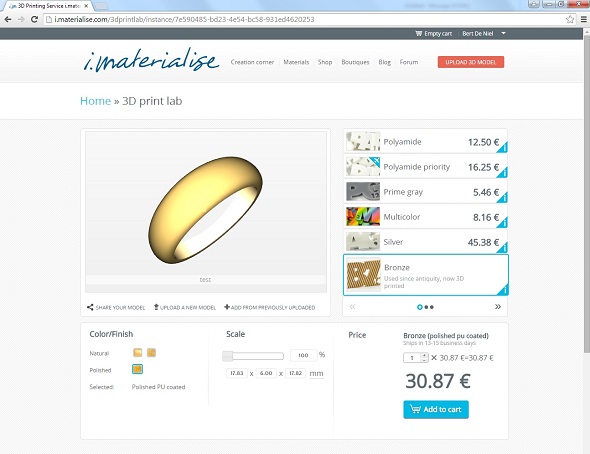
i.materialise turns your 3D designs into 3D prints
Also make sure to submit your jewelry design to our ‘3D Printed Jewelry‘ design challenge and get a chance to win a free silver or gold print of your design!
Recommended Articles
No related posts.


