Maya 3D Modeling Tutorial – Tips and Tricks for Using Autodesk Maya
In this tutorial you will learn some of the basic modeling functions of Autodesk Maya. Maya expert designer Russ Ogi will show you how he designed Samurai Helmets in Autodesk’s mighty Maya software. This beginner-friendly tutorial will cover important modeling tips & tricks and get you the knowledge you need to create your own 3D design with Maya.
About Your Instructor
This tutorial is written by Autodesk Maya expert Russ Ogi, a Hawaii-based mixed-media artist. Being from a crossroad of cultures, he grew up with Eastern and Western influences. The result is a unique fusion of Eastern and Western aesthetics and tradition. He often begins to work without a defined sketch and the final piece is revealed as he sculpts digitally. You can find more of his work on his website.
Autodesk Maya and NURBS
I am an Autodesk Maya NURBS modeler. NURBS stands for “non-uniform rational B-spline,” which is a mathematical model that generates and represents curves and surfaces. For those who are not familiar with 3D modeling, basically I work with curved surfaces and splines rather than faces and edges. It is much more common to find a modeler who works with polygons than with NURBS.
I am self-taught, which led me to develop my own build style from scratch. The way I do some things is unconventional. This has been both a blessing and curse. I learn as I go, so I may not know the most efficient way of doing things but I get the job done. On the other hand, my unique build style has influenced my designs and it’s these distinctive undertones that help my pieces to stand out. I think people look at my work and feel the difference.
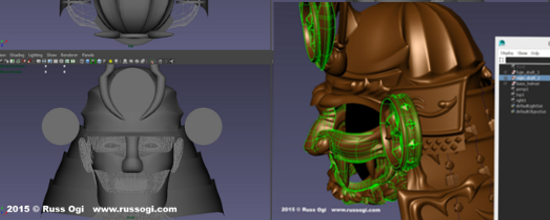
I hope to give you more of a behind-the-scenes insight into the thought process behind how I digitally sculpted samurai helmets (kabuto) using Maya NURBS tools. After developing the concept (read about how I developed the concepts for the two kabuto on the i.materialise blog here), I blocked out the design around a generic 3D human figure. This sets the proportions and general shape. The parts in the images were constructed with NURBS planes and spheres.
click image to enlarge
Since I was building two kabuto that shared common parts, I focused on developing these pieces first. The plan was to base the specific sections on the common parts to help create features that, while unique, felt like they were related.
Using the Maya Outliner
The Maya Outliner shows me a representation of the different model parts as a partial tree. This is useful in selecting or finding certain sections of a model quickly. For example, if I wanted to select all the lacing (odoshi), I can just select the group node and select all of those pieces.
In this case, I grouped the common parts together. I would keep another group for Raijin parts and another for Fujin parts (Raijin and Fujin are my two different helmets that I was to create).
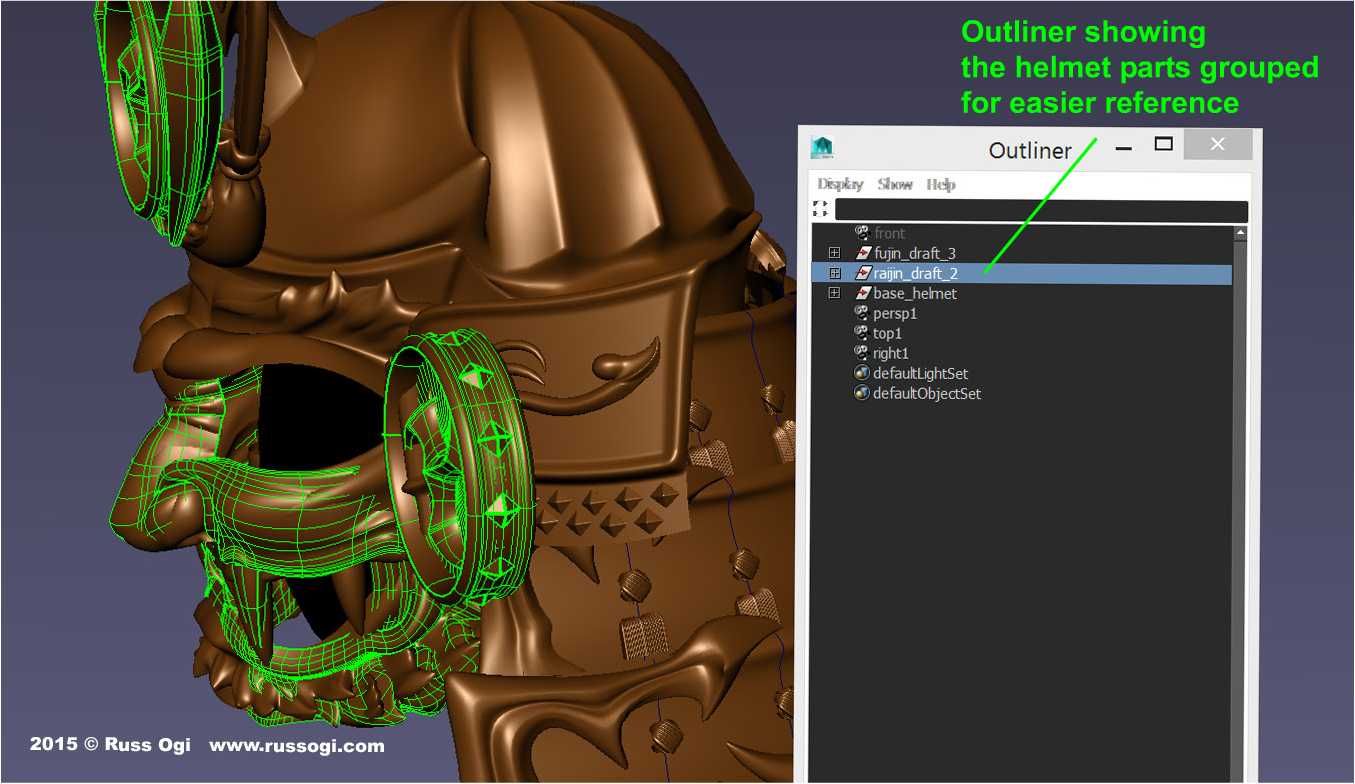
Keeping the Outliner orderly with nodes with meaningful names is important. For example, names like head, neck guard, visor etc. Otherwise you will be looking at a bunch of nodes with names like sphere 1, sphere 2, sphere 3, etc.
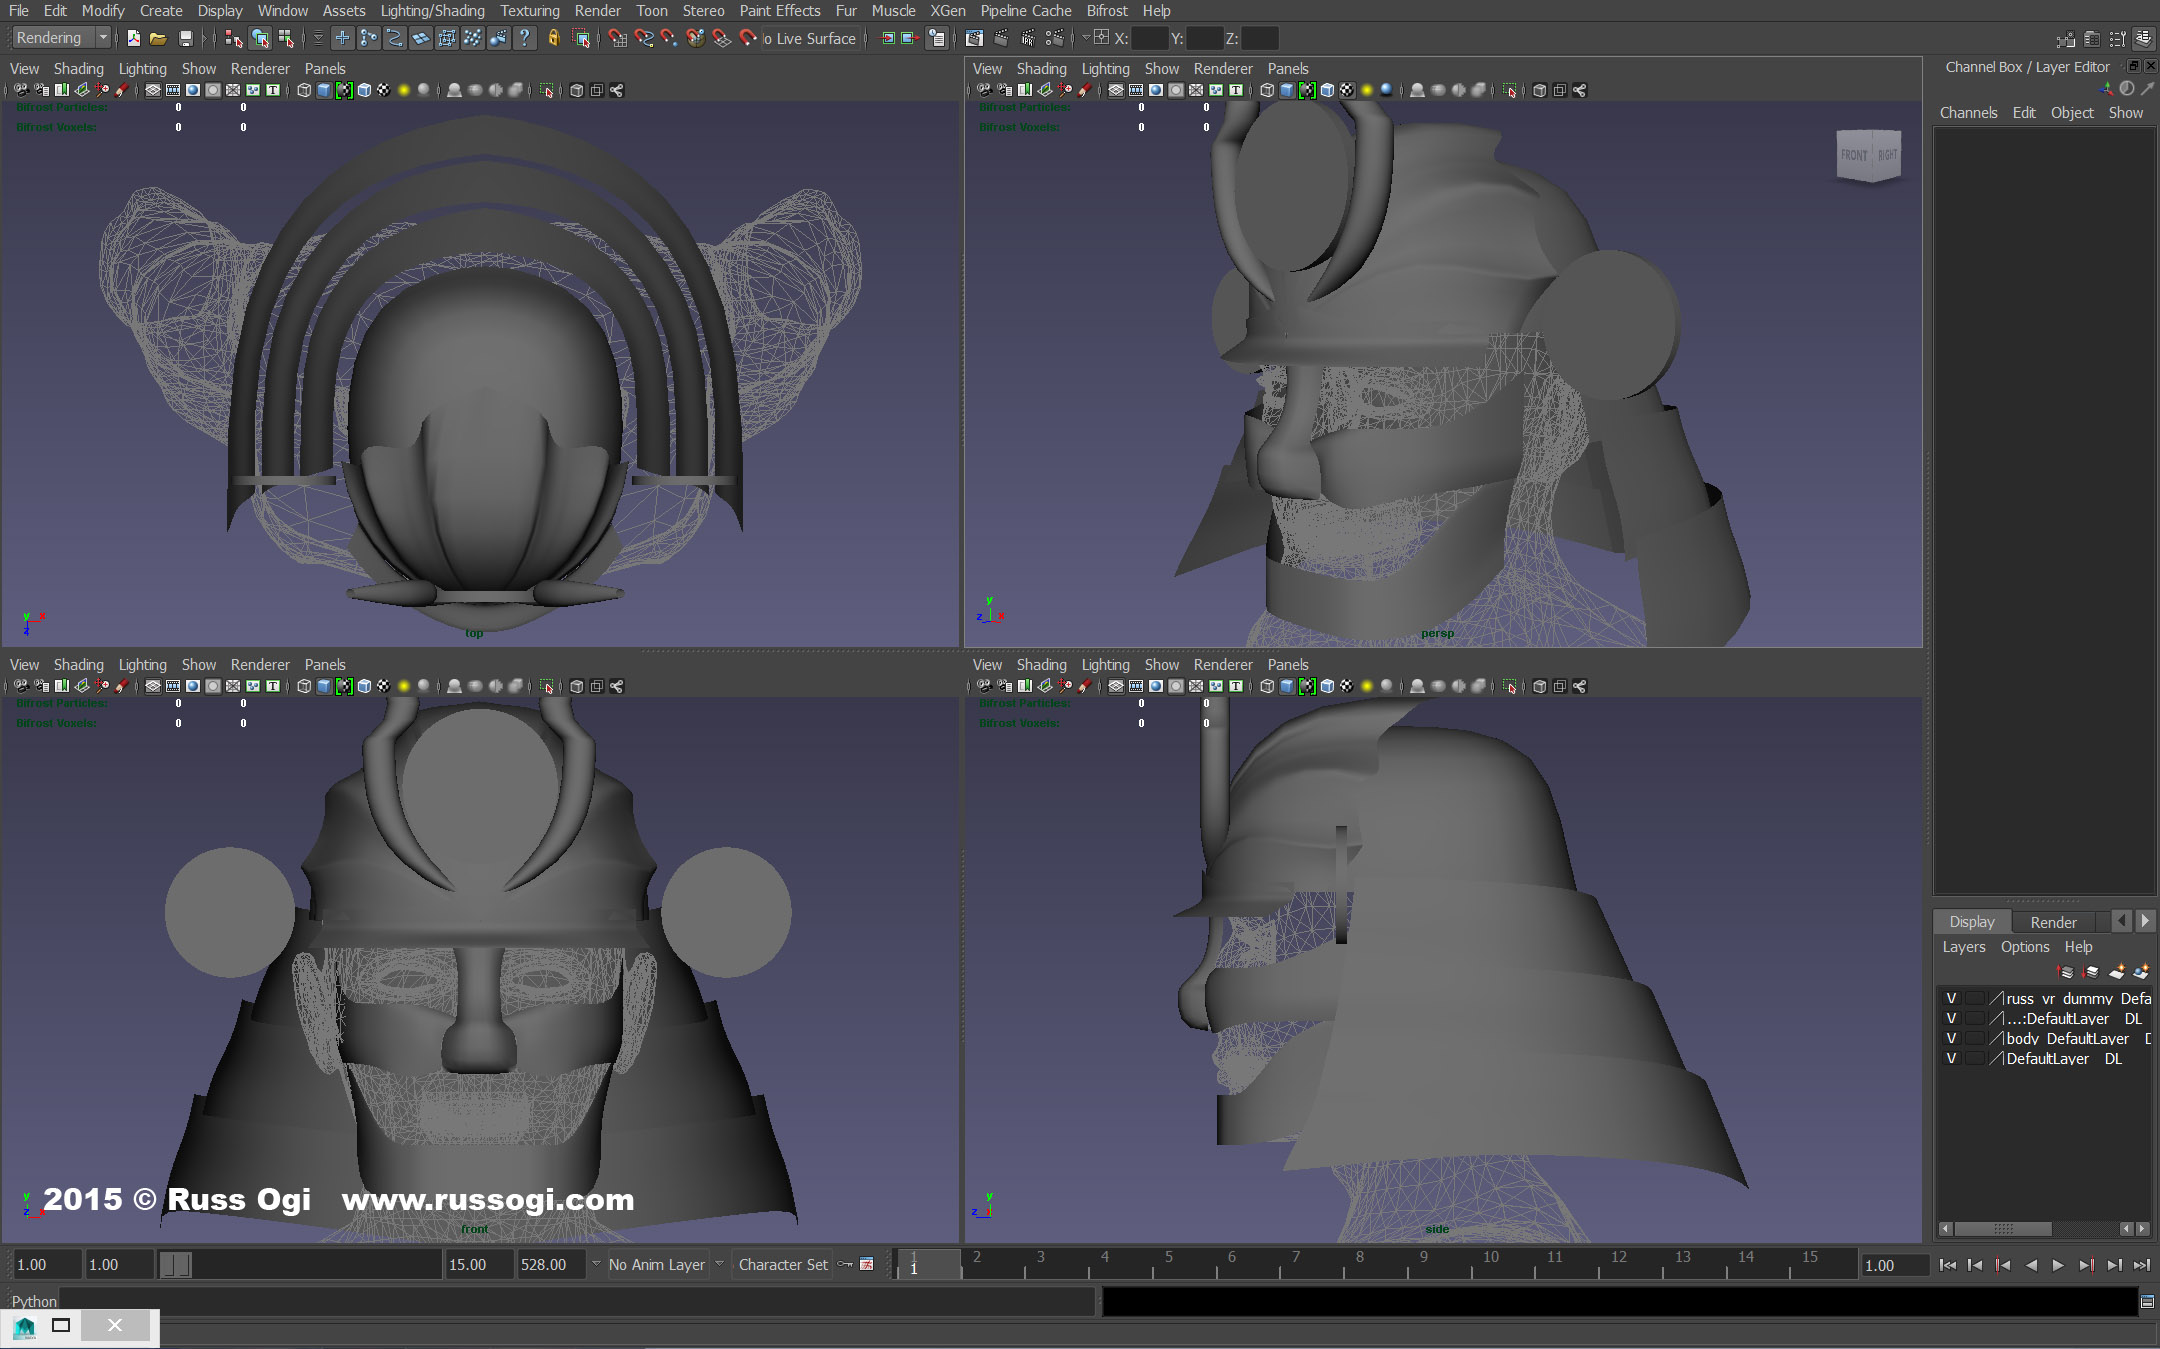
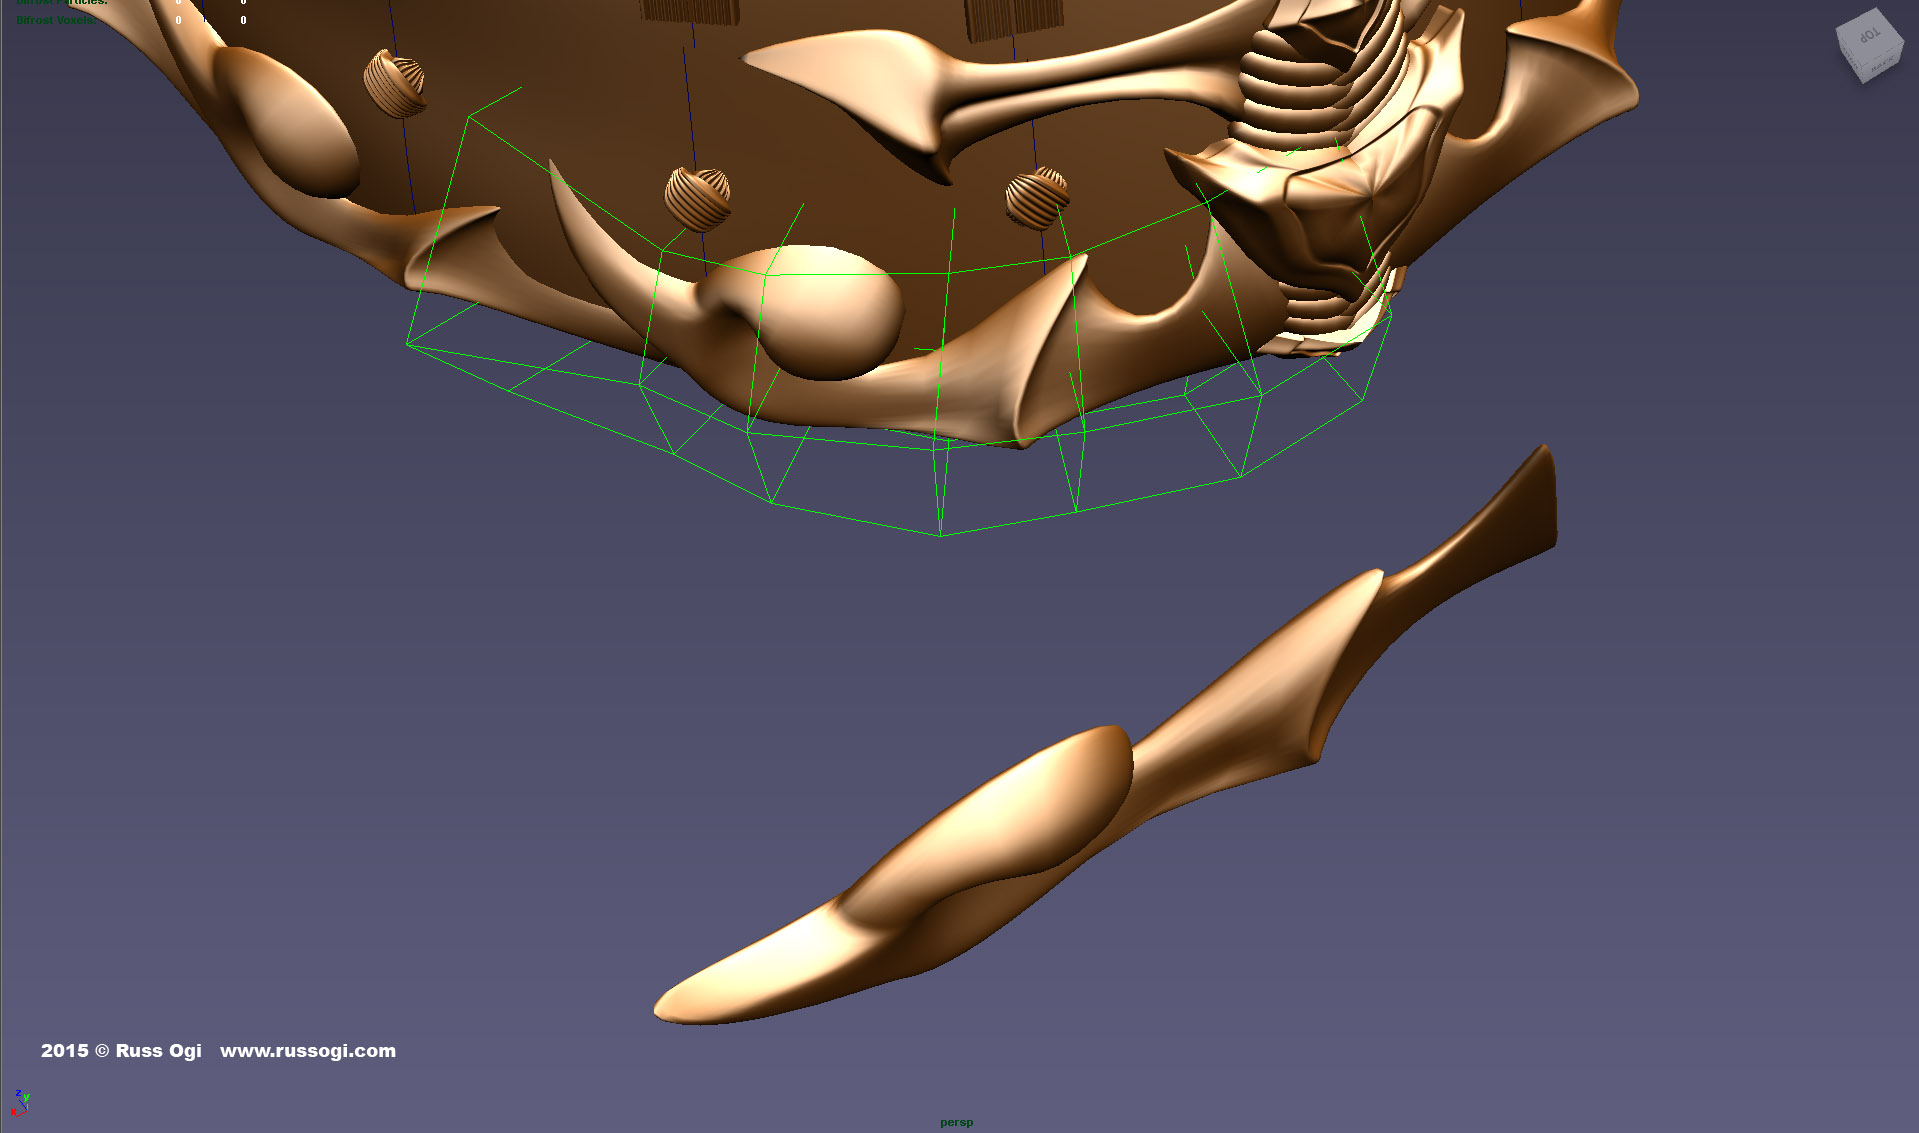
I usually start from primitives. Most of the time, I use a sphere or plane. The menpo (face mask) and shikoro (neck guard) lames are comprised of planes. The cloud design elements of the shikoro and the hachi (dome composed of overlapping plates) start as spheres.

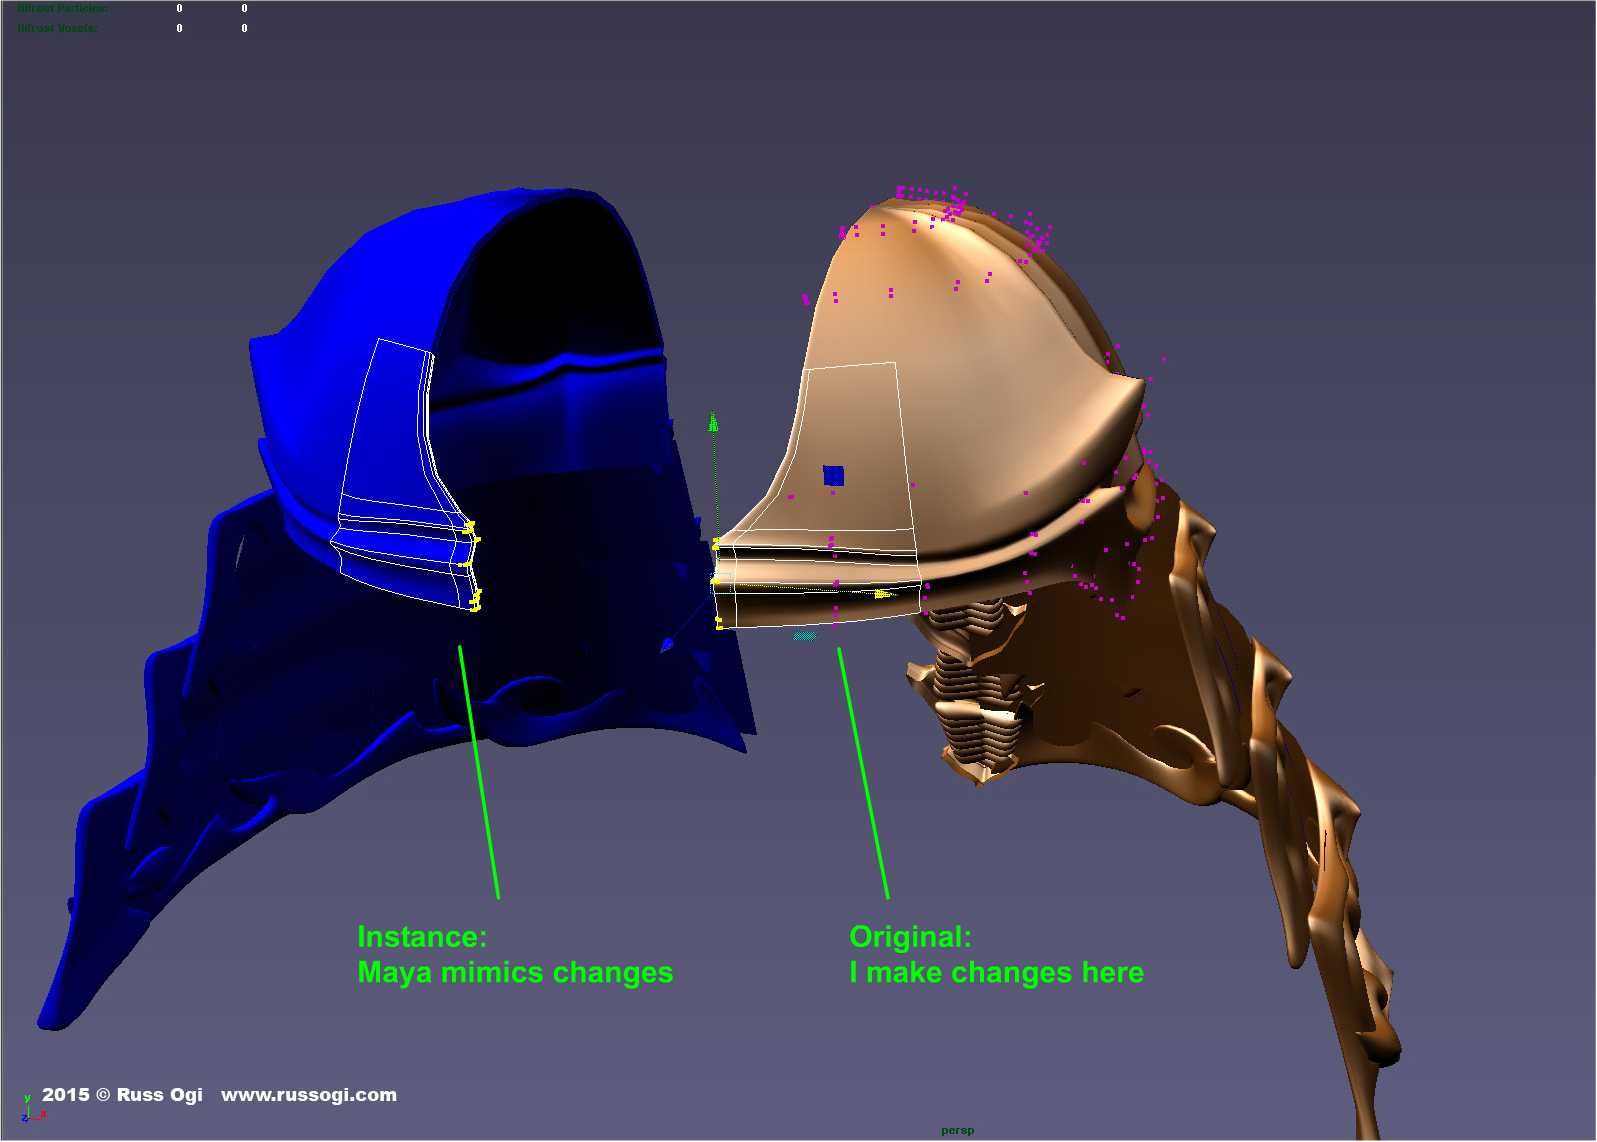
Maya’s Duplication Tool
I built half of the model and used Maya’s Instance (Edit > Duplicate Special) to create copies of the other half of the model. The Instance feature in Maya allows me to work on half the model and the software will update the other half for me.
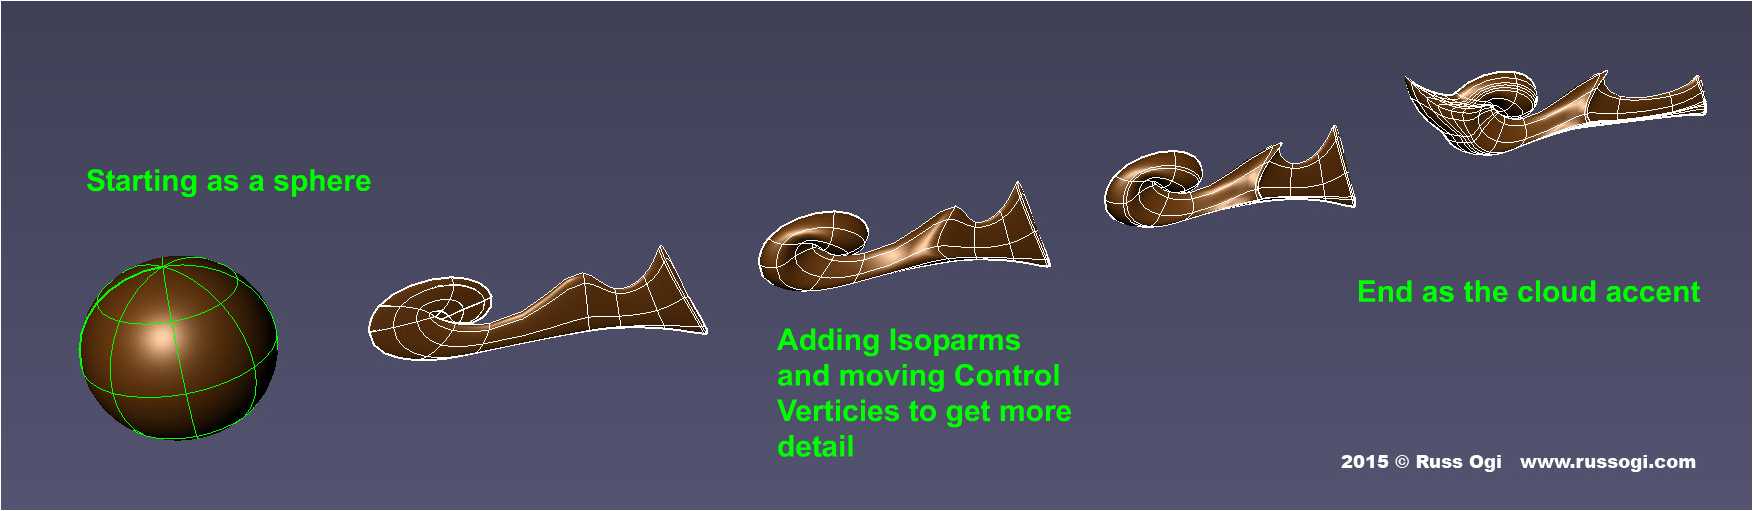
Control Vertices (CVs) in Maya
To add detail, I manipulate the NURBS surface using Control Vertices or CVs. I right-click over the NURBS surface I want to alter and a pop-up context menu allows me to show and move, scale or rotate the CVs.

Where I need more detail, I add isoparms, the intermediate splines that crisscross and define the surface. The isoparms are accessed through the same right-click context menu. Adding more isoparms gives me more CVs to work with.
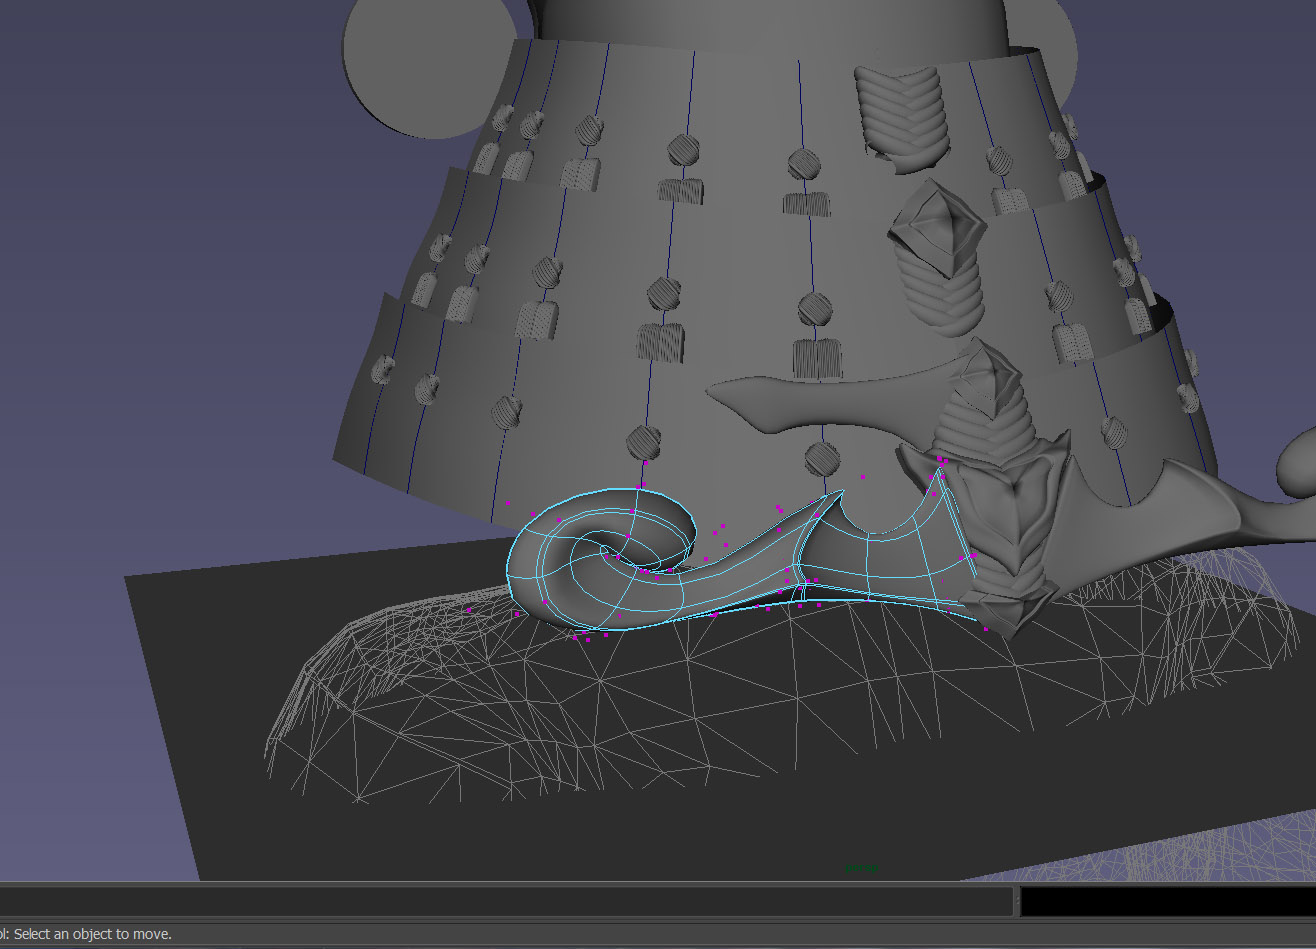
Since it is easier to fine-tune detail on objects like the cloud trim when they are flat, I build them flat then use the Maya Deformer Lattice (Create Deformer > Lattice) to bend them to fit around the shikoro.
To keep my blog entries in this series from becoming too long, I edited out quite a bit. You can read some of the edited content on my blog here.
Some General Tips for 3D Modeling with Maya
- Work from big to small: I block out shapes first and then gradually add more and more fine details. Work the entire model at the same time. Don’t block out and finish one part of your model before starting another part. Block everything first. This helps to make sure your model sections are in proportion and relate properly to each other.
- Save often: Saving often reduces the chances of losing hours of work due to a computer crash or power outage. Sounds basic, but when you get caught up in modeling it is easy to forget.
- Saving in increments: I save files with numbers after the name. I usually choose to save a different version of the file when I am experimenting [with] building or detailing a part a certain way. This allows me to revert back to an earlier version if the sculpt does not work out. It also keeps you from losing all your work should a file become corrupt.
- Look at your model from different views as you work: For example, the sculpt might look great from the front but weak from the top or side. Look at the different views often. When more detail is added, it usually gets more difficult to make overall form changes.
- Give your parts meaningful names: When you have a complex model with 100 or more pieces, it can be time-consuming and frustrating to try to find a particular piece. This is especially true if you are revisiting a file some time later.“
Turning your Maya 3D model into a 3D print
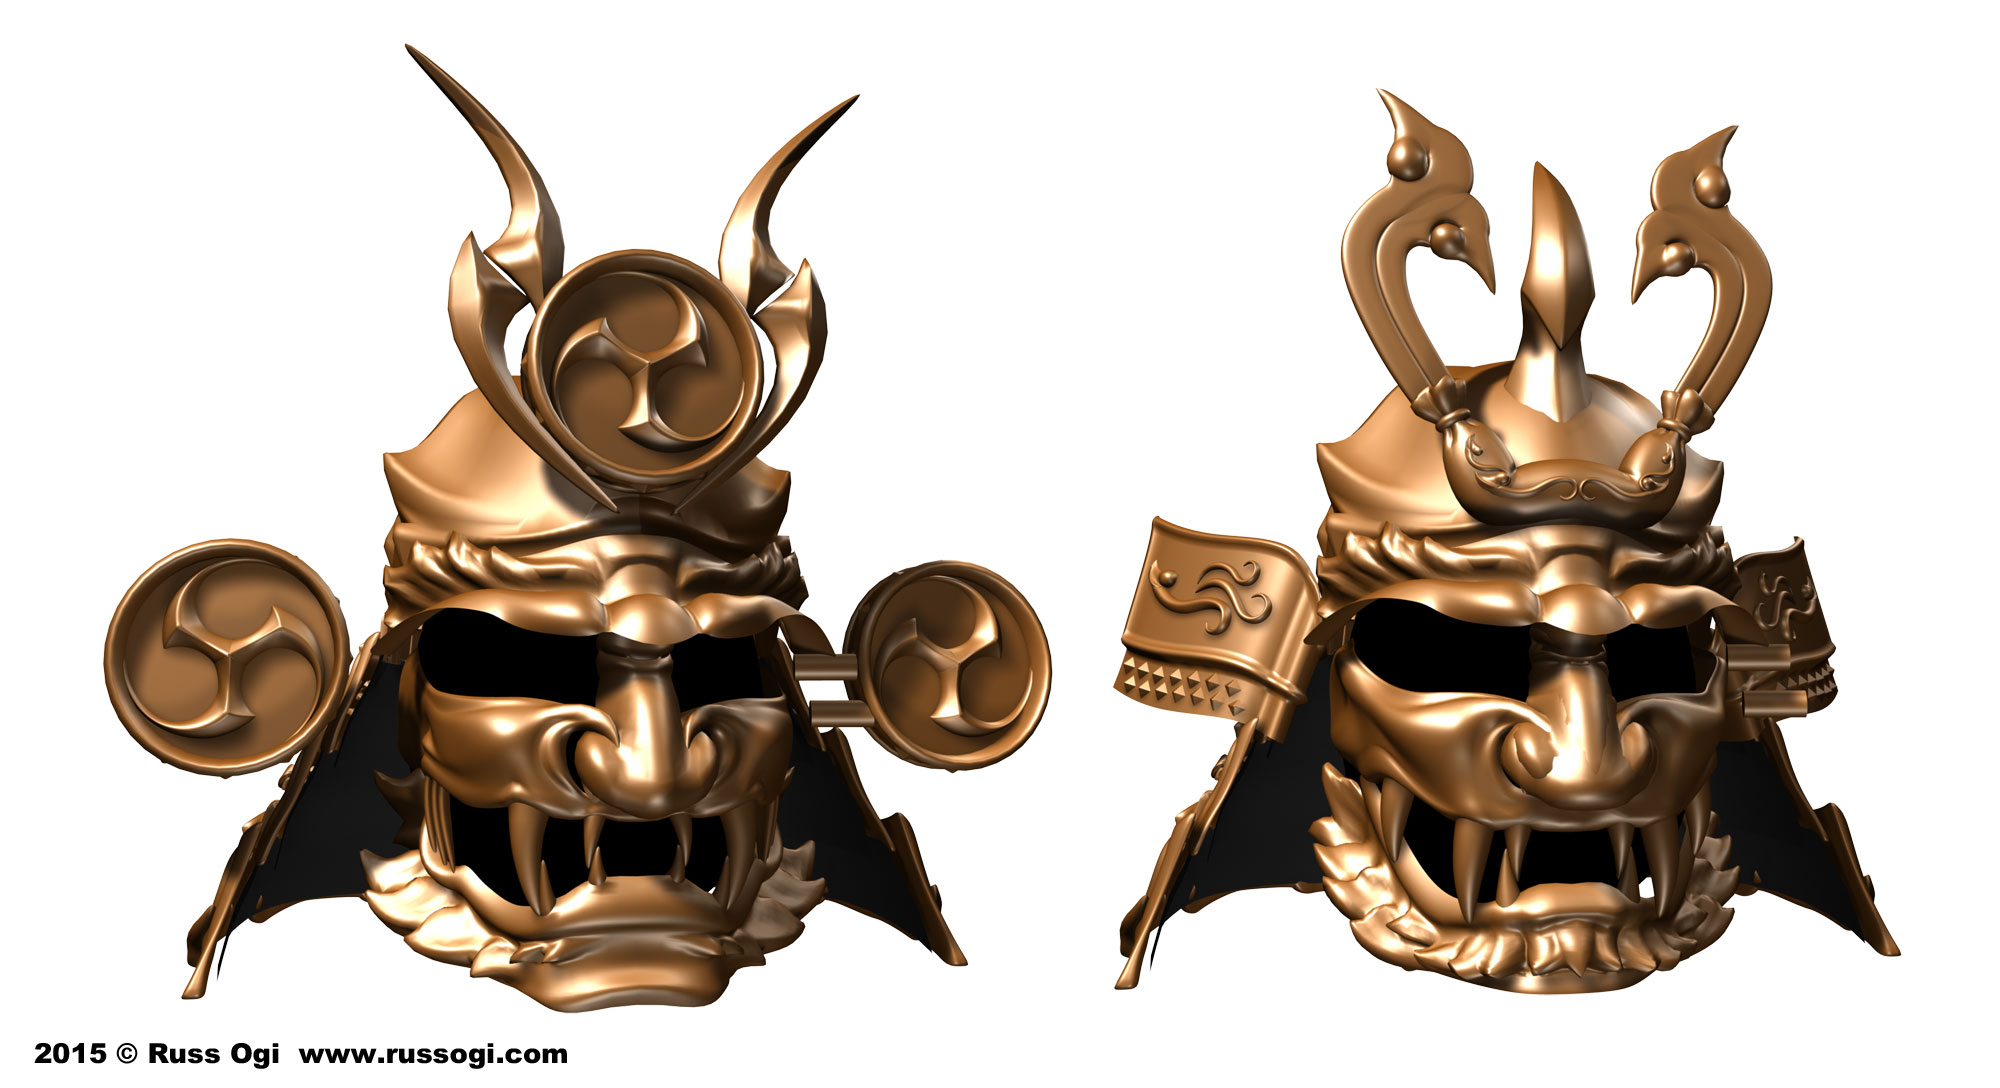
Thinking about turning your Maya 3D model into a 3D print? Here is just the right tutorial for doing so. We’ll also show you how the bronze 3D prints of this helmets look like in reality.
For printing your Maya 3D model you don’t even need to own a printer. Our online 3D printing service with its 18 material options can take care of this.