3D Printing Toys & Figurines: Recreating Lost Action Figures
Today we have an intriguing blog post by special guest writer Mike de Coninck, a Belgian visual effects supervisor. He’s with us today to share the story of his long journey that ended up bringing his lifetime dream toy to life with the use of 3D printing. It’s a story that shows true dedication and an unquestionable passion for realizing a lifelong dream.
Creating 3D Printed Toys: Background Story of the Grada K7
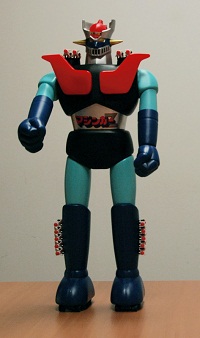
Mazinger Z
This is the story about making a replica of one of the most mystical and rare toys from Japan: the Garada K7
To understand the story behind this mystical toy we need to go back to 1972, the year that aired one of the first cartoons that included a giant robot: the Mazinger Z. This character was created by Go Nagai, one of the most important manga authors in the 70’s and the conceptual father of many fictitious robots.
Mazinger was really popular in Japan back then and in 1973, Popy: a sub company of Bandai released a new toy line called Jumbo Machinder. The Mazinger Z was the first character to be made for this toy line.
Those Jumbo Machinder were huge 60 cm plastic robots that were fabricated with the same plastic as the shampoo bottles of then. They were a huge success and earned the title of Toy of the Year in Japan in 1973. As a result, a lot of other characters where incorporated to this toy line. To promote the TV heroes Popy made a first series of villains as store display to simulate the famous TV battles they had. It got the Japanese public very excited and demand for turning them into a commercial product followed.
A second series of six villains followed the year after that included some villains from cartoon series Mazinger Z and Kamen Rider V3 (another really popular show in Japan). Garada K7 is an important villain from Mazinger Z as he features in the first two episodes and is in the main title sequence.
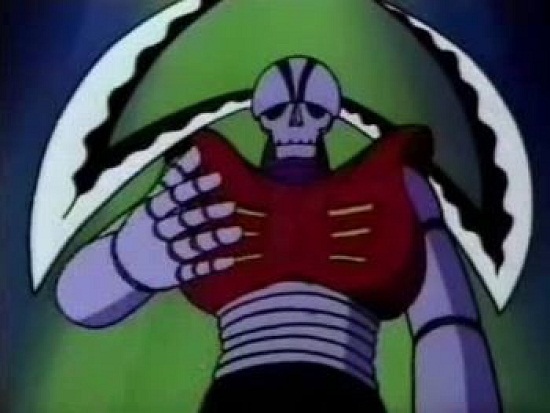
Garada K7 as part of Mazinger Z cartoons
He was released as a toy with this second series of villains.
What makes this toy so special? Well, that’s a good question… For a long time nobody was even sure that it was ever produced. All those second series villains share the same box art where you can see all of them. Some collectors have been able to collect them all expect the Garada K7, and back there was no Internet to have auctions like today so most of the really hardcore collectors had to travel to Japan and search in various vintage toy shops to try to get them.
Lots of people had heard vague stories about it, but nobody ever saw a picture of the Garada K7.
Then in 1999, Unifive, another sub company of Bandai decided to release a new Jumbo Machinder based on the original toys that included a replica of Mazinger Z with an additional two other toys. Shortly after they released a Garada K7 but to construct one they had to base their design on the original boxart of this famous second series since the original was so rare and nobody had ever been able to see it.
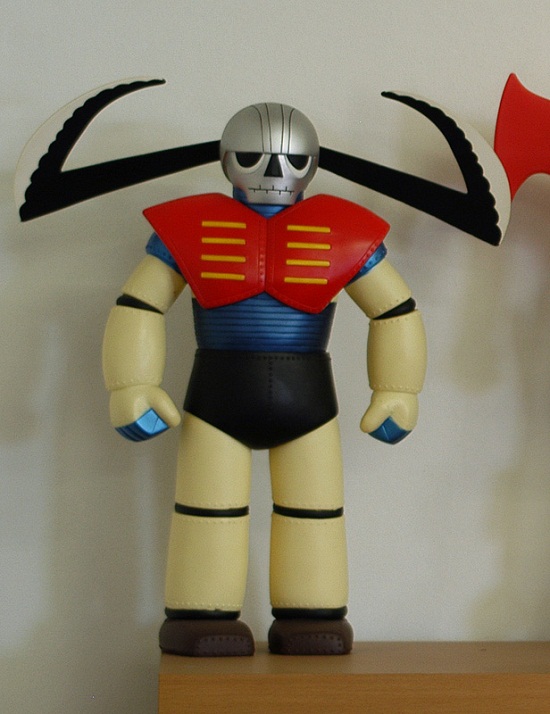
The first Garada K7?
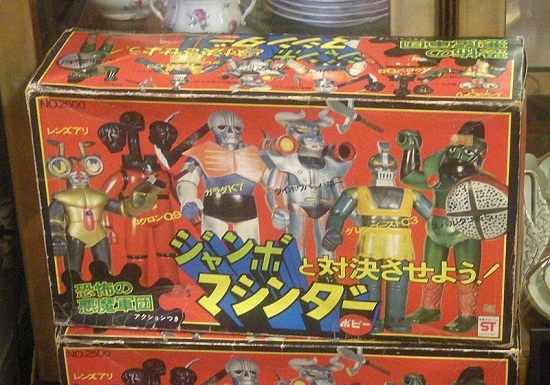
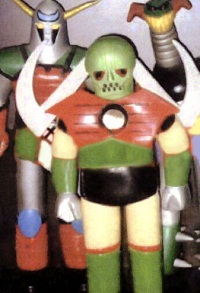
Like on this box Garada K7 has a white body, a red chest piece and blue hands
caption: Like on this box Garada K7 has a white body, a red chest piece and blue hands.
The original one from the second Mazinger Z series?
It was supposed to be what the original toy looks like, except that a few months after this toy was released, a collector in Japan saw a picture of a strange toy that might actually be the original toy from the second series. Unfortunately the quality of the picture was quite poor and nobody was able to say if this toy was real or not.
The strange part was that the colors on the Garada K7 were completely off compared with the box art, the body was green as well as the forearms and the legs and there was something in the chest not to mention the global proportions that were completely different.
A bit after that came out a magazine: Gangu Jinsei #2 wrote a full article on the Jumbo Machinder containing the very first picture ever published of the real toy. Like on the first crappy picture, it was beige and green and the stuff in the chest was actually a ball launcher.
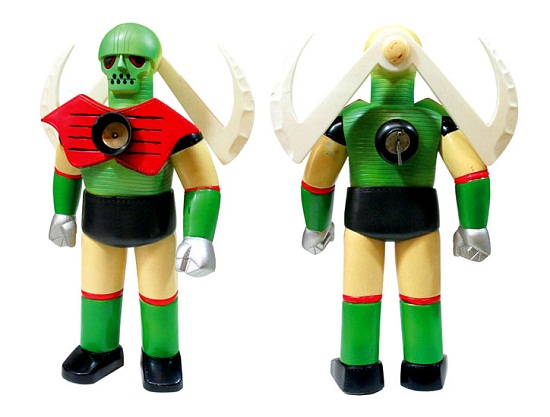
Garada K7 from the back and front
Finally there was proof that this toy really did exist and we realized that what was pictured on the box was actually the early prototype of the toy. It turned out that the toy in the magazine was the same as the one on the very first picture the public got see.
Then a few years later, Bandai opened a museum in Tokyo with lots of toys for all ages. It was a big surprise that in one of the rooms, there was a Garada K7 hanging with wire on a display. Supposedly it was discovered by a search team who found it in an old warehouse of Bandai. Their objective was to gather toys for the museum but they had no idea how rare and unique this particular toy really was. As a result they displayed it poorly. Since that Garada K7 had the same colors as the one in the magazine, it was now a fact that it was a real production toy and not another prototype.
Then, out of nowhere… a third one showed up on auctions in 2006 and was won by a famous US collector who had been searching for it for more than 13 years.
As of today, no other specimen of that toy has shown up and the first one was sold not so long ago for an insane price. To this day still nobody can tell why this toy is so rare since all the other from the same series a whole lot easier to get and some are close to common.
So why that one?
There are a lot of theories… Some people say that the Garada K7 was too scary for kids because it had a skull and didn’t sell well. Some say that maybe his sickles were fragile and the toy was pull out of production at an early stage. Some say that it was part of a prize contest. Others say that it was only produced to appear in a commercial to promote the Mazinger Jumbo. Yes… there’s an old TV commercial where a real Garada K7 is blow away by Mazinger, a real snuff movie of toys!
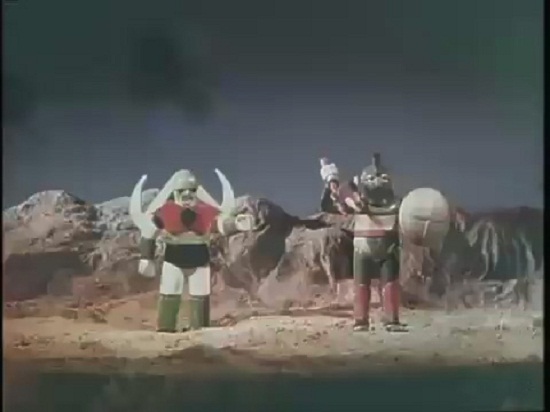
Garada K7 in a Japanese TV commercial
There were lots and lots of stories but no real explanations and many more questions like: Why is the prototype so different in colors from the original cartoon? Or why is the production toy so different from the prototype on the box? All the others were really close to their prototype but not that guy. At the end this toy had something really special. The skull head with those dark eyes were almost hypnotic. It had a proud stance and a really overall nice design.
As you can see there are a lot of mysteries surrounding this toy and it’s maybe one of the most sought after toys in Japan, one of the holy grails for a lot of Jumbo Machinder collectors.
I’ve been collecting those Jumbos for a long time now and I’ve been fascinated by this guy since the beginning. The Unifive release was my very first Jumbo Machinder and I’ve followed all those discoveries over the following years and gathered a big collection of all the original toys from the 70’s.
Getting Started with 3D Modeling & 3D Printing Toys
There’s really a strong esthetic with this toy line, straight pose, simple design, strong colors, minimal articulations. But even if the designs are simple, there are nice little details on every one of them. As it’s now obvious that the chances of getting a real Garada K7 are close to zero, I’ve decide to build one as close as the original as possible. To do this, I made use of some modern tools such as 3D modeling and printing.
I’ve been passionate with 3D for more than 20 years now and so I made it my job 18 years ago. Since those big robots are another passion of mine, it was the perfect opportunity to mix my two passions and spend some good time working on that.
A few years ago, one of my colleagues told me about a company based in Leuven who specializes in 3D printing and that they were able to produce toys or characters based on a 3D model. I was really curious about that. It almost felt like science fiction to be able to do something like that.
After researching of my own, I’ve decide to give it a try and do a first project and replicate one of the other hard to get villains, the Rokuron Q9.
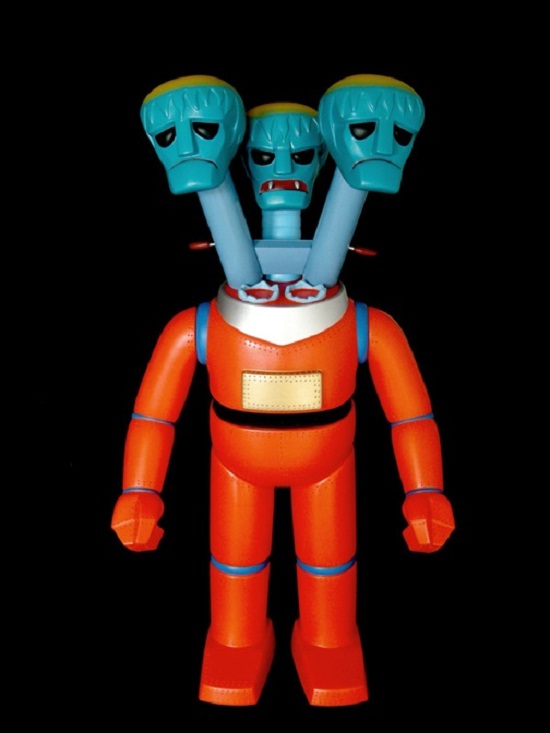
Mike de Coninck’s first 3D print with Materialise (done in paintable resin)
This project came out nicely and the people at i.aterialise have been really enthusiast and helpful. So after that I’ve decide to go for the most famous one: the Garada K7
The 3D Model of the Action Figure
With all the images of the originals I’ve gather during the years, I’ve been able to model a 3D version quite accurately (maybe not 100% accurate because it’s based on pictures but I’ve been able to capture the things that makes it so special).
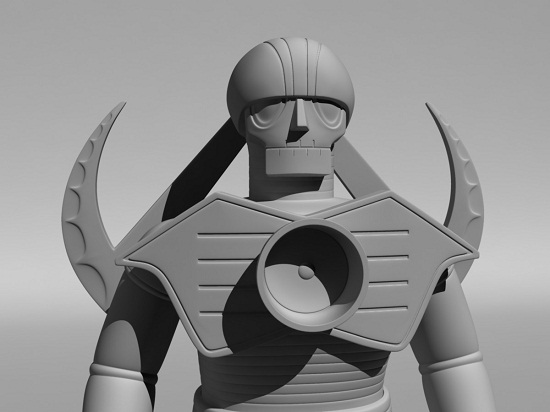
Garada K7 got modeled by Mike de Coninck in a 3D software package
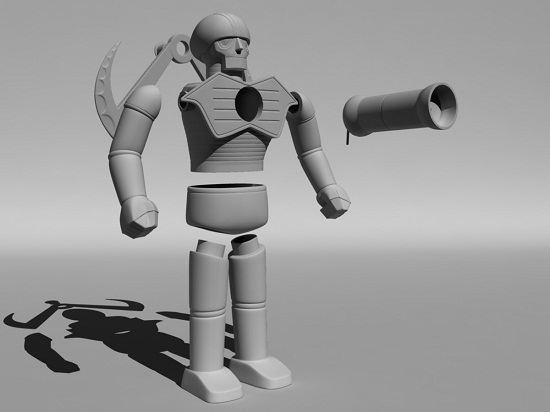
All pieces had to be build seperately to match the original toy design
The 3D Printed Action Figure
I’ve first made a tiny version of it of 18cm. This was really helpful since I was able see it in real life and see that it needed a few adjustments and that I needed to improve some details.
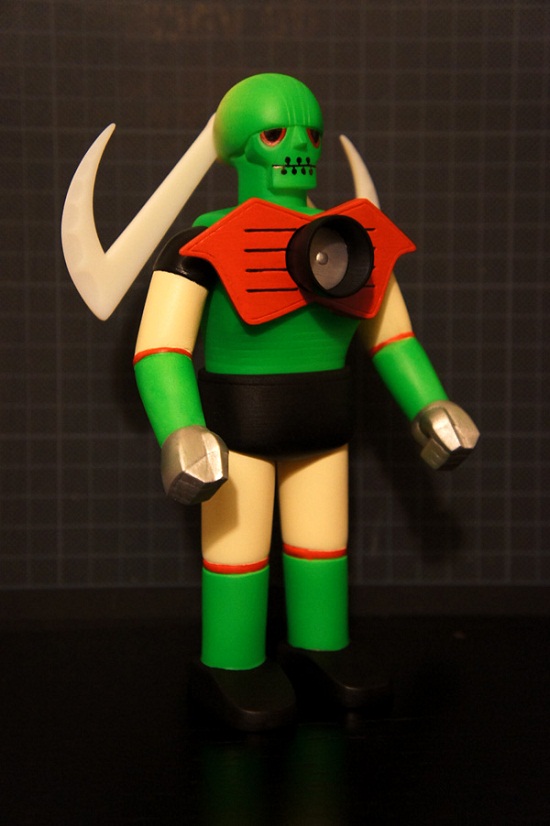
Mike’s first 18cm version 3D printed in paintable resin, hand painted by him
So after many revisions on the main shapes, I’ve modeled all the interiors and applied the correct wall thickness for a full size version. That was the technical part of the modeling but also quite important as it made optimizing some costs possible. For my first project I didn’t manage to do that myself but for that one, I wanted to be able to deliver a model that was ready to print. This was almost the case as I didn’t anticipate designing the little holes in my creation to let the liquid flow out. After a few exchanges with the technical support of i.materialise, all my files were finished and ready to go.
The print came out perfectly and it was a huge relief to see that every piece was fitting perfectly with each other.
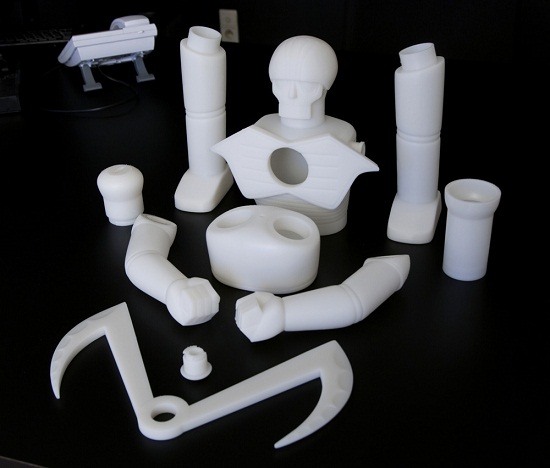
Garada K7 was 3D printed as seperate parts…
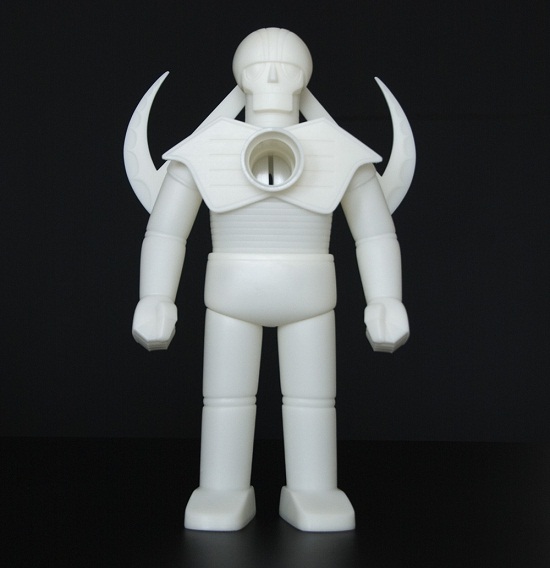
…to then be assembled back together forming an almost 48cm tall robot
As usual with 3D print, there are always some tiny print layers visible. I was able to accept this and knew that I would have to spend a lot of time on the post-process and especially on the part I hate the most: sanding… It’s a necessary step and one of the most important one because this is what will make it perfectly smooth and look like a real production toy and not a 3D print.
With only a few hours here and there to work on my Garada K7, it took me weeks to end up with the smooth surface I was looking for. The original one had tiny holes aligned on each connecting part and to replicate the effect I had to drill them one by one. It could have been done in the original 3D file but would have be a nightmare to model and it would have increased the file size. So doing them during the post-process ended up being the right choice after all.
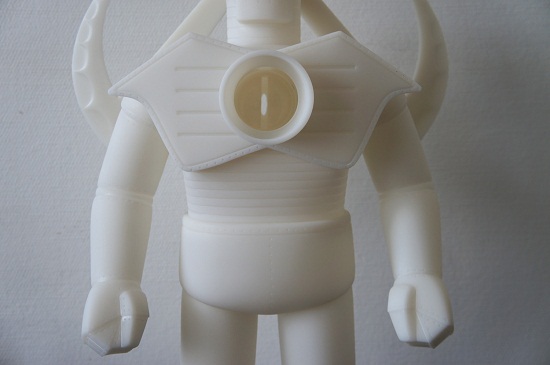
A closer look at the 3D printed Garada K7
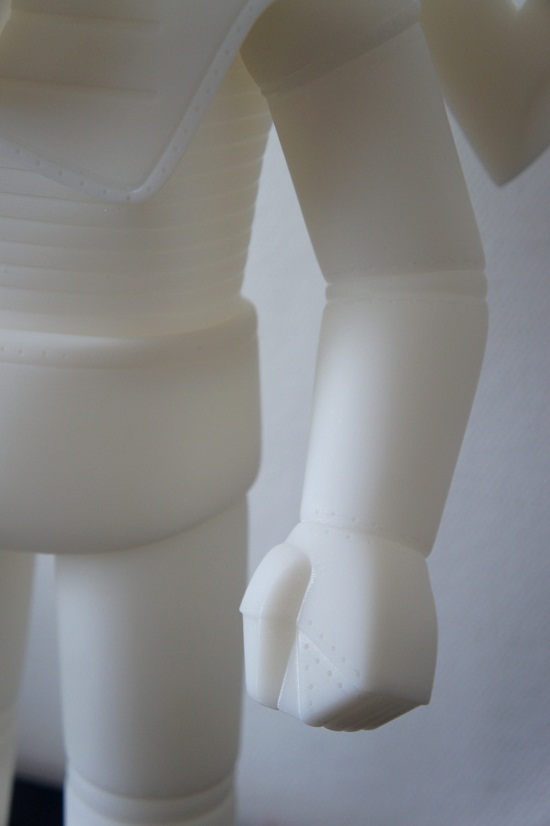
Mike kept an eye on all minor details when recreating Garada K7
And then the last step was the painting and the usual nightmare of choosing the right colors. On almost all the pictures I have of the three original toys, there’s no consistency of colors, as sometimes the picture is taken with a flash, sometimes with low light, or a wrong white balance. So I’ve tried to establish some average tone for every color. I was seriously struggling to find something that matched the color palette of the original paintings.
For the other projects I’ve done, I used the same technique. I’ve paint them myself but always in poor conditions: in my garden with some wind or in my basement with not enough lights. But for my special Garada K7, I’ve requested some help of a professional painter with a real paint cabin, good tooling and perfect conditions to work in; a real dream. The guy did an amazing job and as you can see the final result is really close to the original.
I’ve also been able to order some metallic pieces and a string to make the ball launcher actually work like the original one. With the help of a fellow collector I’ve also been able to reproduce the original box as seen below.
The 3D Printed Result: An Old, New Action Figure
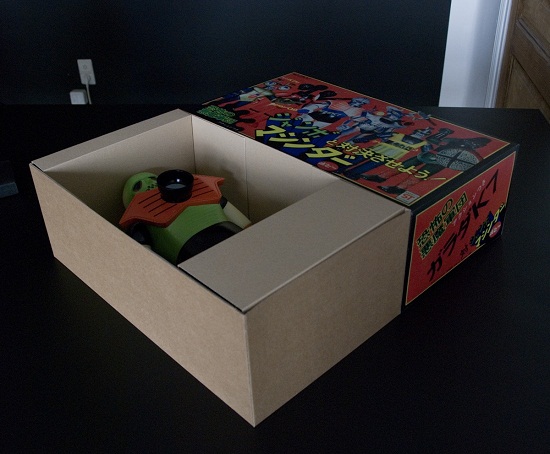
Mike even got a design made for the box with the original box art
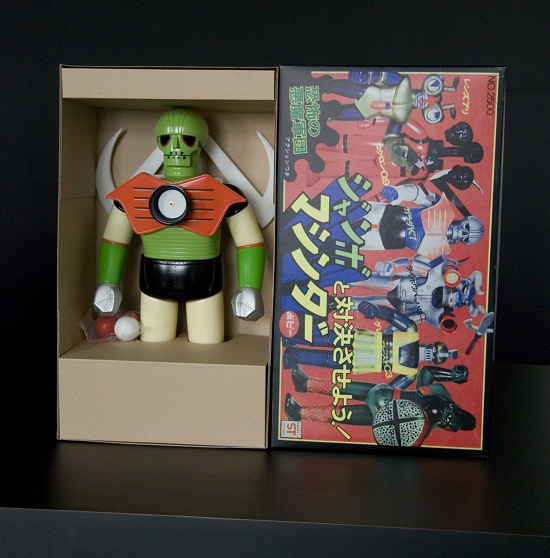
The boxart viewed from the front
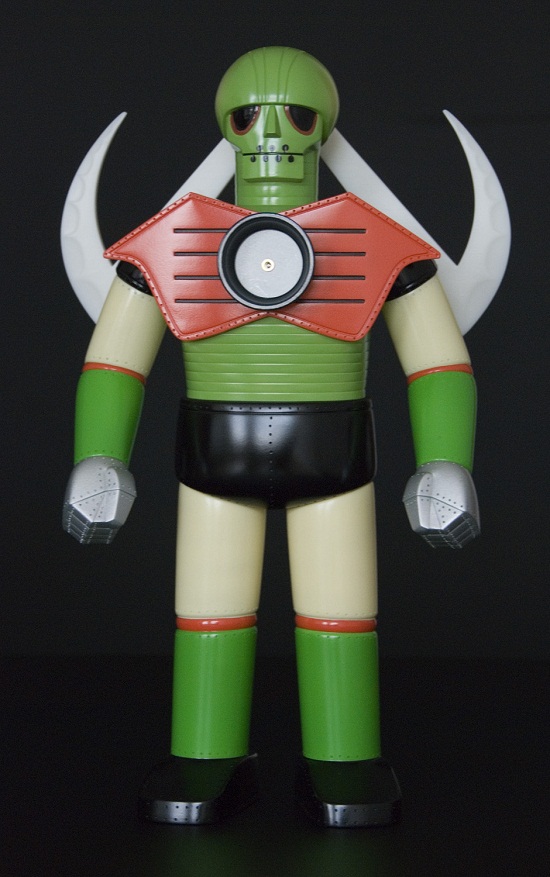
Garada K7 finished in all it’s glory!
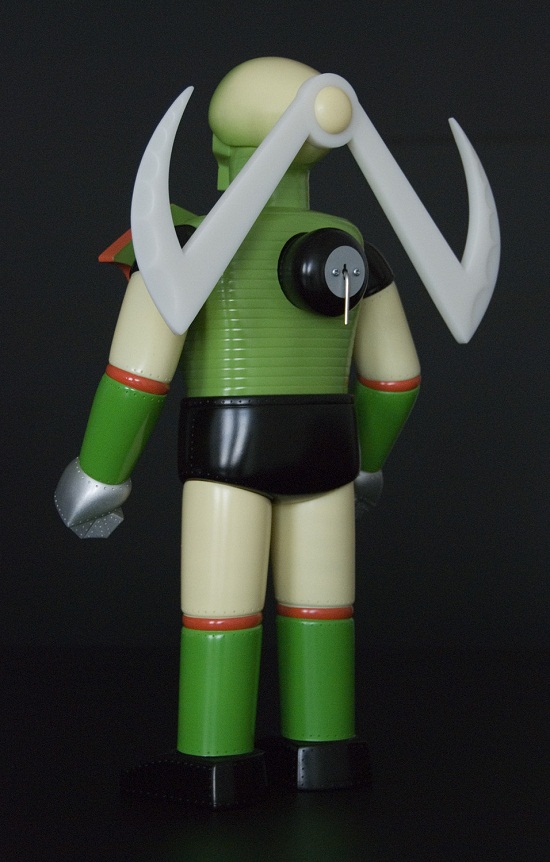
Robot collectors around the world, eat your heart out. Mike has brought back a legend!
So now after a year of work on that guy, I have plenty of hours of play waiting for me and I can proudly celebrate the Garada K7’s 40th birthday. You can find more of Mike’s wonderful work at his blog.
How to 3D Print Your own Toy/Action Figure
If you’re interested in creating (3D printing) your own figurine, simply upload your 3D file here and we’ll deliver you a high quality print. You will have more than 100 materials and finishes options – Mike selected paintable resin, a great material for post-processing and painting your action figure.
Recommended Articles
No related posts.


