3D Printing With SketchUp: An Easy Introduction
SketchUp is a free beginner-friendly Computer Assisted Design (CAD) software that can create highly detailed, 3D printable architecture (i.e. houses), furniture (i.e. cabinets), and mechanical parts (i.e. drone propeller blades). Formerly owned by Google, SketchUp can cause some troubles when it comes to 3D printing, however. That’s why we put together with 3D printing manual featuring beginner-friendly tips on how to use SketchUp for preparing printable 3D models.
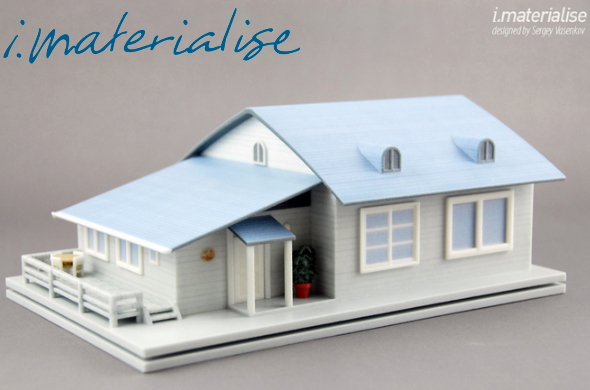
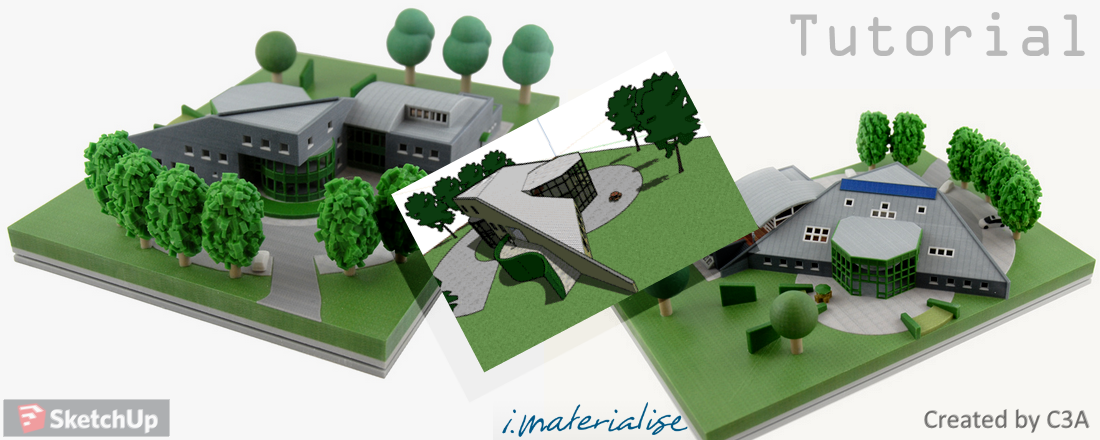
Houses made by Sergey Vasenkov on Google Sketchup, printed in multicolor by i.materialise. The print comes out in full color, it is not hand-painted.
Basic facts about SketchUp
SketchUp is a rather user-friendly 3D modeling software that is easy to learn. It’s internal measurement system is precise and easy to use, making it a good choice for creating tightly fitted pieces (such as wheels, lids, hinges, swivel ball joints, and some types of action figure jointing.)
SketchUp also has useful 2D capabilities, such as creating blueprints from multiple angles and creating photo-realistic preview renders of your designs.
- Download Link: Via the official SketchUp website.
- Price: Free (for the Basic Version, used in this tutorial).
- You Will Need: A mouse with a click-wheel.
SketchUp is a great 3D modeling program good for:
- Architecture Design
- Furniture Design
- Mechanical part Design
- 3D Designs With Text (i.e. 2D logo design or 3D printed logos)
- Creating miniature scale houses, trains, and cars.
- Blueprints
- Rendering (via add-ons) and creating designs that render well.
- Coloring and texturing items (you can use premade textures or upload your own.)
But it’s not super easy to 3D print with SketchUp:
- SketchUp doesn’t export files in .STL format (but has other popular export formats, like .OBJ and STL plugins are available).
- In order for 3D printers to be able to print SketchUp models, they need some preparation first.
- You’ll also find out that it’s difficult to create rounded, organic shapes (such as human faces) with SketchUp. You can make curved shapes and spheres, but this isn’t enough to easily make a realistic 3D human face. For these kind of operations 3D modeling software with more design freedom and sculpting options like Blender, ZBrush, Meshmixer, or Sculptris might make more sense.
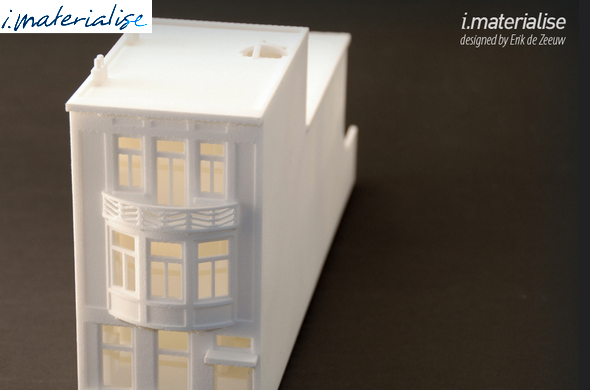
You cannot export .STL files with Google SketchUp, and its “builder”-style interface makes sculpting organic, human-like shapes difficult. This townhouse design includes some curve and arc-based features, and was created by Erik de Zeeuw.
SketchUp’s cool features:
- 3D Warehouse
Location: File => 3D Warehouse => Get Models
Share and download hundreds of user-uploaded, pre-made designs. Populate your 3D printed house with matching furniture!
- Extensions Warehouse
Location: https://extensions.SketchUp.com/
Basic features are, well, basic. Want to add in extra features, such as a “render engine” to generate photo-realistic previews of your work? This is the place to go.
- Follow Me Tool
The “Follow Me” tool creates a 3D object from a 2D silhouette by rotating the silhouette around itself. It is like a digital version of the classic “paper foldout,” only it creates an entirely solid object. It is a handy option for anything from chess pieces to rounded, 18th Century antique table legs.
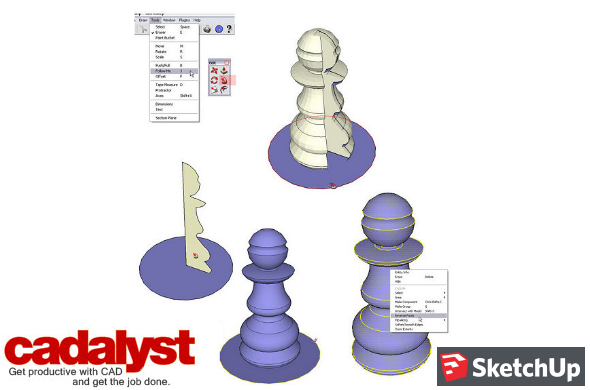
SketchUp’s Follow Me tool rotates an object around itself, turning 2D lineart into a printable 3D file. It can print this way, but needs to be hollowed out first in order to save money. Click here to read about the children who made these designs.
SketchUp Keyboard Shortcuts
- Select Objects: The Black Arrow button in the upper far-left corner. Repeat to yourself: “I will not forget the black arrow’s existence. I need it to select things.” Click this arrow before selecting anything.
- Select Multiple Objects: Click the black arrow. Move it away from the menu, and toward the area where you build models. Hold down left mouse button. Drag your cursor across the screen until you see a bounding box. Drag the box around the area you wish to select.
- Undo: Ctrl+Z on Windows; Cmd + Z on Mac
- Redo: Ctrl+Y on Windows; Cmd Shift Z on Mac
- Zoom In/Out: Gently scroll up and down with the clickwheel in the middle of your mouse.
- Pan Around Object: Click down on the clickwheel. As you hold your finger down in this position, move your mouse back, forth, left, right, and so on.
- Make a Line: Use the pencil tool in the upper far-left corner. Click down in one part of the working area beneath the top menu buttons. Move your cursor, and click down on another part of the screen. Join them into squares and other shapes to create walls.
- Delete a line or wall piece: Right click on it, and then click “Erase.”
- See All Vertices: Your design is a quilt, and vertices are the points at the polygon-shaped edges that make up the quilt. SketchUp hides vertices by default, but you can see them by selecting VIEW => HIDDEN GEOGRAPHY.
Create a basic 3D printable object with Sketchup
Here is a basic way to make a basic 3D printed object. Over time, you’ll discover hundreds of more complex ways.
First thing in order to use SketchUp for 3D printing is selecting the right template (scale). Make sure to use a 3D printing template in inches or millimeters to start from.
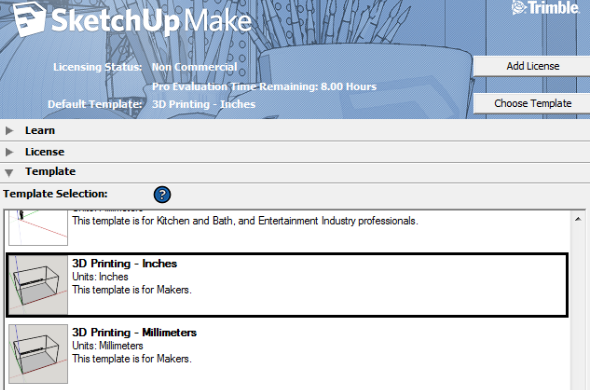
There are many templates inside SketchUp… you can make a 3D printable file on any one of them.
To be 3D printable, a design needs walls, a hollow inside, and an “escape hole” for extra material during the 3D printed process. This shape is a basic cylandrical tower, and contains all those features.
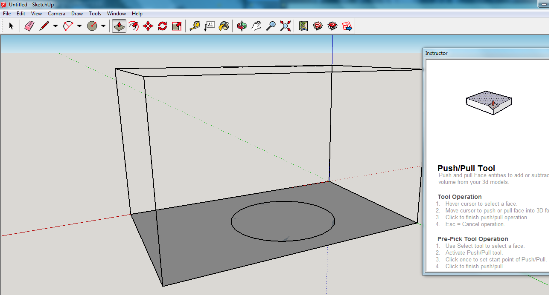
1. Create a shape: Click DRAW. Select “SHAPES” for generic premade shapes, or click on LINES => FREEHAND to hand-draw a shape. Note that a hand-drawn shape might require additional clean-up and processing. Since this tutorial is beginner-friendly, we’re working with a pre-made circle.
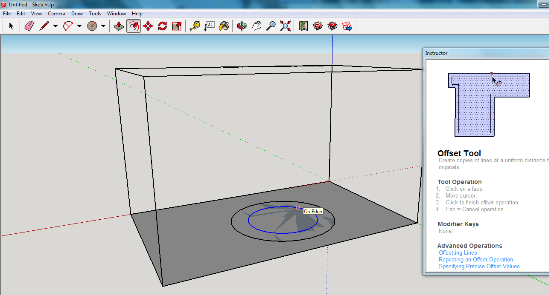
2. Click the “Offset” button to create walls, and to mark where the interior begins: The offset button is at the middle left at the menu on top. The offset feature is crucial for creating 3D printable shapes! Leave enough space for wall thickness! On a hand-drawn part, you might see ugly overlapping lines. Right click and select “erase” to remove lines you don’t want, and use the pencil tool to create new ones when needed.
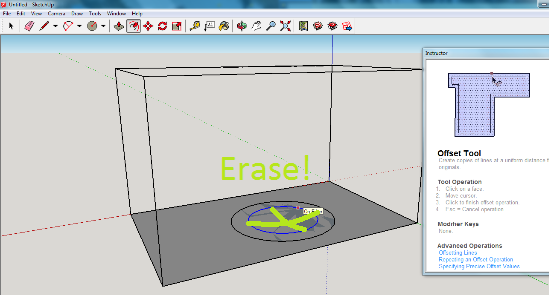
Most 3D printed objects have a hollow interior. Make your SketchUp design hollow by using the offset tool to mark where the inside is, and then erasing the inside of your shape.
3. Erase the interior to make your design hollow inside: Click on the black “selection” arrow at the far upper right corner of the menu. Then right click the interior of the circle. Click “Erase.” You should remain with a hollow “o” or “donut-style” shape. Even complex shapes should have hollow interiors to save money and material.
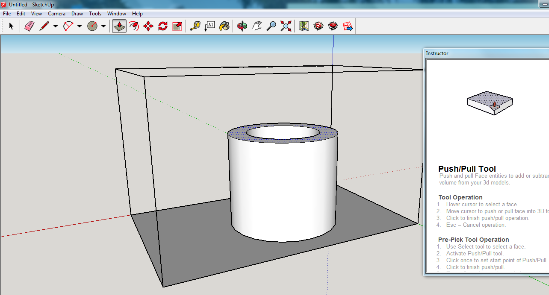
4. Raise the walls of your design: Right click on the frame-like part that remains behind. Make sure it stays selected as you click the “PUSH/PULL” button. Drag the selected border up to create a 3D shape.
5. Post process your part to make sure it prints correctly: Steps 1-4 will yield a basic 3D printable shape, but it still needs post processing to check if it will print correctly. Post-processing is like proofreading: a good habit to get into.
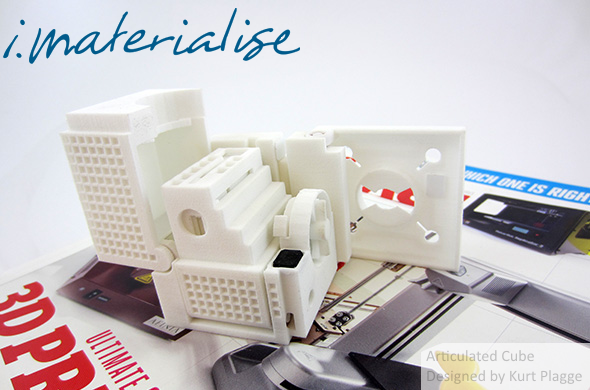
Articulated Cube, designed by Kurt Plagge. SketchUp’s measurement system is precise, and good for created tight joints or hinges. No matter what you make, be sure to “post-process” it! This is especially important for “jointed” or “articulated” pieces.
Prepare your SketchUp model for 3D printing
To post-process your file, download Meshlab (a free program useful for converting file formats), and a “3D file-checking” program. There are many free programs that do this, including Materialise’s MiniMagics (free version here). What spell check is to your e-mails, Magics is to 3D printed files.
Create beautiful 3D renders with SketchUp
You can render (i.e. create photo-realistic previews) of your design in two ways:
- Using an add-on right inside SketchUp. Ariel Vision is a popular choice.
- Exporting your model, then importing it into rendering software (i.e. VRay, Kerkythea, Blender Cycles). Most CAD (Computer Assisted Design) software can render files you import from SketchUp. You can also import your design into browser-based rendering apps like Sketchfab (Sketchfab is not affiliated with SketchUp).
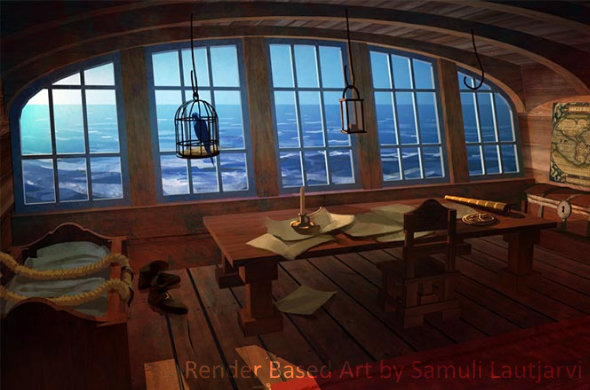
You can improve renders with Photoshop (not free) or Gimp (free) to create high detail renders… and game art. This render-based art is by Samuli Lautjarvi, a digital painter from Finland. Check out his detailed tutorial and source file archive.
Do you need more info about SketchUp? Check out our beginner-friendly step-by-step guide on how to create your first 3D model in SketchUp here. Want to 3D print your SketchUp model in high quality and in various different materials – without even owning a printer? Then upload your 3D file here and get an instant price for your 3D print. Still having trouble to make your SketchUp file 3D printable? Then ask a professional 3D designer on our 3D modeling service for help.
Recommended Articles
No related posts.


