3D Printing With Meshmixer: A Beginner-friendly Introduction to 3D Sculpting and Combining Meshes
Meshmixer is a free 3D sculpting-based CAD (Computer Assisted Design) program created by Autodesk as part of their “123D” software line. Autodesk is best known for releasing premium-rate professional-grade software like Maya and 3Ds Max, and their “123D” free line can be seen as a simpler, beginner-friendly version of those professional programs. This Meshmixer covers how Autodesk Meshmixer can be used to intuitively sculpt designs, hollow them out, cut them apart, and combine parts together without wrecking your mesh’s internal or external geometry. It also covers how to prepare your design for 3D printing.
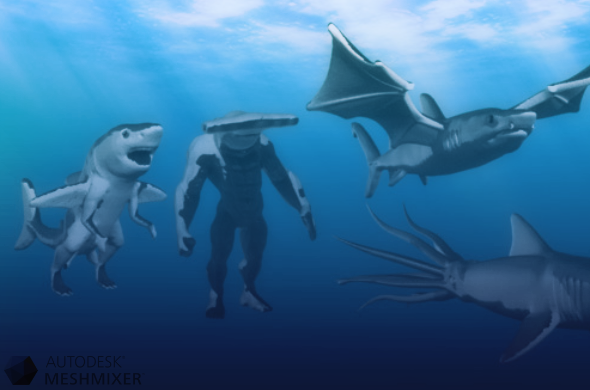
Meshmixer is great for making human-animal hybrids and anthromorphs.
Basic Facts about Autodesk Meshmixer
- Download: You can download Meshmixer at Autodesk’s official website.
- Price: Free (part of 123D, Autodesk’s freeware line)
- You Will Need: A mouse with a click-wheel
- Supported formats include OBJ, .STL, .DAE, and .PLY, .AMF and .WRL
Meshmixer is good for:
- Sculpting: Sculpting interface is intuitive and very responsive
- Fine detail sculpting: customize the brush size, type, sensitivity and fall-off (i.e. pointed, round smooth, rectangular, etc.) The regular drag, draw, flatten, inflate, pinch, and move brushes also include three smoothening brushes and one spike making brush. They work well with Wacom tablets, but not as well with a computer touch-screen.
- Exporting and importing 3D files
- Preparing designs for 3D printing (tools to slice, generate supports, and analyze fragility/ability to balance included)
- Cutting models apart
- Hollowing models out
- Symmetry: There are four symmetry options that create symmetry as you sculpt: one under the “Select” button, one under the Sculpt Button, and one in the Sculpt button’s paint mode (i.e. Vertice Paint.) This means that you can select surfaces symmetrically (i.e. selecting both ears at the same time), and sculpt symmetrically (i.e. if smoothen one ear, you also smoothen the other. Live!) The third symmetry option is called “Mirror,” and it “mirrors” one side of your existing mesh to match the other side.
- Painting and shading items (you can use premade colors, patterns, and shaders or upload your own)
Meshmixer is “bad” at:
- Meshmixer is a sculpting program, so it isn’t made for taking exact measurements, creating mechanical parts, or creating architecture models.
- Basic rendering options make pretty screenshots, but advanced users might want to add in backgrounds or set up custom lighting.
Useful 3D modeling features in Meshmixer
Here’s a short overview about Meshmixer’s best features and most important tools.
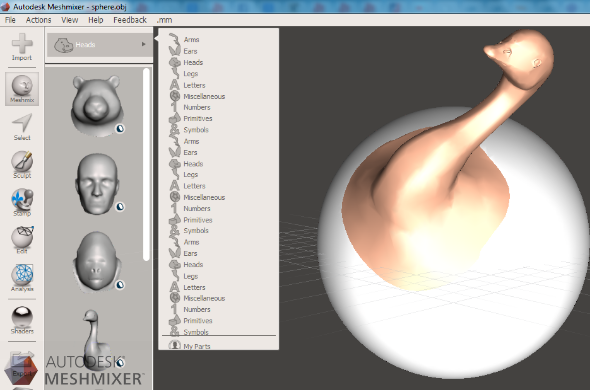
Meshmix Archive
Location: The Meshmix Button File => Primitives
This archive consists of multiple galleries full of parts. Parts in this archive include premade animal and human hands, feet, symbols, and other shapes you can use and mix together. Good for those who don’t want to start sculpting completely from scratch.
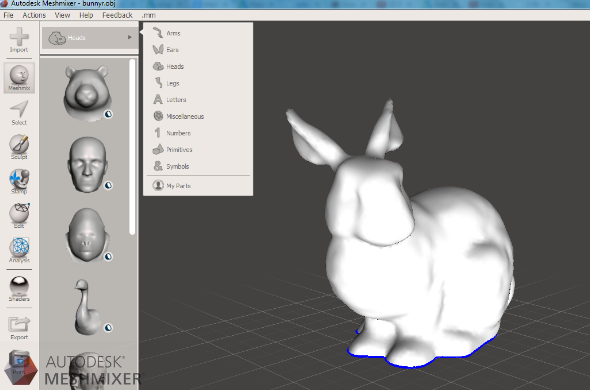
The Meshmix button contains a large archive of premade hands, feet, arms, heads, and ears you can add to your sculpt.
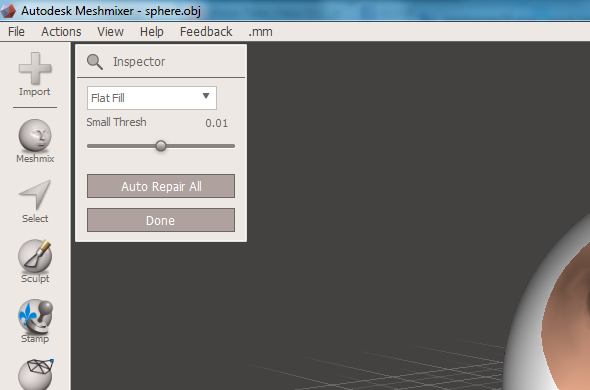
Automatic Repair Features
Location: Analysis =>Inspector
This feature automatically Repairs defects in your mesh. More importantly, it tells you what the defects there are: blue sphere means “hole,” red means “nonmanifold edges,” magenta means “tiny disconnected parts.”
- Left click on a sphere to automatically repair a defect.
- Right, click to select the area and fix it yourself. This exits the Inspector but lets you fix the area your own way (good if your project has specific aesthetic or design needs.)
- Repair all Defects: Click the “Auto Repair All” button on the “Inspector” menu.
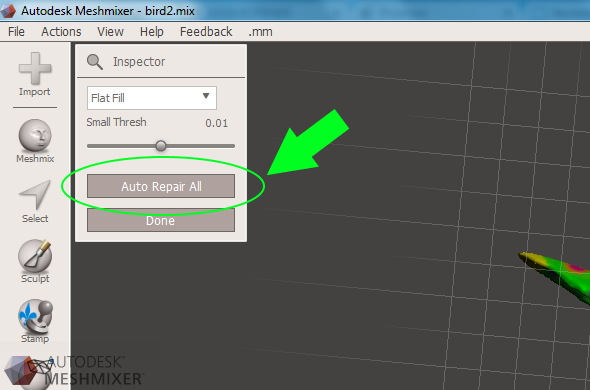
You can automatically repair your design by going to Analysis => Inspector => Auto Repair All.
The Analysis Button
This button has sub menus that analyze which parts of your design are the most fragile, whether it can stand on its own (or topples over!), and houses all auto-repair options.
The “Analysis” button contains an automatic mesh repair tool, and some useful visual tools to check your design’s ability to balance, strength, and fragility.
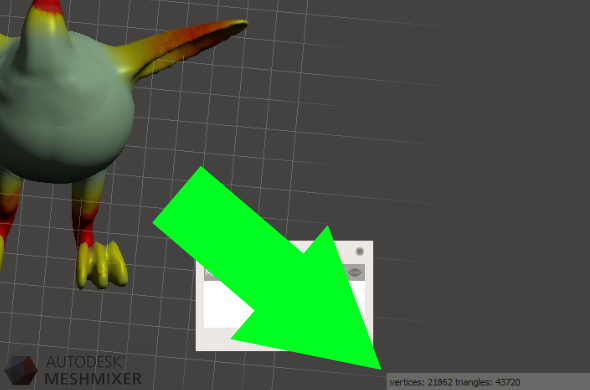
Vertex Count
To see how many vertices your design has, check the bottom right corner of the screen. More vertices can cause models to 3D print more slowly, and some printing services charge extra to print models with more vertices. Also, many design contests have limits on how many vertices your finished model can have (i.e. vertex count cannot exceed 999,999 total vertices.)
Mesh Shaders Button
This rendering option won’t affect your sculpt, but will changes how it looks as you sculpt it. Click on the Mesh Shaders button, select a sphere, drag it onto your design— and let go. Make your design look like chrome, ancient bronze, water, or any texture you upload.
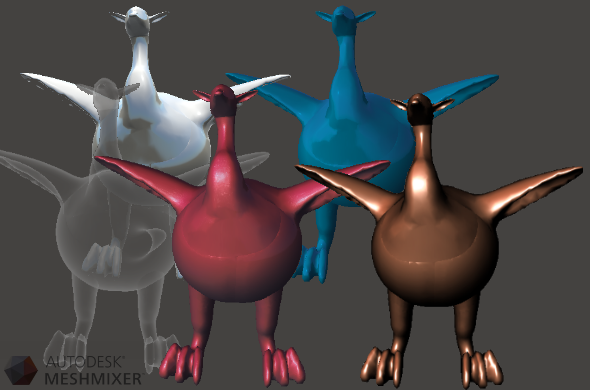
“Shaders” are a rendering option that changes how your model looks as you sculpt it. It does not change the actual mesh, just how it looks to you as you sculpt it.
Patterns
Location: Edit => Make Pattern
This quickly makes a pattern of 3D printable holes on your design. You can determine how far apart or close together the holes are, and how large they are. A good way to save money and material on a 3D print.
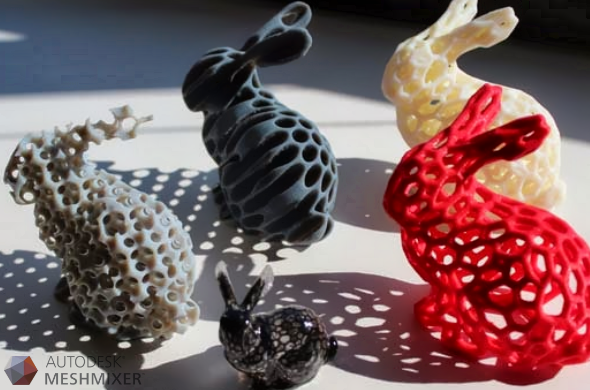
This is what patterns look like when printed.
Re-size
Make an object larger: Click the small purple arrow next to the mesh, or manually increase the size via the “Drag and Drop” menu. This menu appears on the left side of the screen every time you drag a part into the work area.
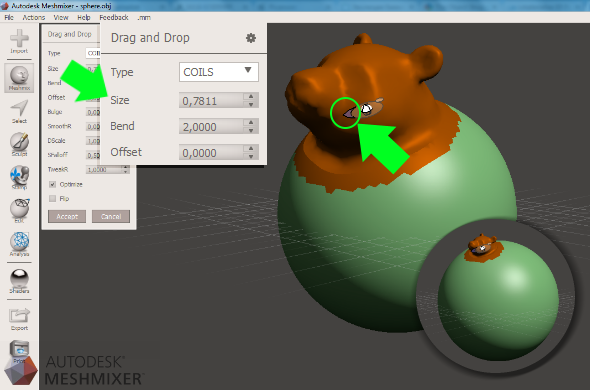
Make your object larger by left-clicking on the purple arrow. Hold your mouse button down while dragging your mouse. To resize, turn, orientate, or generally “transform” your object, click EDIT => TRANSFORM.
Useful keyboard shortcuts
- 3D Print Menu: CTRL+P
- Undo: Ctrl+Z on Windows; Cmd + Z on Mac
- Redo: Ctrl+Y on Windows; Cmd Shift Z on Mac
- Hide Object (i.e. x-ray mode): Ctrl+V
- Center View: Not a keystroke, but still useful. Click View => Recenter View.
- Zoom In/Out: First hold down Alt, then Left click at the same time. Move your mouse around as you do this.
- Pan Around Object: Press down on the click wheel, and move your mouse.
- See All Vertices: Your design is a quilt, and vertices are the points at the polygon-shaped edges that make up the quilt. Meshmixer hides vertices by default, but vertices can be revealed by selecting View => Toggle Wireframe in the menu at the top of the screen.
- Select Object: Right click on the object.
- Select Multiple Objects: Click on one object, then hold down Shift as you right-click on another object.
- Delete Object: Click on the object, then click on Edit, and finally, “Transform.”
- Transform Object: Select the object by clicking on it. Click “Edit.”
- Select Object: Right click on the object.
How to Cut a Mesh
- Click the Edit Button on the left side menu.
- Click “Plane Cut”
- Click and drag your cursor across the screen to make a red “cut line.” This generates a “cutting board” grid. The settings can be edited further by left-clicking and holding down the arrows beside the grid. You can spin the grid around to determine which part you wish to cut (i.e, top, bottom, side).
- Press ENTER.
- Boom, instant cut!

Use Ctrl+V to “x-ray” your model, and see whether parts successfully joined together. The part at the left is two separate parts, while the part at the right is one successfully merged whole part. This is a one-armed safety cone.
How to Join a Mesh Together
Here are two ways to join meshes together on Meshmixer:
Easy Way:
With this method, the part is instantly “snapped” to your design.
- Begin with one object (such as the sphere or rabbit from the start menu.)
- Select an “open” object (i.e. an object that is not closed off, such as an arm or a leg.)
- Drag this “open” object onto the screen, and place it against the wall of the other object. For best results, drag and release it directly onto the closed off model. This automatically connects it to your model, like a suction cup.
- If you have an object with an unsealed “open” edge sticking out, and leaving a hole, go to Analysis => Inspector and click “Auto Repair All.” It will build a connection.
- Check if it worked. Click Ctrl+V. If the parts are joined internally as one piece, it worked. If they aren’t, reread the directions.
Meshmixer Boolean tools: perfect for making anthromorphs! This grizzly bear anthromorph has an “open edge” sticking out by the neck. This needs to be automatically repaired with “Auto Repair All,” then smoothed out with “Sculpt” tools. This took 60 seconds and no sculpting.
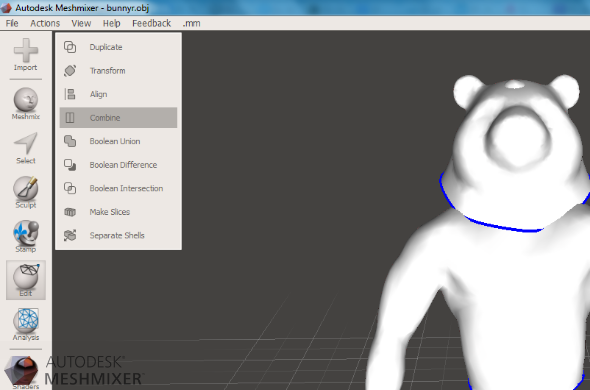
“Boolean” Way:
Booleans are modeling tools that make holes, combine objects, or intersect objects. They can save a lot of time if used correctly, but don’t exist or function well in a lot of free 3D design software. On Meshmixer, the boolean tool is fairly reliable but does not work on all types of designs. When it does not work, it says so.
- Drag two models onto the work area.
- Slide one object into another object.
- Left click on one object.
- Hold down SHIFT while clicking on the second object.
- The Boolean menu will appear. Click the Boolean tool you want to use.
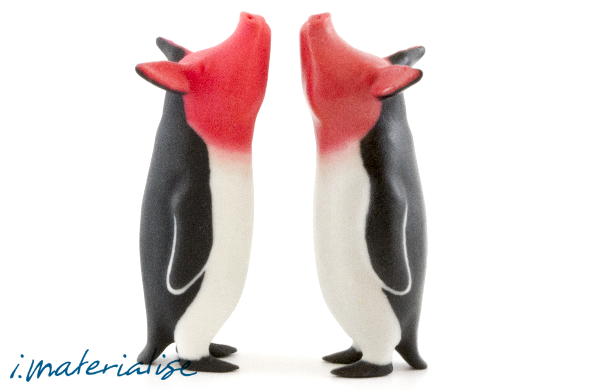
This is Piggy, or “Piguine.” Our very own designer, Bert, sculpted, painted, and printed this sculpt using Meshmixer. This sculpt was not painted after printing. It was printed in full color in a material called Multicolor Gloss. Design specs here.
3D Printing with Meshmixer
Here is a basic way to make a simple 3D printable design with Meshmixer. Over time, you’ll discover hundreds of more complex ways, including some that use secondary “mesh repair” software. This method does not use secondary software— all preparations are made within Meshmixer. To be 3D printable, most designs need walls, a hollow inside, and at least one hole (i.e. an “escape hole.”) Designs that do not usually need escape holes or to be made hollow are very thin designs (i.e. rings). For more information on how to make a 3D printable design, click here.
1. Make a design by cutting and combining parts.
2. Check that your parts work well together. Go to Analysis => Inspector and click “Auto Repair All.” It will build a connection.
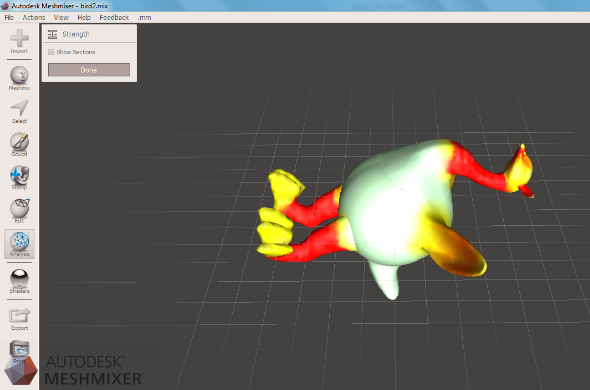
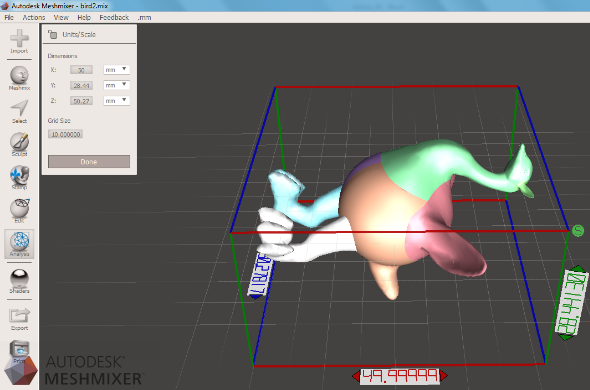
3. Make your object big enough to print. Meshmixer’s default settings make your design extremely tiny! This might make your design unprintable. For reference, i.materialise’s lowest wall thickness requirement is 0.8mm for polyamide plastic. Most machines cannot print parts thinner or tinier than that. Make your design larger by clicking Analysis => Units & Scale. Then type in a higher number, and hit ENTER. Your design scales up automatically and in proportion. Hit “Done” when finished.
Meshmixer Tutorial Image: How to 3D Print a File With Meshmixer
4. If needed, hollow out your model. Your model might need to be hollow to print cheaper and better. Go to Edit => Hollow. “Offset” determines wall thickness. 2mm is a good number for this. On the menu that appears, click “Accept” to accept changes.’ We suggest lowering “Solid Accuracy” and “Mesh Density” for a cleaner interior space and thicker walls. To skip hollowing and hole-making steps, make a thin model. This has a higher chance of printing without holes.
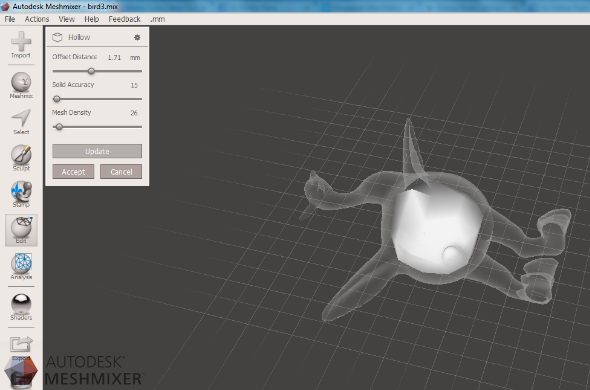
Make your design hollow with Meshmixer.
5. If needed, use the pattern tool to create holes. Meshmixer’s Pattern tool can be found in EDIT => Make Pattern. Use it to make holes in thick areas, such as your sculpt’s torso. Don’t make holes in thin parts such as necks and fingers. For the 3D printer to read your model as hollow, you need an escape hole. This is especially important for models that are very thick. The pattern tool may be inefficient for some complex high-poly models. Those models need retopology and users may want to construct a hole using another software. To skip hollowing and hole-making steps, make a small, long, and thin model. This has a higher chance of printing without holes.
6. If you hollowed out your model and made a hole, then click “Auto Repair All” again to ensure no remaining flaws exist.
7. Click “Make Solid.” Go to Edit => Make Solid. Choose your settings for how dense you want your design to be, and then click “Accept.” Denser designs are usually more durable than lower-mass designs, but low-mass designs normally print faster.
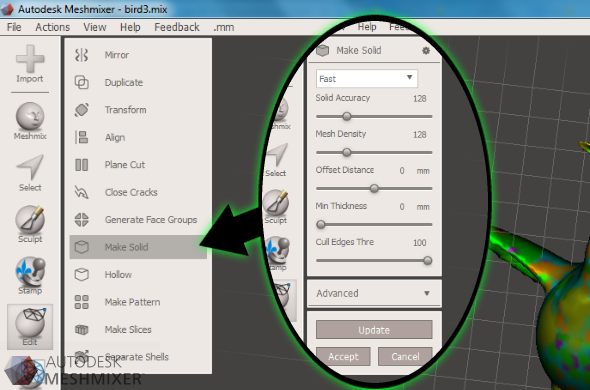
Make your design solid with Meshmixer.
8. 3D Print your design by going to the 3D Print Menu (CTRL+P.) From there, you can directly print your part professionally on 3D printing services like i.materialise, and in a variety of materials. You can also print it at home, or export it to save on a memory stick or home computer.
Painting a Model
- To paint a model, go to Sculpt => Brushes => Paint vertex.
- Hold down the space bar. Then, using your mouse, select the button with the purple-gray sphere.
- Finally, lower all the “Refinement” settings to 0, so that you don’t sculpt while you paint.
Creating a render in Meshmixer
- You can use the shaders tools to prepare your file for a screenshot and improve this screenshot with Photoshop (not free) or Gimp (free).
- For more options, you can also export your Meshmixer file into another software that has more extensive rendering options. 3DS Max (not free) is one option, and Blender’s Cycles Render (free but slow) is another.
- A third option is to upload it to free portfolio sites such as Sketchfab, which includes simple rendering options and along with a free and relatively safe way to share your design. People can view and interact with your design on Sketchfab, but they cannot download it.
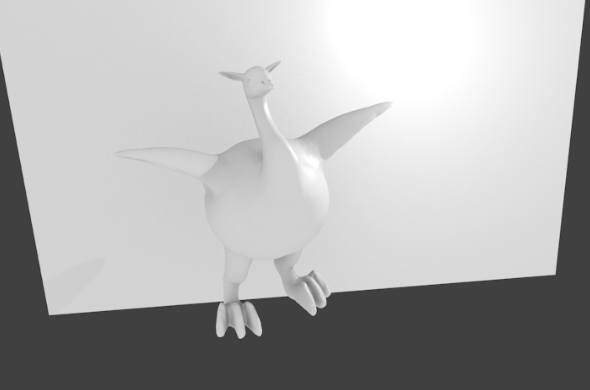
I used Blender to render my Meshmixer project. A render is a realistic “preview” of what your design would look like in real life. Renders range from simple black-and-white renders to stunning, photo-realistic, full-color renders. You can also “enhance” renders by using editing programs such as Gimp or Photoshop. Good for 2D artists!
Have you created something with Meshmixer, then upload it to our 3D print lab and order your 3D print now. You can choose between more than 100 different 3D printing material and finishes options so make sure to visit our material page to learn more about them. If you want to discover other easy-to-use 3D modeling software and design apps, visit our creation corner.