3D Printing Tutorial: Print Your Autodesk Maya 3D Model
When turning your 3D model into a 3D print, the software you’re using may require some extra editing before you end up with a printable piece: the wall thickness needs to be checked, the model needs to be watertight, and your final printing size needs to be defined. To make your life easier, Autodesk Maya expert Russ Ogi has put together a step-by-step tutorial about how to make your Maya 3D model printable.
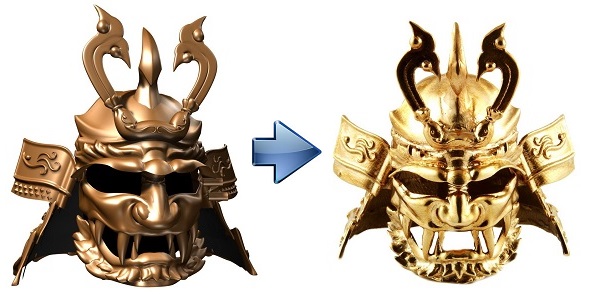
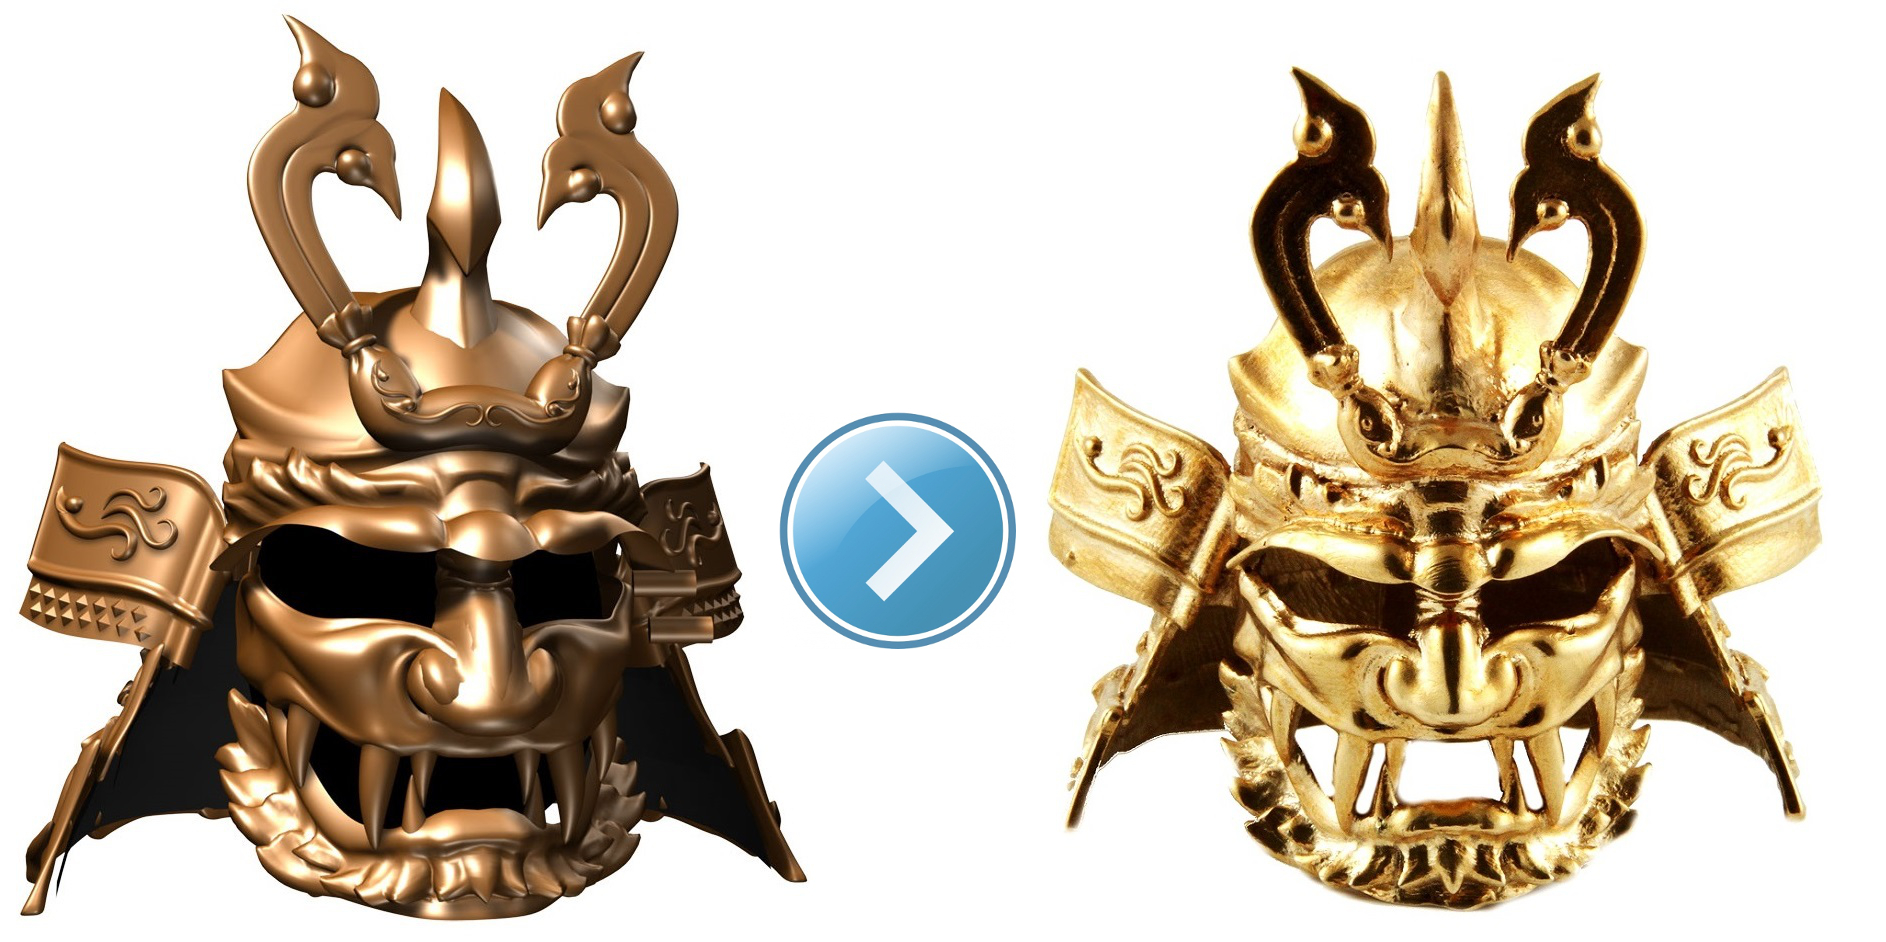
Turning a 3D model in Maya (left) into a 3D print in bronze (right)
Make your Maya 3D model watertight
If you’re not familiar with designing for 3D printing, the most important aspect of your model is that it is a “watertight” virtual object. In layman’s terms, think of the “watertight” model as a real object: would your model be able to exist in the real world and would it be able to hold water (like a cup) or keep it out (like a boat)?
In more technical terms, “watertight” means that your outer surface forms one contiguous shell that encompasses a volume of space and includes wall thicknesses. You also need to take into consideration minimum feature size, resolution, file size, format, etc.
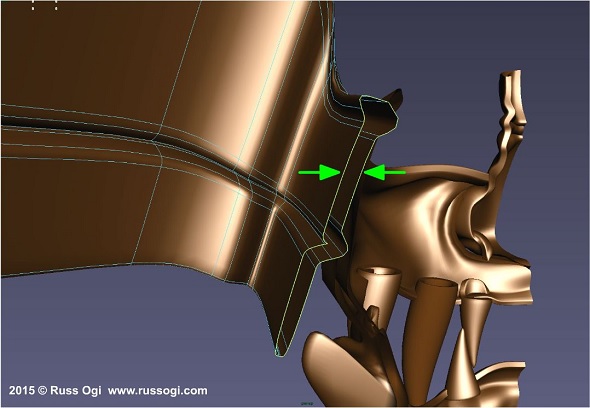
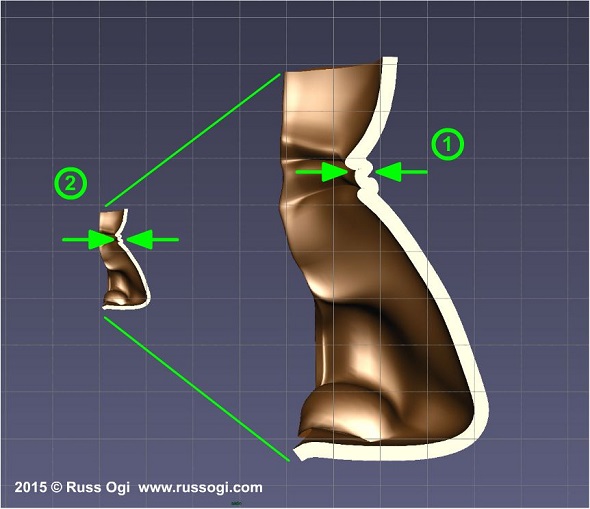
The wall thickness is highlighted
i.materialise has some great information on their blog. In light of that, I’m not going to cover those details in this post. You can read their entry regarding polygon resolution and file size here. They also have some great information regarding file format, wall thickness and other surface issues to ensure your model is optimized and watertight. You can check that out here.
Instead, I’m going to focus on my workflow in turning my models into watertight virtual objects.
Giving your Maya 3D model a wall thickness
In my last posting, the model I built was a surface model and therefore had no wall thickness. Wall thickness is one of the main criteria for a 3D model to exist in the real world. If I haven’t already built the model at the final intended size, or if I need a smaller or larger version of the model, the first thing I usually do is scale the virtual sculpt to the final size it would be in the physical world (for example, 4″ wide x 4″ high x 5″ deep).
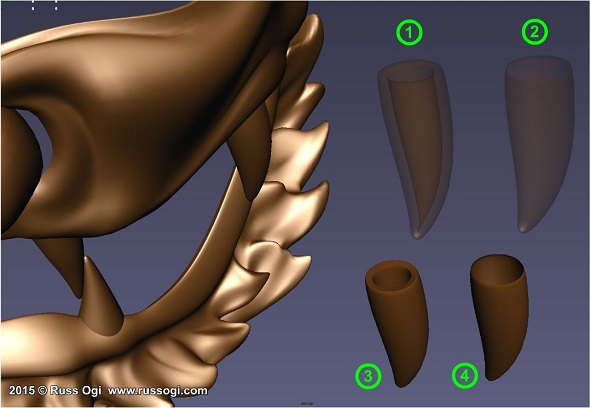
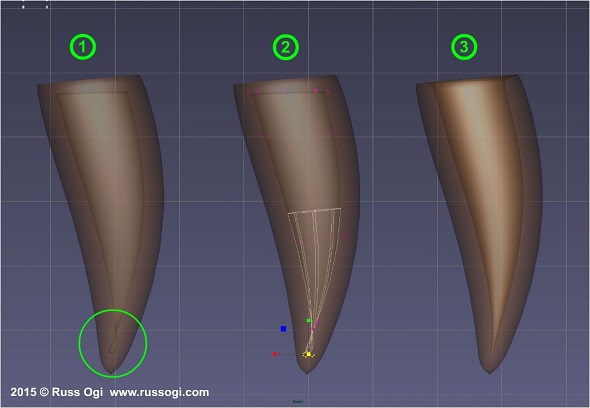
(1) X-ray view of a solid model (2) X-ray view of a surface model (3) Shaded view of a solid model (4) Shaded view of a surface model
Once I have the model at the correct measurements. I proceed in giving the surfaces a wall thickness.
Why not build a solid model to begin with?
By building a surface model first, I am able to resize the model and still make adjustments to the wall thickness according to the 3D printing technology that I will be using and appropriate to the final physical dimensions.
Wall thickness will also depend on how much mass that wall must support. If you have a section of your model with a lot of mass, you don’t want it to be supported by only a thin piece of material.
Why does the final size affect the wall thickness?
Wall thickness decreases in proportion to the size of the model. For example, if you make a model with a wall thickness of 1/8” and then scale that model to a quarter of the size, your wall thickness is now 1/32”. This may be too thin for the mass of the model or the 3D printer technology that you will be using.
(1) Original object at full size (2) Scaled down object with a proportionate wall thickness
Many of the specific details such as, ‘how thick do I need to make my walls’ and ‘what is the minimum feature size that I can make,’ are dependent on the type of 3D printer you will be using. It is best to decide how you will be 3D printing and research the specifications for that 3D printing technology or service.
Services like i.materialise usually provide design guides or specifications for the different materials they use for different 3D printing processes. Since I wanted to print this model in Bronze, I checked out i.materialise’s design guide for their bronze printing process here. They also published an introduction on finding the perfect wall thickness for your 3D model here.
With 3D printing technology developing as fast as it is, design specifications or different processes for the same material may exist. Make sure to check the latest design specifications for the specific process you will be using.
Use Maya’s offset surface function
When I’m ready to make my models into solids, I use the “offset surfaces” function in Maya to create an inner surface. I usually design my armor pieces at full scale with a 1/8” wall thickness.
Sometimes with very complex geometry, the offset surface is not correct. It will sometimes overlap or otherwise not follow the original surface. I manually correct these errors using the same technique I used to build the surfaces: moving control vertices.
Edit NURBS > Offset Surface (1) Automatic surface with error (2) Select and scale control vertices to correct (3) Corrected inner surface
Now I have two surfaces. I then use Maya’s lofting tool to bridge two sides. Depending on my needs, I alternate between “blend edges” to round out edges and “preserve edges” to keep edges sharp. I use “blend” for edges and “preserve” for middle seams between left and right.
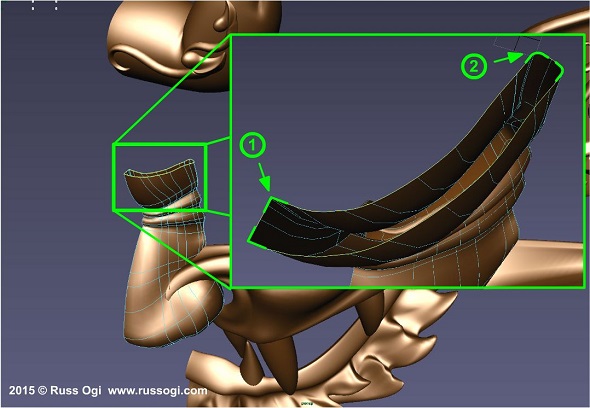
Edit NURBS > Attach Surfaces Options (1) Preserved corners for sharp corners at the center seam of the facemask (menpo) (2) Blended corners for the outside edges
I then add isoparms to even out the spacing on that area of the geometry. It doesn’t have to be exact. Rather, I try to avoid large open spaces with no isoparms.
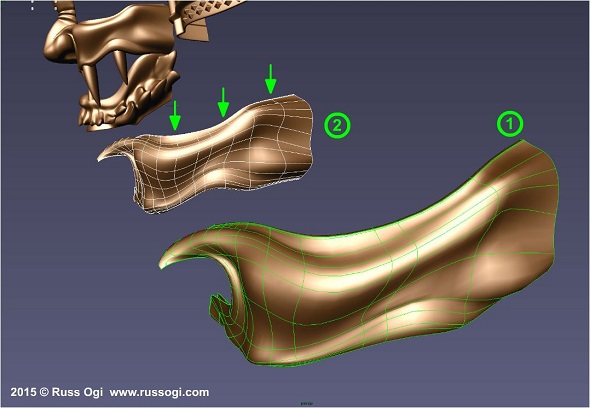
(1) Original NURBS surface with uneven isoparms (2) New isoparms added
The last step is to rebuild the surfaces. I adjust the settings to get the surface density that I want and in this way adjust the resolution of the final 3D printable model (refer to the i.materialise blog post about resolution here).
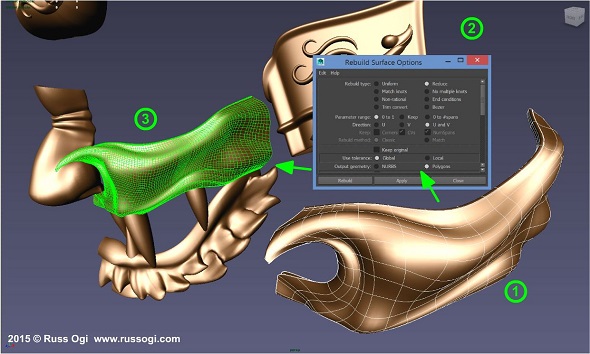
(1) Original NURBS surface (2) Edit NURBS > Rebuild Surface Options menu (3) Rebuilt polygon surface
Use tha Maya outliner
As you rebuild, keep the Maya outliner ordered with meaningful names for your rebuilt parts. For example, names like ‘rebuilt head’, ‘rebuilt neck guard’, ‘rebuilt visor’, etc. are what you want. Otherwise you will be looking at a bunch of nodes with names like ‘rebuilt surface 1’, ‘rebuilt surface 2’, ‘rebuilt surface 3’, etc.

Outliner in Autodesk Maya without meaningful names
Export your Maya 3D model for 3D printing
Last step: export. This output depends on what 3D printer you will be using or if you plan to use additional software for any processing of the digital mesh. I will usually out put an .STL, .vrml or .obj file. If I am using Autodesk Meshmixer for any additional printer preparation, I will export an .obj file. And a general reminder: save often.
After this, my 3D model in Maya was ready for the printers. I uploaded the models to online 3D printing service i.materialise and received these stunning bronze prints:
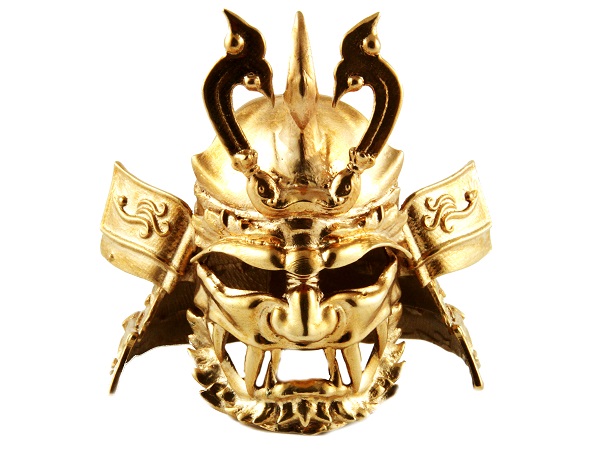
3D Printed Samurai Helmet (Kabuto) in Bronze. Motif: Fujin, God of Wind
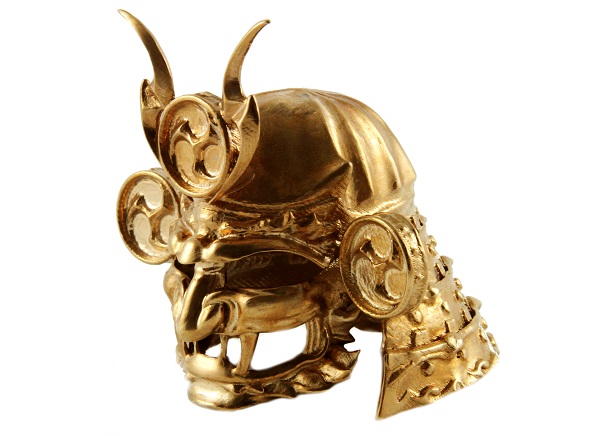
3D Printed Samurai Helmet (Kabuto) in Bronze. Motif: Raijin, God of Thunder
If you want to learn more about Russ’s designs, check out his other two blog posts for i.materialise: In his first blog post he provides us background information about his samurai 3D models, and in his second blog post he shares tips and tricks on how to model with Maya. We also encourage you to read our post about 5 mistakes to avoid when turning your 3D model into a 3D print to further dive into the fascinating world of 3D printing and 3D modeling. Once you model is ready for printing, simply upload it here and order your high quality 3D print in 18 materials.