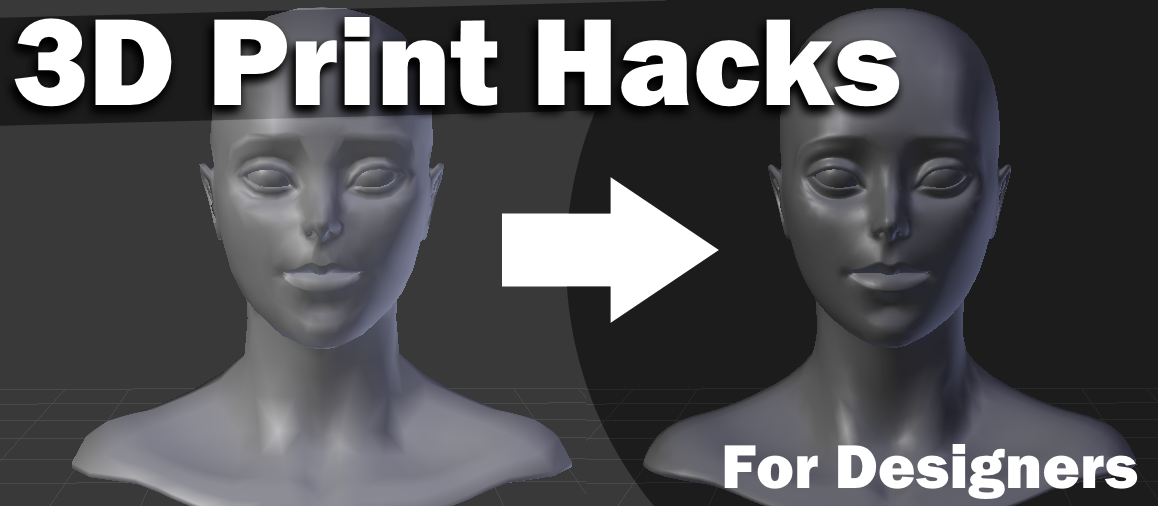
3D Design Software Lifehacks: Basic 3D Printing Features Every Designer Should Know About
There are common software tools that make it easier to 3D print a design— and that all designers should know about. 3D Design software can be categorized according to how it works and is used: “sculpting,” “building,” “scanning,” etc. But a designer’s project needs might overlap, so there are commonly available tools that all designers can use and benefit from: wall thickening, subdivide (i.e. smoothing), symmetry, sculpt, and “boolean”/“hole making.”
These tools aren’t available in every 3D design software package, but just knowing that they exist saves time. Once you know what type of tool you need for a project, you can seek out the design software that has it— just as you would “seek” pizza at a pizza parlor, and sushi at a sushi bar.
Read on for how wall thickening, subdivide (i.e. smoothing), symmetry, sculpt, and “boolean”/“hole making” work— and for free software packages with those features.
When all else fails, bluff with this.
Wall thickening tools such as “solidify” do not usually work well on surfaces that have too complex geometry or that already have wall thickness. You cannot, for example, use this tool twice on the same model without making a mess.
Wall thickening
Increasing the size of your model can increase wall thickness (if it has wall thickness to begin with), but there is also another way. Most design software packages include tools that automatically “thicken” or “solidify” surfaces to create wall thickness. As a general rule, you don’t have to “build walls” unless your design’s “inside” is radically different from its “outside.”
“Solidify” and thickening tools work best on models that have simple, clean geometry (i.e. not too many vertices) and no wall thickness.
One way to create wall thickness is on Blender, via the Solidify modifier:
1. Import your model: Delete the default cube, select “File” from the top menu, and then click “Import.”
2. Select the model (once it appears on your screen) by right clicking it.
3. Solidify: Left click on the wrench in the bottom right menu. Click “Solidify” on the drop down menu that appears. Enter in the wall thickness you want.
4. Hit “apply” to create wall thickness (or else it’s just a pretty preview.) For best results, use “solidify” on a mesh with no thickness whatsoever— and with relatively few vertices, squares, or polygons.
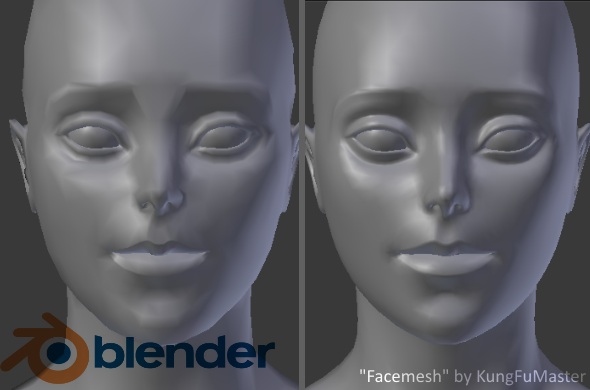
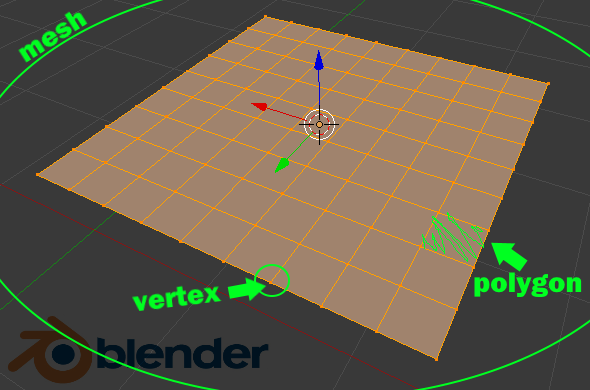
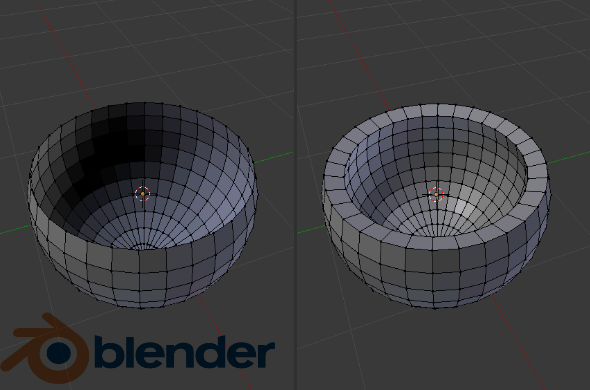
Subdivision automatically smooths rough blocky or rough surfaces. It’s best to work with as few polygons, squares, and/or vertices as possible, and then subdivide as your final step.
Subdivide (i.e. “Smoothing”)
With the bush of a button, subdivide tools automatically smoothen models by multiplying the number of squares, triangles, and/or vertices a design has.
When building or sculpting a 3D design, it’s best to start with simple shapes. Specifically, shapes that contain as few vertices, polygons, or squares as possible. The more of these you add, the harder your model becomes to work with. When you start out, don’t add extra vertices just to make your model look smooth. Instead, start with a “blocky” model, and smooth it out during its final stage by using subdivide tools.
In Blender, there is a sophisticated “Subdivision Surface Modifier” you can use to smooth out a rough model. To use the Subdivision Surface modifier:
1. Create or Import your model
2. Right click on it
3. Click on the “Modifier” wrench in the bottom right menu.
4. Click “Subdivision surface” on the “Modifier” drop down menu. This creates a subdivided preview of how your model looks “smoothed out.”
5. In “Object Mode,” click “Apply.”
Mirror, mirror on the wall… can I really make a whole model from just one half? YES.
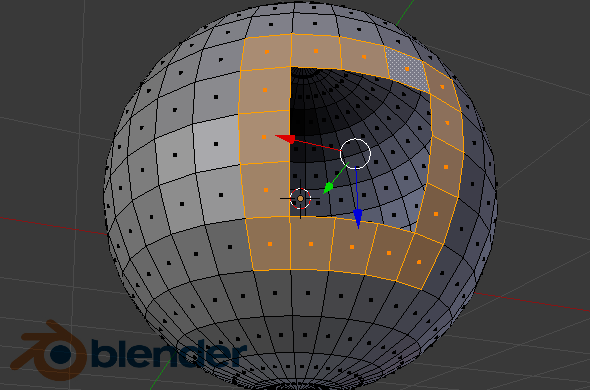
Symmetry
Nearly all sculpting software, from Meshmixer to Blender to 123D Sculpt, contains symmetry features. These are usually in the form of a button on the main menu.
In Blender, the most commonly used one is the “Mirror” modifier button (located in the “Modifier” drop down menu.)
Meshmixer is another free software to consider, since it contains four main symmetry options: one under the “Select” button, one under the Sculpt Button, and one in the Sculpt button’s paint mode (i.e. Vertice Paint.) This means that you can select surfaces symmetrically (i.e. selecting both nostrils at the same time), and sculpt symmetrically (i.e. if smoothen one nostril, you also smoothen the other. Live!) The third symmetry option is called “Mirror,” and it “mirrors” one side of your existing mesh to match the other side. For more on Meshmixer, go see our previous Tutorial Thursday feature.
On 123D Sculpt, the symmetry button is located on the top menu, five buttons from the left. It looks like a sideways M.

3D sculpting can be a way to “nudge,” drag, and pull your model into how you want it to look…
Sculpt
Sculpting tools are increasingly being included in more technical builder-style software. If you want to gently “nudge” or pull at vertices for a more organic look, check for a sculpt tool menu. If your software of choice is anything like Trimble SketchUp, you might not find one. In that case, you can use Blender’s sculpt menu to gently sculpt without significantly altering your vertices.
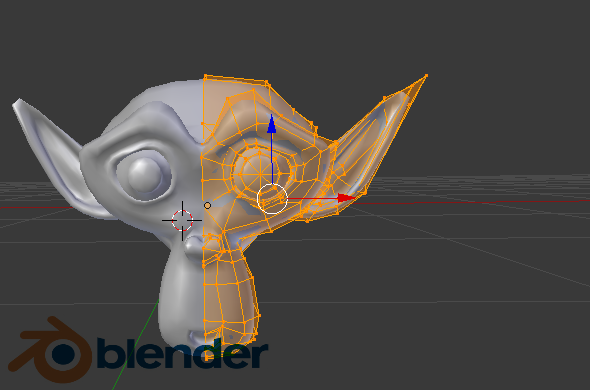
This is not a boolean. This hole was made from squares, and I deleted the inside. A lot of boolean tools don’t work on complex meshes, so “building a hole” instead of “breaking a hole” might be the best idea for your model.
“Boolean”/“Hole Making”
Most free boolean (i.e. hole making) features don’t work as well as professional ones.
A lot of free 3D design software, including Meshmixer and Blender, have boolean features that work in simple models with few vertices, but crash or don’t function as nicely on more complex surfaces.
On Blender, one workaround is to “build” a hole instead of “breaking” a hole. To “build” a hole, align your vertices into the shape of a hole, or as squares around a center square/polygon. Delete the center square, and then thicken the strcture by using a thicken modifier. Of course, this won’t help if your model has bad topology or too many vertices/squares/triangles/polygons.
Meshmixer has a “pattern” boolean feature that makes several printable holes at the same time. No building needed. It functions best on models with simple topology or relatively few vertices/squares/triangles/polygons– using it on a complex surface results in lag, and the results usually aren’t as nice.
To access the pattern feature on Meshmixer, click the “EDIT” button and select “Making Pattern:”
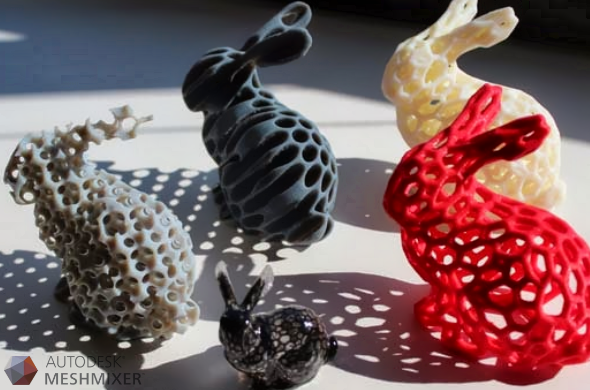
This is what patterns look like when printed. To access this feature on Meshmixer: EDIT => MAKE PATTERN.
Which time-saving 3D print software tools do you like best?