2D-to-3D Converter: How to Turn Logos and Text into 3D Models & 3D Prints
We receive a lot of questions about how users can turn any two-dimensional objects (such as 2D logos, images, photos, text, etc.) into three-dimensional, 3D-printable objects. Luckily, this is easier to achieve than it sounds.
The first step is to take a look at what kind of 2D files we are talking about. Logos and text files are very different from photos. In this blog post we’ll concentrate on logos and text. If you’re more interested in photos, click here for another tutorial.
To turn logos and text into 3D models, we use the freemium online tool Selva 3D. You simply upload your 2D image/logo/text on their website and they provide you with the printable 3D model. We were really impressed by the high quality and recognition capabilities of this app, so we’re going to focus on this one for this tutorial. However, many of these tips and tricks are also applicable to other websites or tools.
1. Clean Up the 2D Image
Before you start thinking about the 3D model, take a moment to look at your 2D image. Make sure that the logo is ‘cleaned up’. A good contrast between the text (or logo) and the background is essential for a successful transformation into the third dimension. Once you start using a converter app like Selva 3D, you need to make it as easy as possible for the app to understand what’s part of your logo and what isn’t.
Let’s get started with some examples. These images below aren’t that great.
The image on the left does not have a consistent background. The sides of the image are very bright while the center has a dark patch. Additionally the photo was taken from a bad angle, making the logo look warped, and the slogan at the bottom and the top right corner were not cut away. The image on the right is somewhat better: the contrast between the text and the background is consistent and the angle is correct. The only disturbing factor is that the lines above and under the text were not cut away. As a consequence the 3D files of these two logos will look rather messy:
So let’s look for a better logo. The image below is what we’re talking about. There’s nothing better than a really clean high contrast image.
This logo will give us a great 3D-printable model.
2. Use High Image Size/Resolution
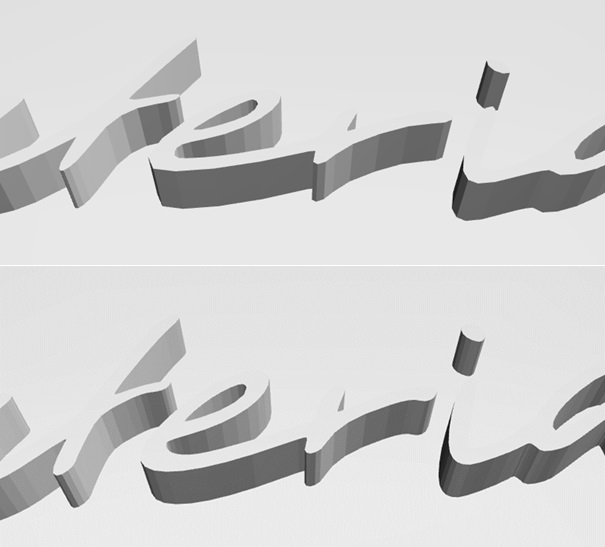
Even the same logo can give different quality results based on its image size. In the two examples below we converted a logo with a pixel size of 300 x 58 and one with a resolution of 1200 x 227 from 2D to 3D.
At first it seems like there isn’t a big difference. But if you start comparing the details of the letters — looking especially at the curves of the letters — you’ll notice that the edges of the first 3D model (which is based on the low resolution image) are rougher. The high-resolution logo (the second image) led to smoother results.
3. Think about Colors in Your Image
So far it was easy for the app to recognize our 2D logo and turn it into a 3D model because there were only two colors in play: white for the background and dark blue for the logo’s text. More colors, however, can cause some confusion.
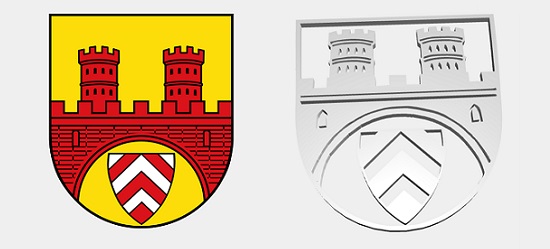
The following image is the coat of arms of the German city of Bielefeld. It’s a great example to see how colors get transformed in a 3D file. We can already predict that the app will detect white as a background and black as part of the logo. But what about the red and yellow parts?

Coat of Arms of Bielefeld – Source: Wikipedia
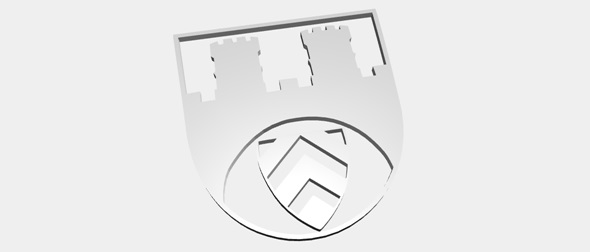
As you can see below, yellow was also seen as part of the background since it is a quite bright color and comes close to white. Red, however, was seen as a darker color that is closer to black than white. For us this means that we’ll lose some of the details in the image (such as the lines of the bridges and windows).
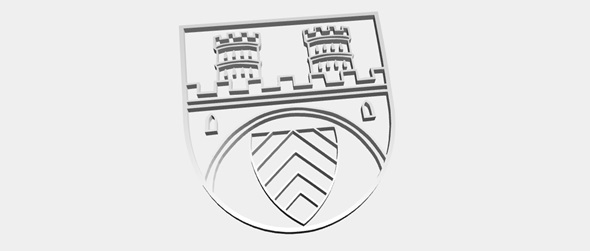
You can tell the app that you want the red color to be seen as part of the background by changing the ‘Threshold’ controller. Changing it from 0.6 to 0.4 makes the details come back to life.
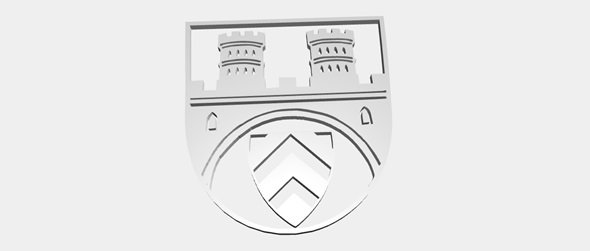
If you want to go a bit further you can also manipulate the original 2D image in order to control which parts of the 3D model will stand out. We transformed some black parts into white, uploaded the image and set the threshold back to 6.0. This way the red areas can stand out and the windows and lines can still be seen (since they’re now recognized as part of the background).
4. Finishing Up, Downloading, and 3D Printing Your Logo
Wouldn’t it be cool to print your logo? We’re nearly there! Let’s take a look at the last steps you should keep in mind.
- It’s quite likely that you will have a 3D model where the individual elements are not connected to one another. If you print the model of the i.materialise logo for example, all the letters and dots would be floating around and there wouldn’t be an element that holds everything together. By clicking on ‘Use this model to create something cooler!’ you can put your model onto a base platform or product (like an iPhone case or a trophy). This will make your logo 3D printable
- You can now download your file. STL is the most common file format for 3D printing and luckily Selva3D lets you download your model in this format. You can download several high quality .STL files for free. If you need more models, you can purchase some credits within the app. Downloading your file makes sense if you want to continue to edit it in another 3D modeling software
- Even without downloading it, you can print your design via our online 3D printing service. Click on ‘Print this with i.materialise’ to be redirected to our website. You will immediately see how much it will cost to 3D print your logo in any of 100+ materials and finishes
Recommended Articles
No related posts.


