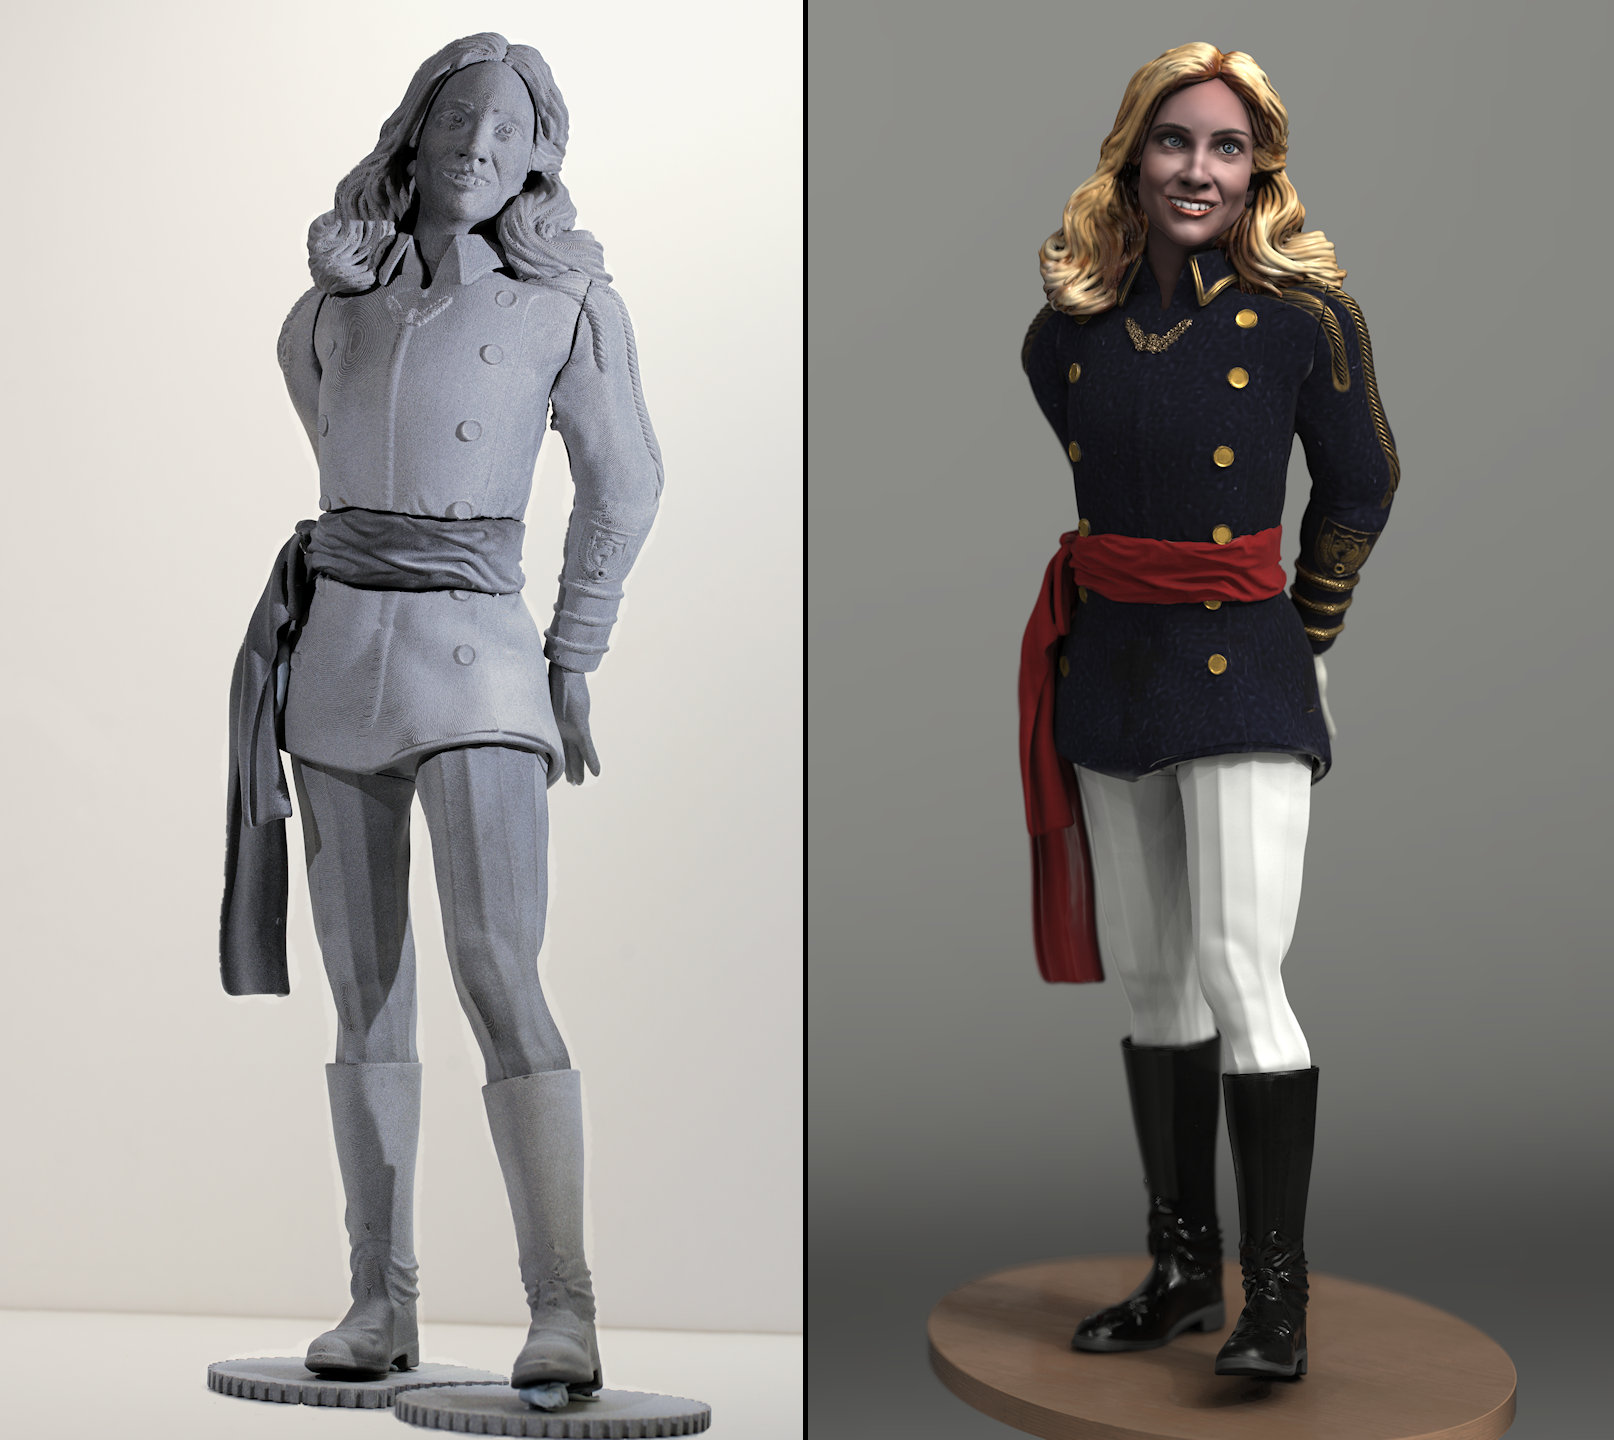
Just received the Multi-Jet Fusion (MJF) printed parts for the Wilma 4.1 project and excited to see how they stack up against the original Digital Clay Sculpt!
𝗙𝗶𝗿𝘀𝘁 𝗜𝗺𝗽𝗿𝗲𝘀𝘀𝗶𝗼𝗻𝘀: Really pleased with the level of detail captured in the prints. You can see the nuances from the digital sculpt have translated well. One thing to note is some prominent striations on the surface, which will need attention during the painting phase.
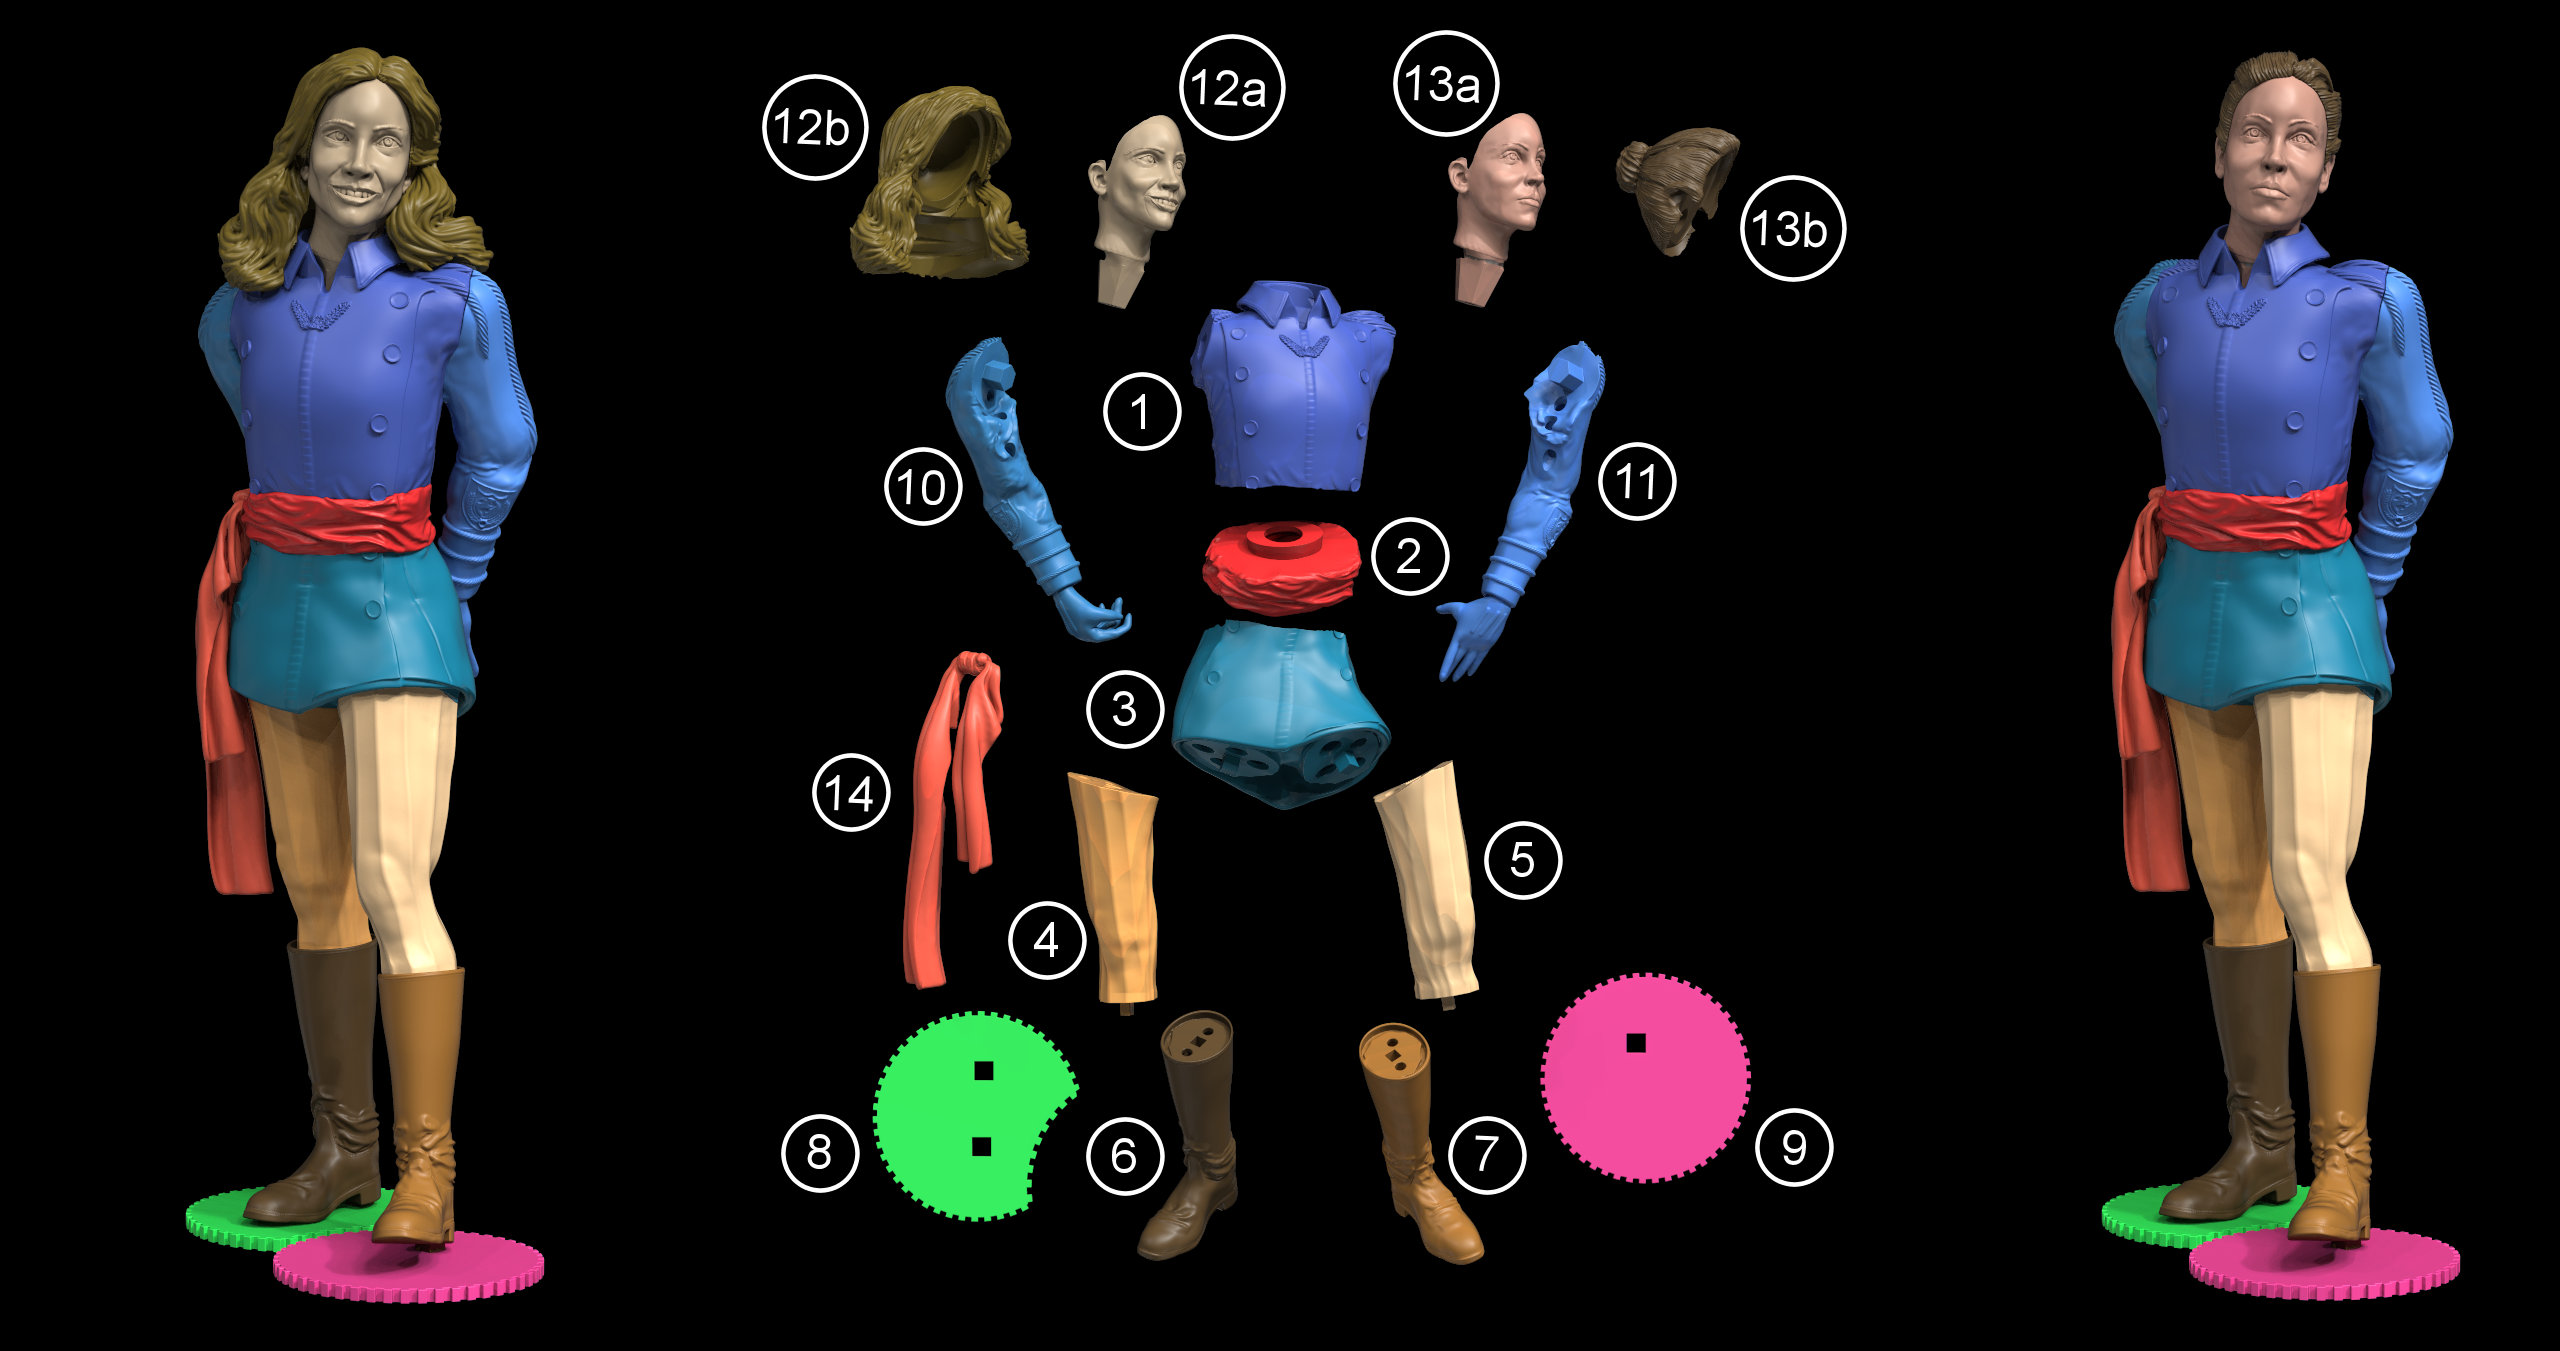
𝗔𝘀𝘀𝗲𝗺𝗯𝗹𝘆 𝗖𝗵𝗲𝗰𝗸: When dry-fitting the main body components, it’s clear that all the complex joint surfaces have printed accurately. Everything fits together smoothly without any clashes – a great result!
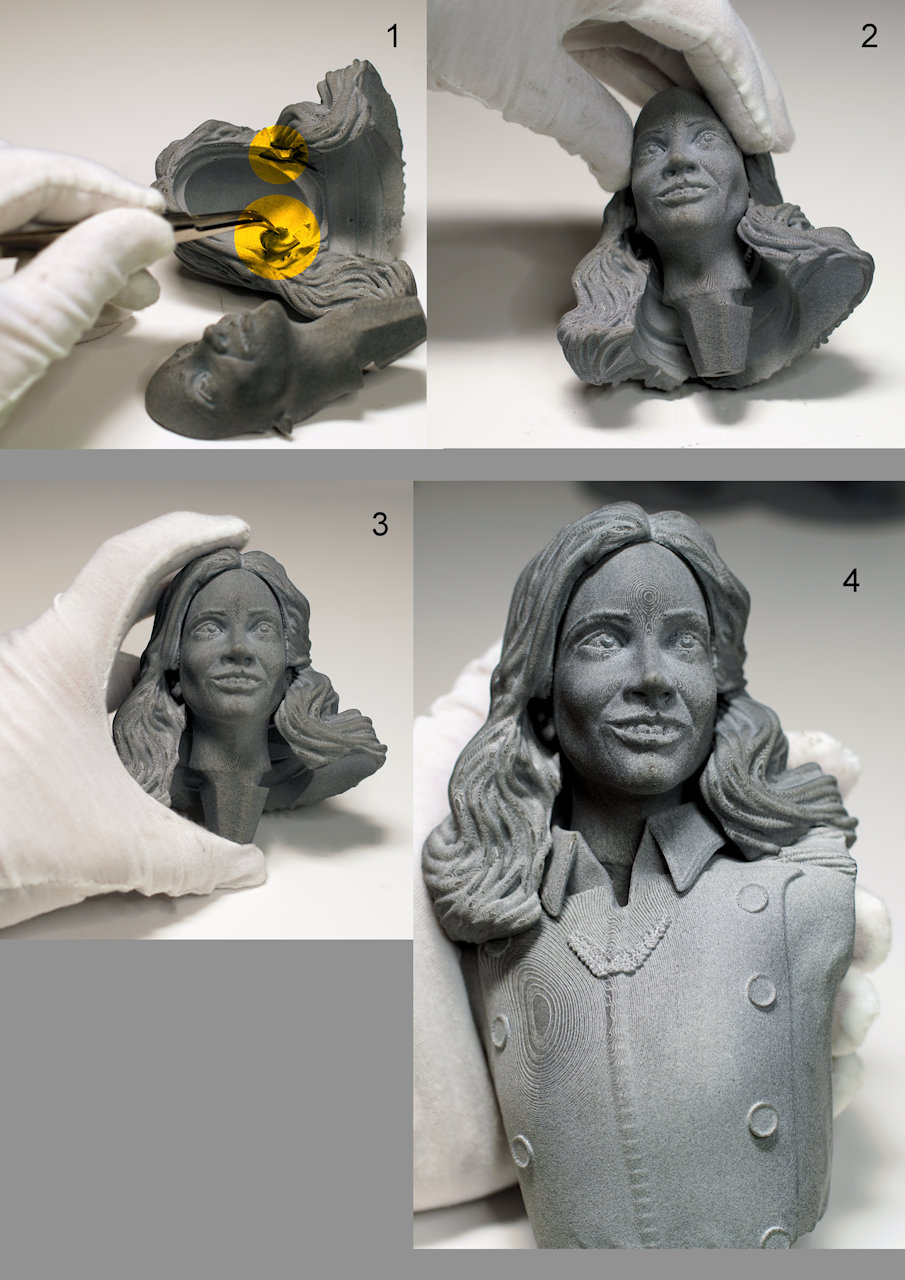
𝗛𝗲𝗮𝗱 𝗮𝗻𝗱 𝗛𝗮𝗶𝗿 𝗖𝗵𝗮𝗹𝗹𝗲𝗻𝗴𝗲: As expected, connecting the detailed head sculpt to the organic hair sculpt presented a bit of a hurdle. The ears were causing interference. To resolve this for now, I carefully removed the ears from the head sculpt. After this adjustment, the head and hair fit together perfectly. This clean fit is crucial to minimise potential scratches and damage when the parts are being painted in detail.
𝗦𝘁𝗿𝗮𝘁𝗲𝗴𝗶𝗰 𝗘𝗮𝗿 𝗥𝗲𝗮𝘁𝘁𝗮𝗰𝗵𝗺𝗲𝗻𝘁: As you can see in image 02, I’ve already planned how to reattach the ears securely when the final bonding happens. The hair sculpt even has handy little pockets designed to temporarily hold the ears in place!
𝗙𝘂𝘁𝘂𝗿𝗲-𝗣𝗿𝗼𝗼𝗳𝗶𝗻𝗴 𝘁𝗵𝗲 𝗗𝗲𝘀𝗶𝗴𝗻: Thinking ahead to a potential future where this model might be available for purchase, I’ve gone back into 3DCoat and added score lines at the base of the ears on the head sculpt. This should make it easier to either cleanly detach the ears or potentially act as a living hinge during assembly.
Overall, I’m really happy with how this test fitting has come together and how well 3DCoat’s tools have facilitated the creation of these digital parts for 3D printing. Onwards to the next stage!