Qubicle 3.0 Review and Tutorial: 3D Printing With a Voxel Editor
Qubicle 3.0 is a voxel editor that enables you to easily create 3D models with a unique blocky style. The software was just launched on steam and comes with a 3D printing function. So if 3D modeling & 3D printing in voxel style is your thing, this software review is for you!
About the Voxel Editor, Qubicle
Qubicle is developed by Minddesk Software GmbH, an independent German software studio. Minddesk focuses on user-friendly voxel tools for 3D modeling and game design. Their newest version (3.0) of Qubicle was just officially released on Steam, but the first roots of the program reach all the way back to 2005.
In 2005, before Minecraft was a thing and before anybody knew what a voxel was, design student Tim Wesoly had the idea to create 3D models made of single-color cubes. (Un)fortunately there wasn’t a tool that could easily create the style he had in mind. So, being a hobby developer since his early childhood days he simply started to create his own tool. The first version was called “Qubes”, and was showcased at his university in the summer of 2005. The positive feedback inspired him to continue his project.
Today, after more than 10 years of hard work, Qubicle is one of the most popular voxel editors used by most game developers and 3D modelers. Some recent video games wouldn’t have been possible without the help of Qubicle, including hits like Crossy Road and Shooty Skies.
Main Advantages of Qubicle
- Easy To Use – Learn all the basics and get started within an hour. The clear and clean interface and easy-to-use tools make learning how to model in 3D as simple as it gets. Working with Qubicle is like using a pixel editor – just in 3D. Do you know how to use a pencil or an eraser? Then you already know the basics!
- Professional Software – Qubicle is designed for professionals. Games like Crossy Road and Shooty Skies were completely designed with Qubicle.
- It’s Fun – Don’t worry about complex 3D techniques. Qubicle is a fast and fun 3D editor based on charmingly retro voxels and a handful of easy rules. You can keep it simple: just start creating and have fun!
How to Get Started With Qubicle
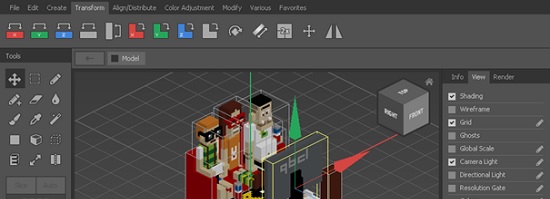
Step 1: Navigation
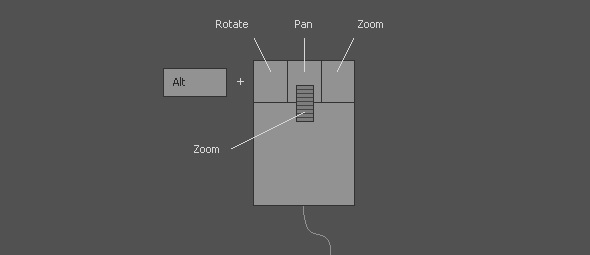
For the first step, open one of the sample 3D models and familiarize yourself with navigating in a 3D space. Press the ALT keyboard key and click the LEFT mouse button to rotate, the RIGHT mouse button to zoom, or the WHEEL to pan.
Step 2: Object Types
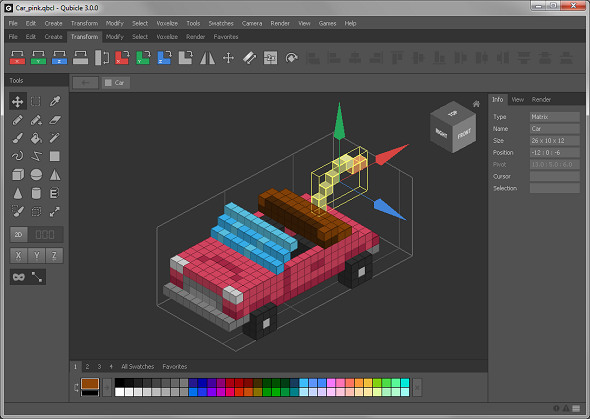
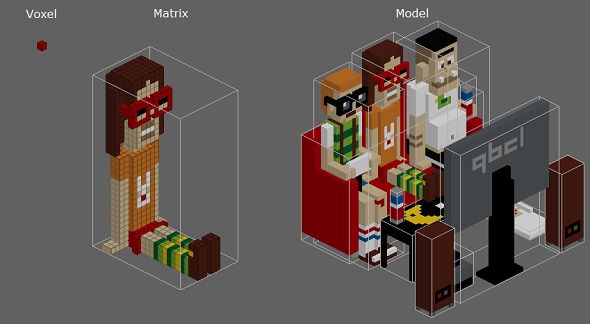
In Qubicle there are three types of objects: Voxel, Matrix, and Models.
- A Voxel is the short form for volumetric pixel – it’s basically a single colored cube.
- A Matrix is a three-dimensional grid of voxels. Matrices have a maximum size of 1024x512x1024. Try to keep your matrices as small as possible. Using large matrices over 128³ will decrease Qubicle’s performance. Instead, you can use several small matrices to build a bigger model.
- A Model is always the root object of your file. It does not transform or has a certain size, it just is. You can place as many objects in a model as you like.
Step 3: Entering the Matrix (Editor)
In order to edit the individual voxels in a matrix you need the Matrix Editor. Inside the Matrix Editor you can draw, erase, select and modify voxels.
Simply double-click the voxels or the bounding box of a matrix in order to enter it. Leave it by double-clicking on an empty area.
Step 4: Drawing Tools
Most tools can only be used inside the Matrix Editor. For all tools the status bar at the bottom offers valuable info on how to use them. If you move your mouse over a toolbar button, it will tell you the tool’s basic purpose. Qubicle 3.0 offers 13 different tools to draw, erase and attach voxels:
- Pencil, Eraser, Attach and Paint Tool: The Pencil draws voxels, the Eraser deletes them, the Attach Tool attaches a new voxel to a side of an existing one and finally the Paint tool paints voxels – without creating new ones.
- Freehand, Line and Rectangle Tool: The basic behavior of these three tools is drawing their shape: the Freehand Tool draws individual voxels, the Line Tool draws straight lines and the Rectangle Tool draws rectangles.
- Standard Primitive Tools: Standard Primitive Tools include the Box, Sphere, Cone, Pyramid and Cylinder
- Paint Bucket Tool: The primary task of the Paint Bucket is to fill all contiguous voxels that have the same color as the clicked one.
By knowing these basics you can already start creating your first objects. If you want to learn more about selection tools, auxiliary tools, and modifiers, you can take a look at the official Qubicle knowledge base here.
3D Printing with Qubicle
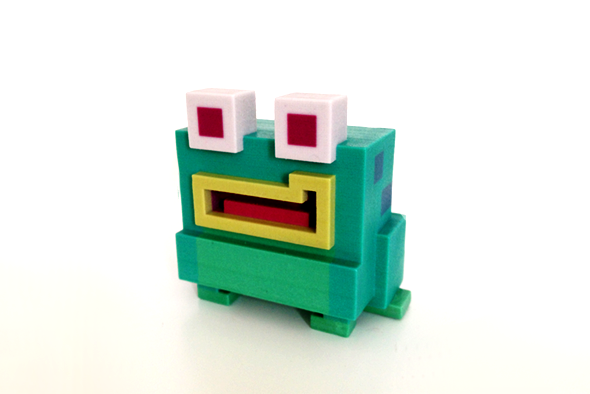
3D printing with Qubicle is very simple, even if you don’t have access to a 3D printer. All you need is your 3D model and an internet connection. To document the workflow, we made a test print with one of our built-in test models – the frog.
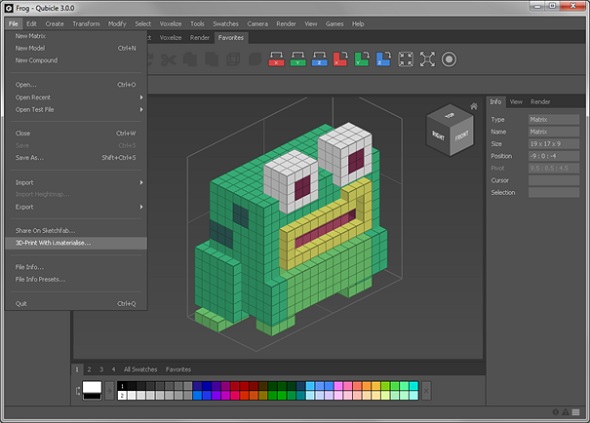
All you need to do is just click on File and select 3D Print With i.materialise from the main menu. Qubicle will generate a mesh, open your browser, and upload your design to the i.materialise website. Here you can pick one of 20 different materials and over 100 finishes and adjust the scale of your 3D print.
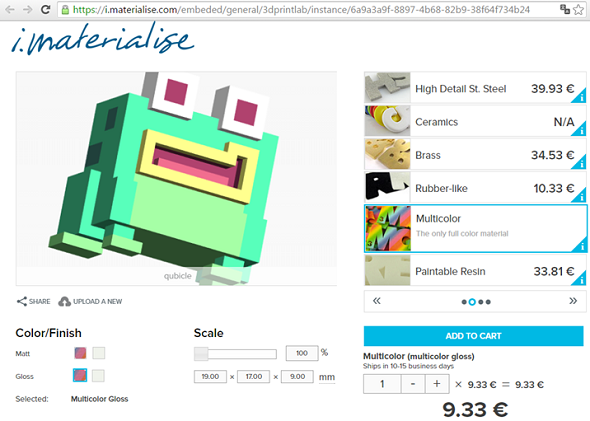
For a great color effect, we advise you to select our multicolor material (see example below). We will then print the 3D model and send it to your doorstep!
So did this voxel editor catch your eye? Then you should visit the Steam page of Qubicle and learn more about this fantastic software. If you want to learn more about 3D modeling in general, take a look at our lift of the top 9 free & beginner-friendly 3D modeling programs here, or check out the 25 most popular software packages in the 3D printing community.