How 3D Printing in Multiple Colors Works
Multicolor printing is a fascinating 3D printing technique, as it allows you to make your 3D file truly come alive in full color. Today we will take a more detailed look at this technology and see how the 3D printer manages to “paint” the model during the printing process.
Our Multicolor material is perfect for visual models that need more than just one color. Typically, these are models you put on your desk or on a shelf such as architectural scale models, figurines, sculptors and awards. Many users have asked us if these models were hand-painted after the printing process, and were surprised to hear that the 3D printer itself did all of the coloring. That’s why we want to shed some light on the 3D printing process of this extraordinary material.
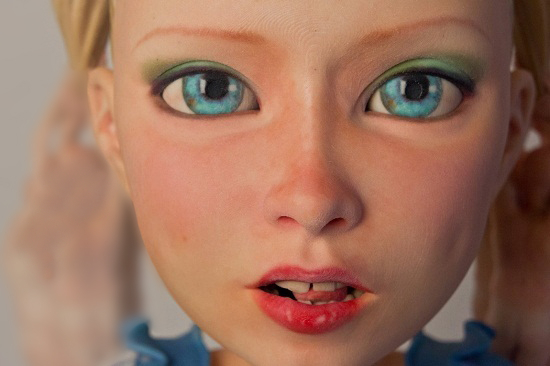
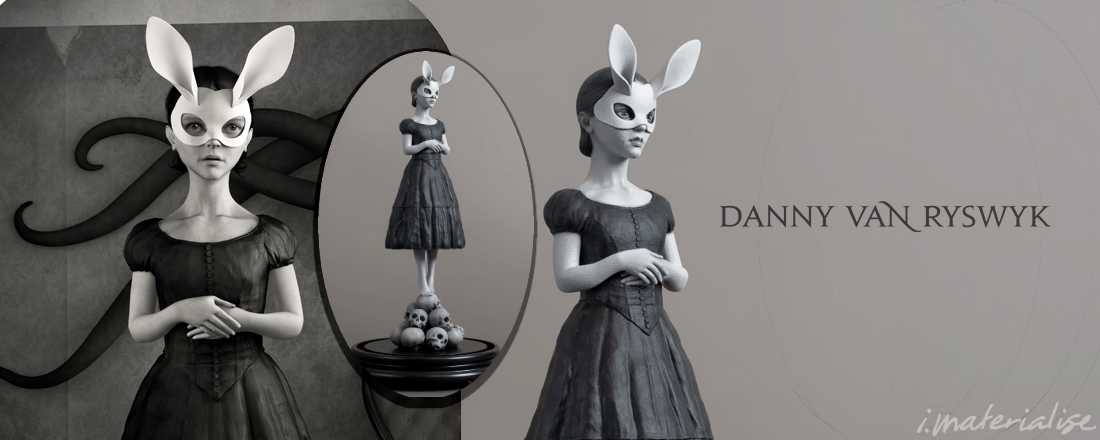
Human face by Eric van Straaten. 3D printed in Multicolor
The Technology: ColorJet Printing
The technology behind our Multicolor material is known as ColorJet 3D printing. This technique builds up the model from a granular powder that is glued together – layer by layer, bottom to top. The technology was first developed at the Massachusetts Institute of Technology (MIT) in 1993 and was known as ZPrinting. In 1995, Z Corporation obtained an exclusive license for the technology. Materialise has been using this technology since 2007.
The Base Material: Sandstone Powder
Unlike with most home printers, ColorJet printers do not use filament. In fact, the 3D-printed parts are constructed from a very fine, granular sandstone powder. It is important to note that the powder used by 3D printers cannot be just any kind of powder. Since it will be used for ultra-thin printing layers, the powder must be perfectly shaped in order to even out. Consider rocks and marbles: you could easily put rocks on top of each other to build a pyramid. However, building a pyramid with marbles would be way more difficult, as the perfectly shaped spheres would fail to stay in place and your pyramid wouldn’t stand a chance. Similar to the marbles, the sandstone powder needs to have the perfect shape since each and every printing layer needs to have exactly the same height – even if we’re talking about microns here.
The Printing Process
To create your 3D print, the printer glues the powder together. So here’s how it works: a super-thin layer of sandstone powder is spread out by a roller. And then the magic happens: a print head places tiny drops of glue on the areas of the layer that are part of your design. The 3D printer will continue to spread out one layer of powder after another, and the print head will systematically glue the correct spots of each layer together. But… where is the color?
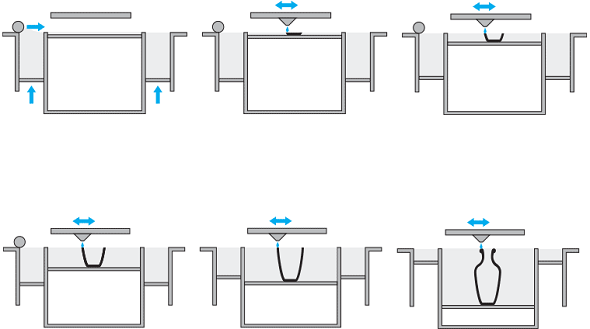
Section view of the printing process
The Coloring Process: 4 Types of Colored Glue
The coloring of your model is done by combining four different pre-colored glues to match the colors that have been requested. These glues will only be placed on the surfaces of the model, while the interior parts will be glued together with clear glue.
The colored glue can of course print in more than four colors. They can be mixed and printed in up to 16.7 million different colors to be precise. Just like a regular 2D printer, the four base colors are Cyan, Magenta, Yellow, and Key (Black), or CMYK for short.
CMYK works pretty much like the box of paints you used back in school. If you don’t have the color of paint you’re looking for, you need to mix two existing colors together. Adding colors together usually means that the new color will be slightly darker (when you mix yellow and black, it follows that the resulting color simply cannot be brighter than yellow). That’s why this system is called a ‘subtractive color model’.
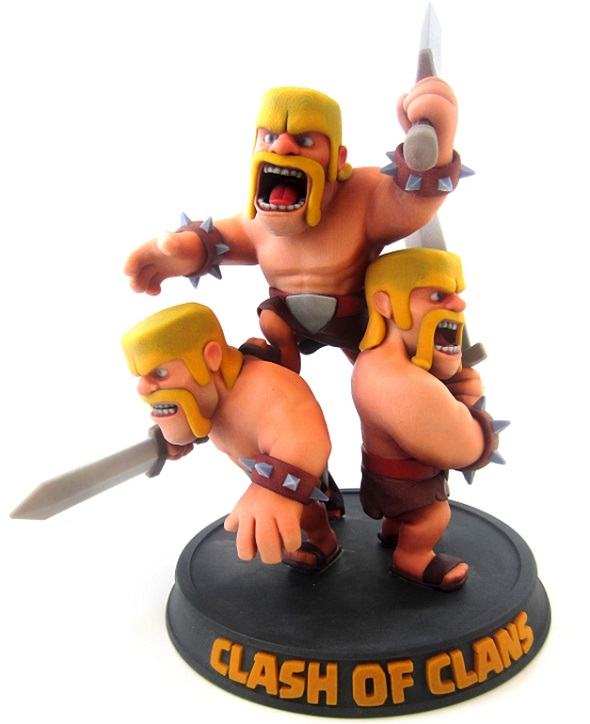
Clash of Clans Multicolor 3D print by Supercell
After the Printing: the Finishing Process
One the printing is done, your model still isn’t ready to be shipped right away. First, we need to dig out the glued model from the box of un-glued powder and clean it carefully. Since it is still quite brittle it needs to be put in a bath of superglue to gain some strength. Next, it will be sprayed with a UV coating to prevent de-coloration by sunlight. That’s what we call our ‘matte’ finish.
You can also go for a ‘gloss’ finish which is achieved by applying a thicker UV coating. This option will give your model a shinier surface. In general, a gloss finish creates an object with more vivid colors, while the colors of a matte object won’t be as shiny. Take a look at the following prints to get a better understanding of the difference between these two finishes:
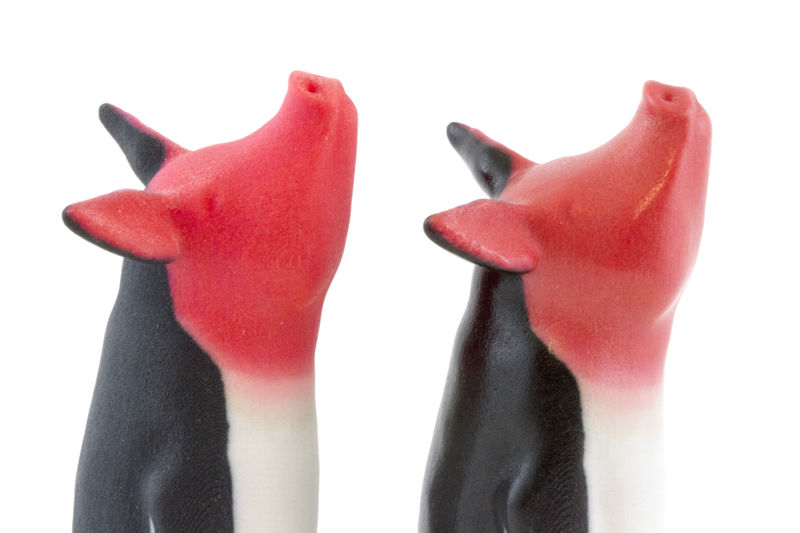
Matte (left) and gloss (right) next to each other
How to Get a High-Quality Multicolor 3D Print
Consumers can simply order their multicolor 3D prints with our online 3D printing service. This brings entirely new possibilities to designers, sculptors, architects, makers and entrepreneurs; and it also opens new doors to individualized manufacturing.
At i.materialise we’re committed to letting you make the future. If you would like to print your design in Multicolor or one of our 100+ other materials and finishes, upload your 3D file here and see the price of your model within seconds. If you want to learn more about this material first, take a look at our blog post “How to Get the Perfect Multicolor 3D Print”.
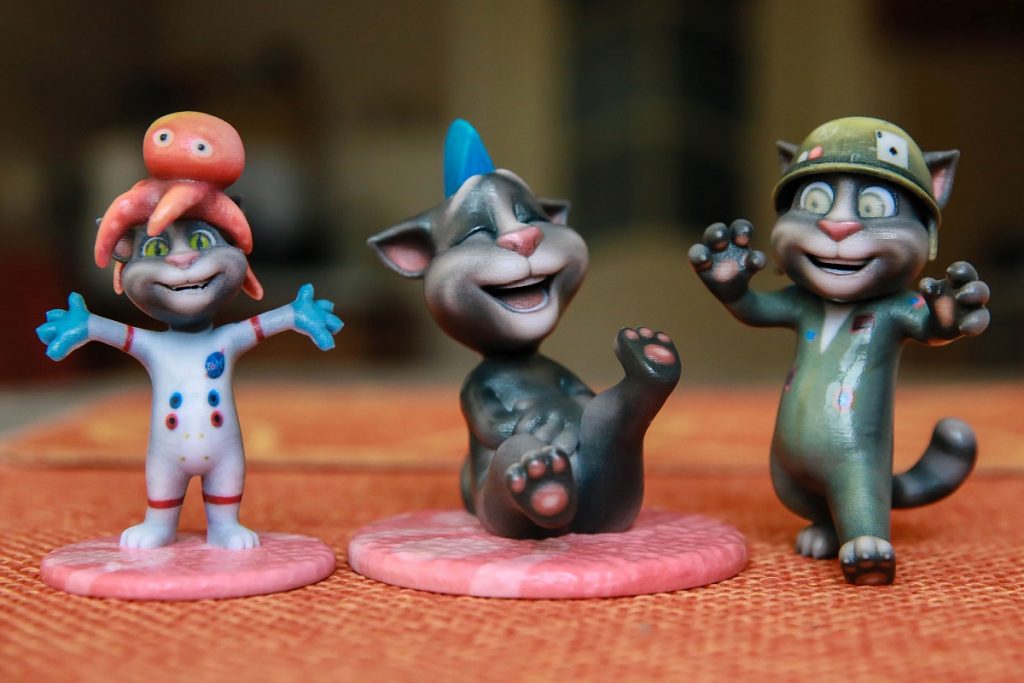
Featured image: Talking Tom by Toyze