Gold 3D Printing Explained: Technology, Alloys, Colors, Design Tips
3D printing is changing the way goldsmiths work and design. More and more people are asking us how 3D printed jewelry items in gold look and feel. In this article, we explain how gold items are created, the difference between 14k and 18k, its various colors, and how to model your 3D design to get the perfect gold 3D print!
The Technology: It’s All Based on Wax
Instead of printing your gold item directly, we use wax 3D printing and lost wax casting to build your design. The wax printing process is a type of Stereolithography that uses a wax-like resin. Support structures are printed along with the model to make sure the item does not fall apart. These support structures are automatically generated and then manually removed after the printing process.
The wax cast is subsequently covered in a fine plaster. When the plaster solidifies, it is put in an oven until the wax is completely burned off. The gold is then poured into the empty cast, thus creating a 3D printed gold item. In the final step of this process, the item is polished and finished manually.

Wax 3D printing and lost wax casting are used to create a gold item.
14k or 18k: The Amount of Gold Matters
A pure gold item (composed of 100% gold) is too soft for durable jewelry. With this in mind, jewel makers and goldsmiths usually mix pure gold with other metals, typically silver, copper, or zinc, in order to make it stronger.
The karat (often just written as “k”) indicates the amount of pure gold in the metal: the higher the karat, the larger the percentage of pure gold in the metal. For instance, 100% of pure gold is equal to 24k. However, as already pointed out, an object made of 24k would be too soft. This is why the amount of gold needs to be reduced: while 18k contains 75.2% pure gold, which is the standard in Europe, 14k gold only contains 58.5% of pure gold and is somewhat less expensive. In fact, 14k gold is the most popular choice for gold jewelry in the United States.

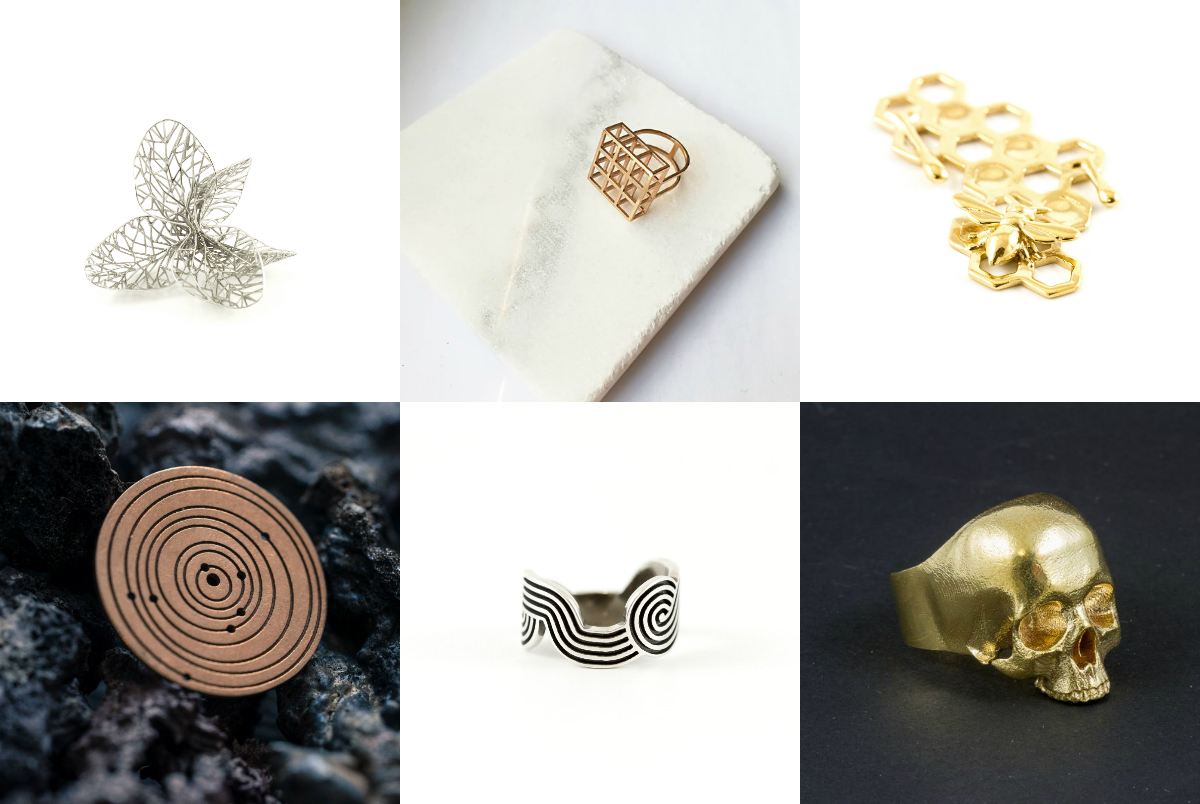
Tulip Shell Pendant by Vulcan Jewelry. Printed in 14k red gold.

Rod of Asclepius Pendant Mini by Marcus Ritland. Printed in 14k yellow gold.
Yellow, White, and Red Gold: The Amount of Silver, Copper, and Zinc Matters
Since neither 14k nor 18k gold contains 100% pure gold, the metals we choose to strengthen pieces of jewelry (silver, copper, and zinc) have an impact on the color of the final item. As a result, gold can be offered in several colors: white, yellow, and red.
Take a look at the following examples of the color difference depending on the amount of pure gold as well as the amount and type of metal alloy:
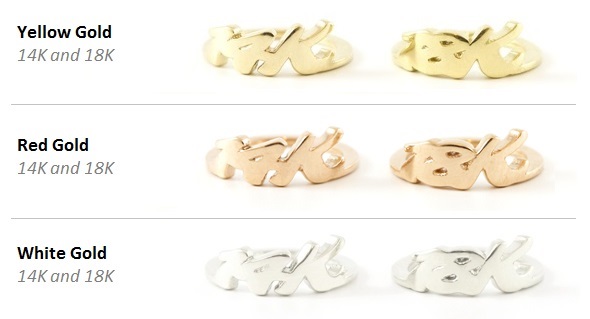
Our three gold color options: yellow gold, red gold, and our updated white gold.
White Gold: A Loose Term
The term ‘white gold’ is used very loosely in the jewelry industry to describe karat gold alloys with a whitish hue. The term ‘white gold’ covers a large spectrum of colors that borders or overlaps with pale yellow, tinted brown, and even very pale rose.
To create a white color effect, nickel is often added to the alloy. Since 1 out of 8 people have allergic reactions to nickel, and in order to comply with a European regulation called REACH, we didn’t want to go this way and preferred a slightly yellowish look.
The jewelry industry often conceals these off-white colors by using rhodium plating. It is a common misconception that the color of the rhodium plating, which is seen on many commercial pieces, is actually the color of white gold. In reality, however, rhodium plating will inevitably wear off. So you would need to ask your local jewelry shop to apply a rhodium plating to whiten your model each time it wears off.
Since neither nickel nor rhodium plating were acceptable options, we decided to add palladium, a rare and lustrous silvery-white metal, to the alloy.
Design Tips: Some Things to Remember
- Wall thickness: For most models in gold, the minimum wall thickness is 0.5 mm. However, when making something small, such as the band of a ring, the wall thickness should be at least 1 mm. If the model is too thin, the fragility of the gold might cause the ring to break when you wear it.
- High definition: The resolution of the wax-printing process is very high, so it is important to create and export your model with enough definition to cover the triangles of the original design.
- Hollow models: Gold can also be used to print hollow models. However, keep in mind that you need to incorporate holes or slots, so we can get rid of the unprinted wax resin and make sure that the casting plaster is sufficiently supported. Without these holes, you will not be able to cast your model properly. To prepare your model for casting, make as many holes or slots as possible (at least two holes or slots for each side), each with a minimum diameter of 1.5 mm.

For more essential tips & tricks for designing your gold model, please visit our gold design guide. You can also learn more about 3D-printed jewelry in our blog posts about Desmond Chan’s stunning jewelry collection, Czech jewelry label blueberries, and our ultimate jewelry style guide.