Fusion 360 3D Printing Tutorial
Autodesk Fusion 360 is one of the most popular programs among the 3D printing community, especially for those interested in industrial design. It combines powerful functionalities with a beginner-friendly interface and a relatively easy learning curve. In this tutorial, we will dive deeper into the 3D printing capabilities of Fusion 360. We will learn how to model, edit, prepare and 3D print a Fusion 360 design. So let’s get started!
1. 3D Modeling Rules for 3D Printing
As with any other program, Fusion 360 users need to make sure to stick to certain design rules when it comes to 3D printing. A 3D model might look perfect on your screen, but would not be able to exist as a geometrical object in the real world. This is a problem in particular for programs mostly used by visual artists and game developers. Luckily for us, Fusion 360 is mainly used by industrial designers to create functional parts. That’s why the transition from virtual 3D model to actual 3D print is quite easy with this software.
Nevertheless, keep these rules in mind. Chances are you already respect them in Fusion 360 without even knowing that they exist.
- Wall Thickness: Printers need information about how thick you intend the wall of your object to be (or if you want to print a completely solid model). Therefore, when turning a 3D model into a real 3D print, the wall thickness or volume information of the model is needed. You simply cannot print an object that has a ‘paper-thin’ wall without substance.
- Watertight: A printable model must not have any holes in its surface. Ask yourself the question: if I were to put water inside my model, would it flow out? If that’s the case, then you need to find those holes and close them. Sometimes this process is also called ‘creating a manifold model’
- Grouped Models: While it is possible to export several bodies in a single STL file (so-called grouped models), we recommend you to export one model at a time
2. 3D Printing Commands
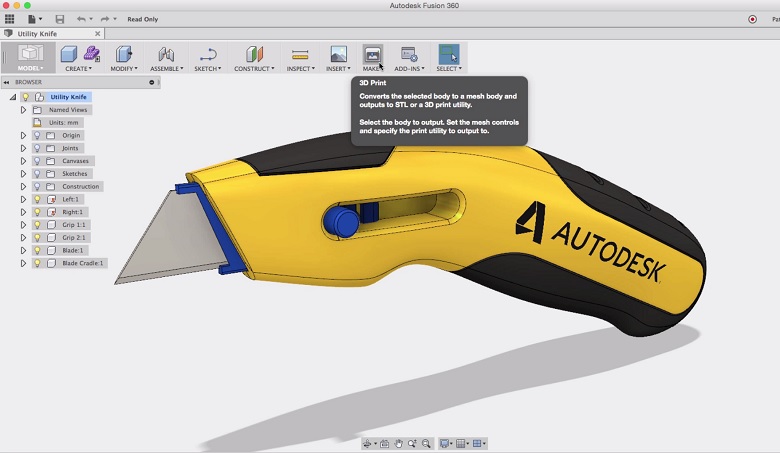
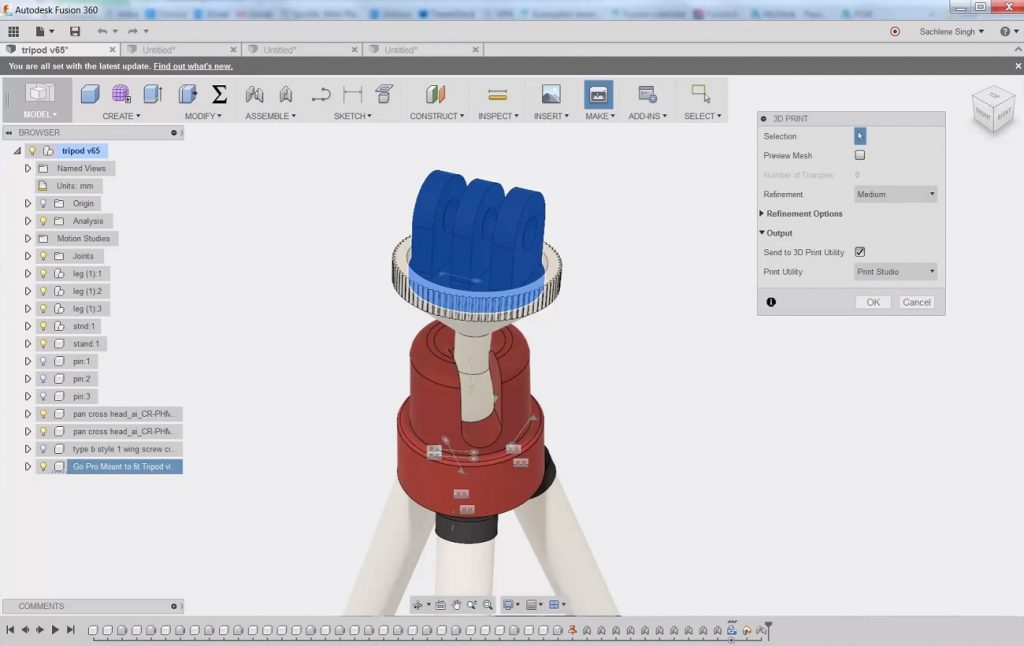
Now that your design is ready for 3D printing, select the MAKE command.
Now select the body that you intend to print by clicking on it.
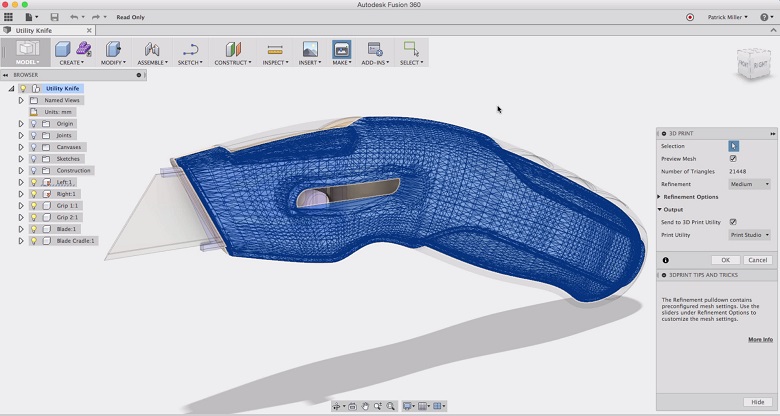
Once selected, you will see the body is previewed as a mesh.
3. File Resolution of 3D Print
On the right-hand side of your screen, you will see a window with additional 3D printing settings to choose from. These are mainly about the resolution of your 3D print. A very low resolution will make the print look somewhat pixelated. A resolution that is too high will make the file very – or even too heavy – to handle.
Besides the pre-defined resolution options of “low, medium or high”, you can click on “Refinement Options” to customize the settings. We recommend a deviation of 0.01 millimeters for 3D printing with i.materialise. This resolution will guarantee a print of the highest possible detail while ensuring that the data won’t be too big.
4. File Type of 3D Print
At the bottom of the settings window, you can decide upon the “output” of your 3D print.
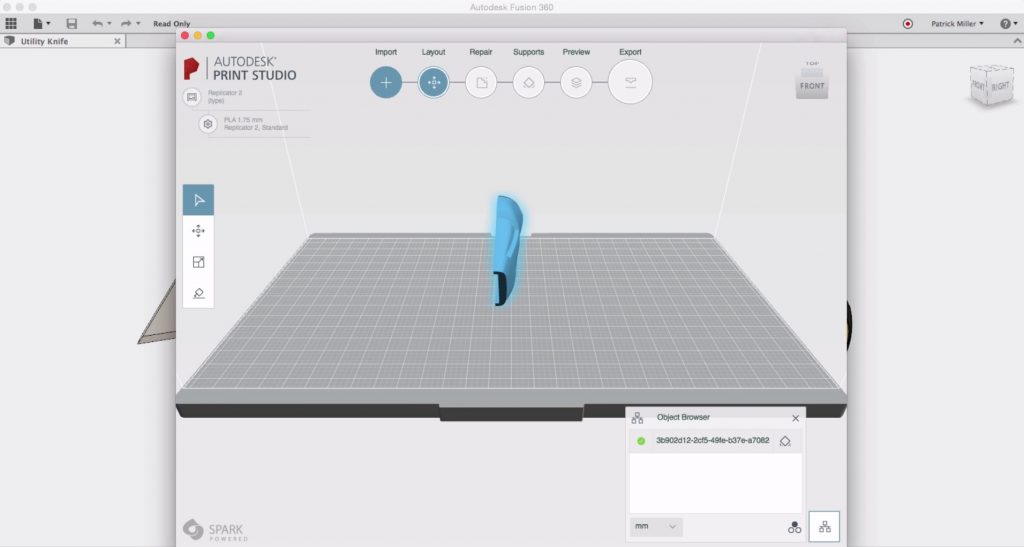
You can either export it as an STL file (the most popular 3D printing file format) or continue with Autodesk’s print studio to prepare this model for the 3D printer. If you go for the latter option, the selected body will be exported from Fusion 360 and imported to a newly opened Autodesk print studio window.
For some more info about importing and exporting STL files in Fusion 360, read the next chapter. To learn more about preparing your 3D print with Autodesk Print Studio, read on from chapter 6.
5. Importing and Exporting STL Files
Fusion 360 offers several ways to export, but also import STL files. The following video tutorial by Autodesk’s Fusion 360 evangelist Sachlene Singh gives a good overview of the different options.
6. Preparing the 3D Print with Autodesk Print Studio
Autodesk Print Studio takes you through the 3D printing process step by step. The first thing you might want to try is the repair tool, which will automatically detect problems and fix them for you. For example, if your model is not watertight and contains holes in its surface, Print Studio’s repair tool will fix this for you.
The next steps of the process are only important if you use home printers. You can optimize rotation to let the software determine how to best position the body on the print pad. Then you can automatically add supports. Keep in mind that for online services like i.materialise, you do not need to add any supports as we will add those automatically if necessary. Most of our 3D printers (especially those printing in Polyamide) do not even require support structure during their printing process.
In the last two steps, you can preview your print and export the file.
7. 3D Printing Online
If you want to print your design in over 100 high-quality materials and finishes, our online 3D printing service might be what you are looking for. With i.materialise you can simply upload your 3D file, choose your favorite material, and get an instantly calculated price quote in seconds. After ordering we’ll also check your file for common 3D modeling issues and let you know if your design still needs some editing.


