3D Printing with SketchUp: 10 Tips and Tricks
SketchUp is one of the most popular 3D modeling & design programs for 3D printing, as we found out from our analysis. However, preparing a SketchUp model for 3D printing can be a little tricky. That’s why we put together a list of 10 simple yet effective tips and tricks to make your SketchUp design 3D printable.
1: Set your Template to Millimeters or Inches
Some simple clicks before getting started will make your life easier: you may want to set your SketchUp template to metric or imperial units. This way, you won’t need to re-scale the printing size of your model later.
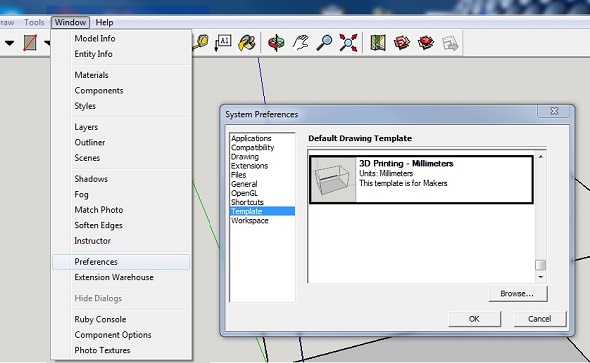
You can change the template by clicking on Window > Preferences > Template and selecting ‘3D Printing – Millimeters’ or ‘3D Printing – Inches’.
2: Install the SketchUp STL Extension
Typically you can save your 3D model as a SketchUp file (SKP). Even though our online 3D printing service accepts these files, you might want to get SketchUp’s free STL Extension. The STL file format is the most commonly used in the 3D printing community and will make it easier to share, print, and edit your design in other software.
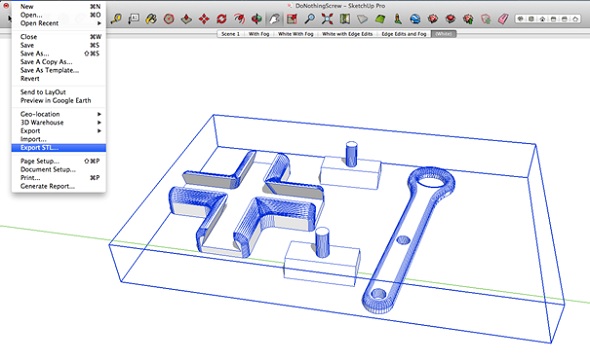
With the SketchUp STL extension installed you can export your model as an STL file. Make sure to select the same unit type that you chose in your template (millimeters or inches) when exporting, and choose the binary file format to reduce the size of your file.
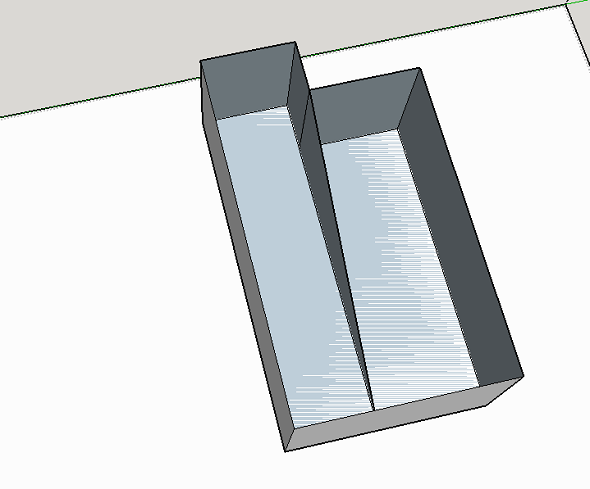
3: Avoid Paper-Thin Surfaces & Set Wall Thicknesses
In order to make your SketchUp model printable, you need to ensure that each and every surface has a wall thickness. Without setting a wall thickness, a 3D printer has no information about how thick or how thin it is supposed to print your part.
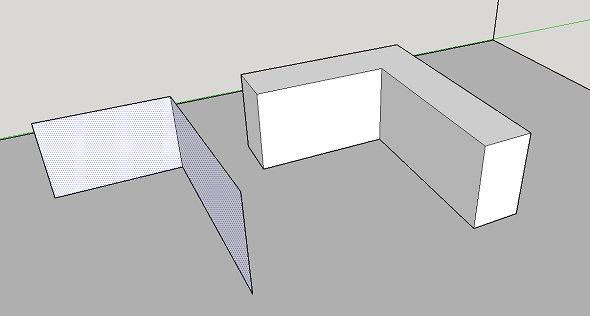
The picture below shows a model with paper-thin surfaces (not printable, left) and a solid object with thick walls (printable, right). If you want to learn more about how thick your walls need to be exactly, make sure to read this blog post.
4: Make Your Model Watertight (Manifold)
A printable model must not feature any holes in its surface. Ask yourself the question: if I were to put water inside my model, would it flow out? If that’s the case you need to find these holes and close them. This is one of the trickiest parts of creating 3D printable models in SketchUp.
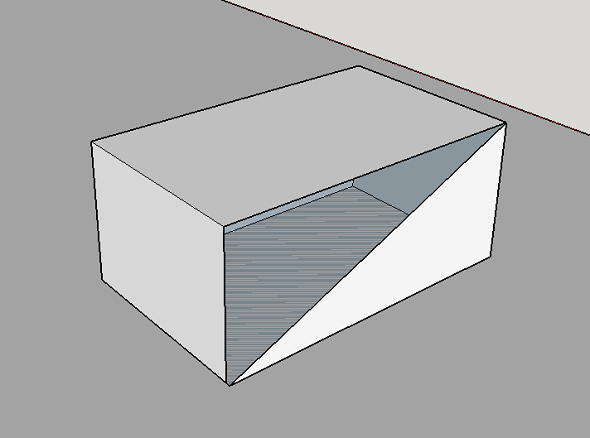
The design below is an example of a model that is not watertight. You can clearly see that there is one big hole on its surface.
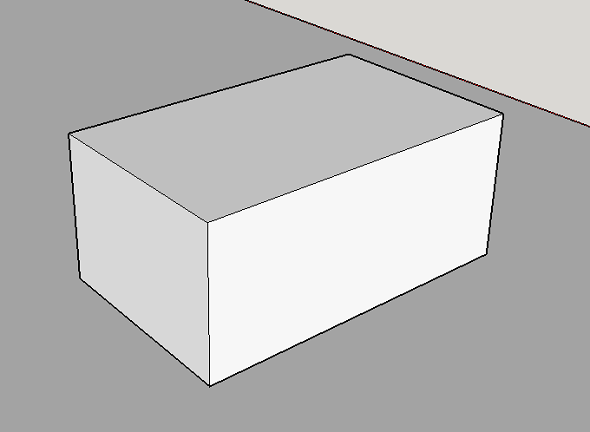
Once this hole is closed (for example by drawing new lines), SketchUp recognizes that the object is solid on the inside and ready for the printer! You can see such a watertight (also referred to as manifold) object below.
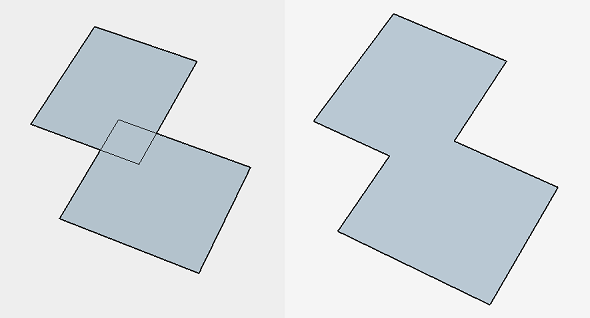
5: Avoid Internal Overlapping
Intersections and walls within your design can make your life difficult since your model needs to have one continuous ‘outer shell’. That’s why it makes sense to think about your model in a 2-dimensional space first.
In the case below, the left shape will not be printable once it is pulled into a 3-dimensional object since it will feature paper-thin walls within the object. The shape on the right, however, won’t be a problem to print once it is pulled into a 3D object because it will only have one ‘shell’. It doesn’t feature paper-thin walls on the inside. We’ll look at an automatic way to create one outer shell later.
6: Check if Your Model Is Solid
Creating watertight models with one continuous outside can be tough sometimes. Luckily SketchUp lets you check if you made any mistakes.
Here’s how it works:
- Triple-click on your model with the select tool (this will select everything).
- Right-click on your object and select ‘Make Group’.
- Right-click on your object again and select ‘Entity Info’.
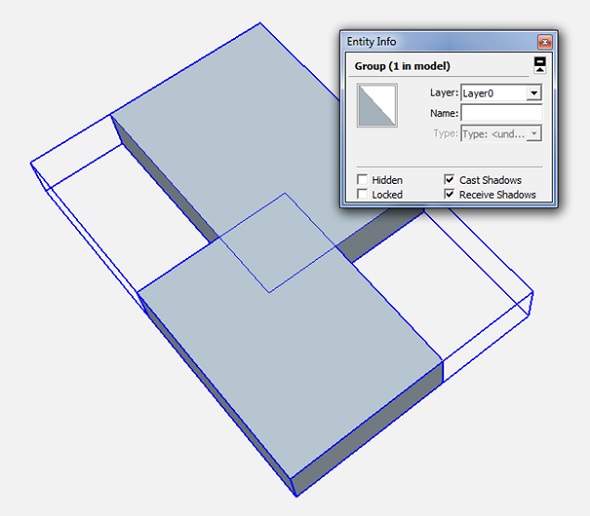
If you designed an object with holes (not watertight) and internal intersection (not in one shell) the Entity Info window will say ‘Group’. This means that your model is not printable and you’ll have to check it again. Right-click on it and select ‘Explode’ to re-edit the components.
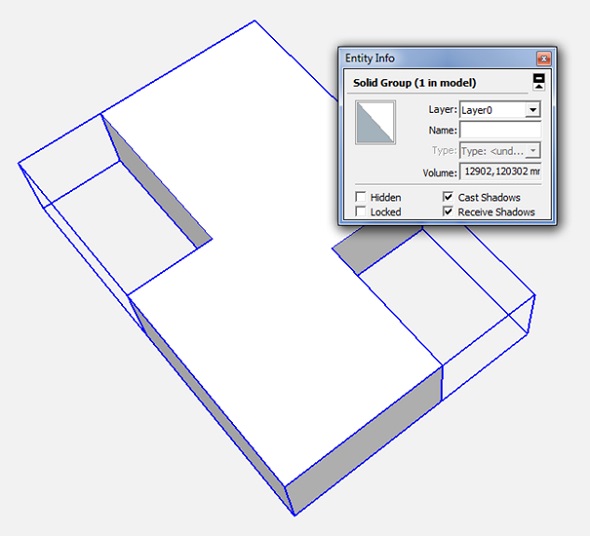
If you designed a watertight model in one shell, the Entity Info window will say ‘Solid Group’ and then you know that your model is ready to be 3D printed (in the next steps we’ll tell you how to fix this).
7: Look inside Your Model with the ‘Hide Tool’ and ‘X-Ray-Mode’
Looking at your model from the outside means that the inside is a ‘black box’ for you. However, even the inside of your model could feature many modeling mistakes that would make your object unprintable. In the example below, the ‘Entity Info’ window indicates that the object is not solid.
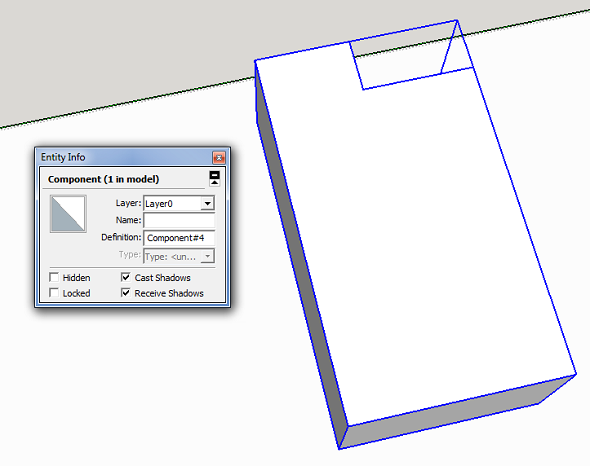
Since it looks solid from the outside, it makes sense to take a look at what’s going on inside. Select a surface (face) you want to hide and select ‘Edit’ > ‘Hide’. And voila: you can find the trouble-making mistake. Alternatively, you can switch into x-ray-mode by clicking on ‘View’ > ‘Face Style’ > ‘X-ray’.
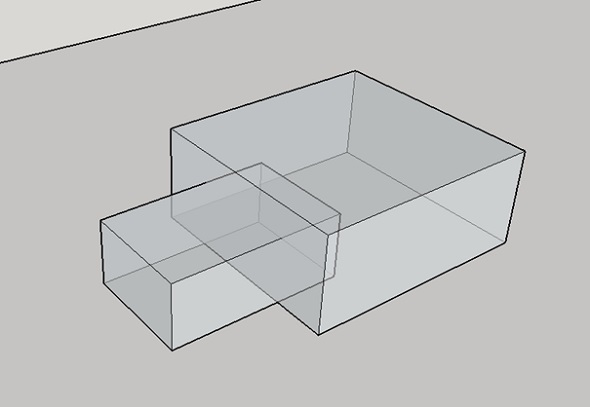
8: Create an ‘Outer Shell’
We already pointed out that designs with overlapping objects create problems for 3D printers. The good news: there’s an automated solution for creating one ‘outer shell’ around the overlapping objects, deleting all internal overlapping parts.
To start with, we have these two solid blocks. Each of these blocks was ‘grouped’ separately (Select > Right click > Make Group). We also selected the x-ray view to make things easier.

We then move one block into the other. We now have overlapping areas in the interior of this object.
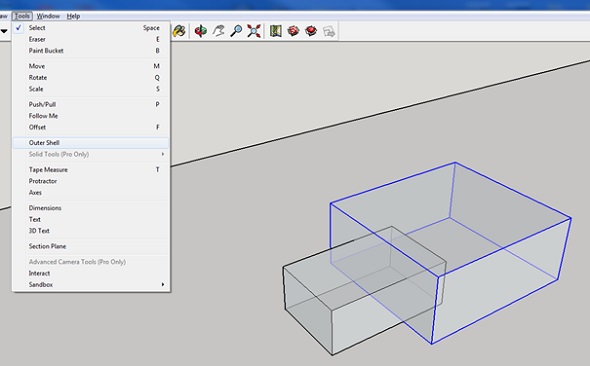
To get rid of these, we select one block, click on ‘Tools’ and choose ‘Outer Shell’.
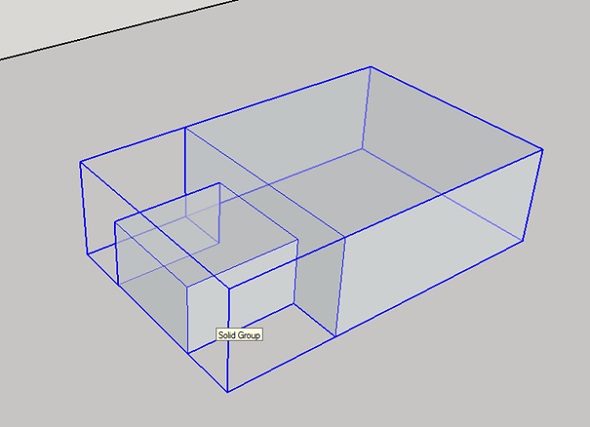
The last thing to do is to click on the second block. SketchUp automatically created one solid group out of these blocks. As you can see, the internal overlapping parts are gone. The result is a new solid object that is ready to be 3D printed!
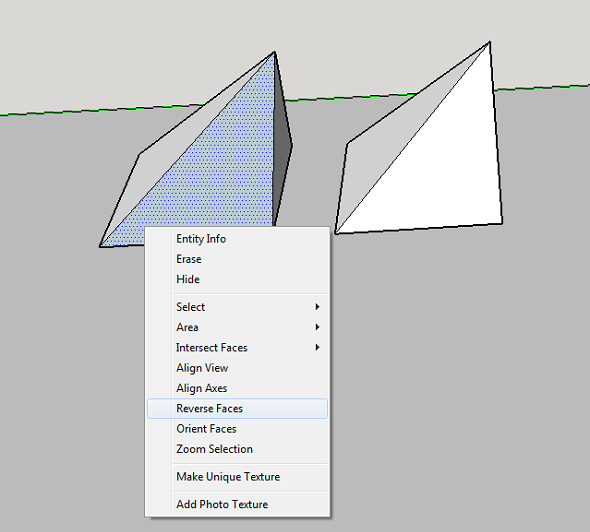
9: Fix Reversed Faces (Inverted Normals)
Another problem that can occur is so-called inward-facing or reversed faces. This means that a surface of your model is facing in the wrong direction (typically this means that it is facing the inside of the object instead of the outside). These surfaces are automatically colored in light blue.
To fix this, right-click on the inward-facing surface (face) and select ‘Reverse Faces’. You can see an example of this in the image below (left). On the right, you can see the object how it is supposed to be: all faces point to the outside again.
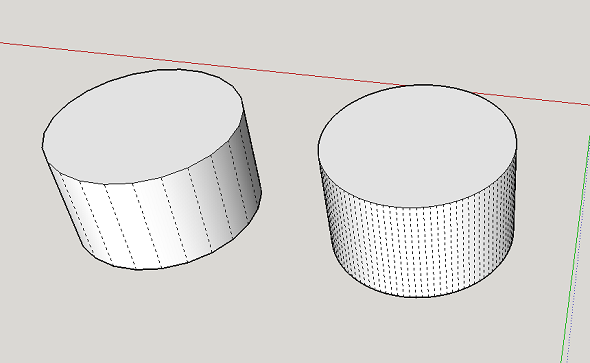
10: Increase Circle/Arc Segments to Getting Smooth Curves
SketchUp ‘smoothens’ arcs and circles in its visual presentation. Even though circles might look perfectly spherical in SketchUp, they are actually only made of 24 sides. Click on ‘View’ > ‘Hidden Geometry’ to see theses sides. When being printed, this circle might come out quite edged.
When you select the arc or curve tool, SketchUp will show you their default sides in the bottom right corner. You can then enter a higher number to increase the number of sides. Validate your entry by hitting the ‘Enter’ key and then draw your arc or circle.
The image below shows a comparison between the default 24 sides (left) and 150 sides (right).
Extra: Automatic File Fixing and Preparation
Sometimes problems are tiny and hard to see with the naked eye. There are SketchUp extensions like the Solid Inspector 2 that find problems automatically and point them out to you. Simply select a group or component and activate the Solid Inspector tool for an analysis of what would prevent it from being a solid manifold.
Another handy extension is CleanUp 3. It allows you to cleans up and optimize your SketchUp model with handy tools like “Erase hidden geometry” and “Erase duplicate faces”.
Extra 2: Getting Your High-Quality 3D Print
Did you manage to follow our tips and tricks and create a printable SketchUp file? In order to send it to our printers, download the SketchUp 3D print service plugin. Alternatively, you can upload your models here and choose from hundreds of material options.
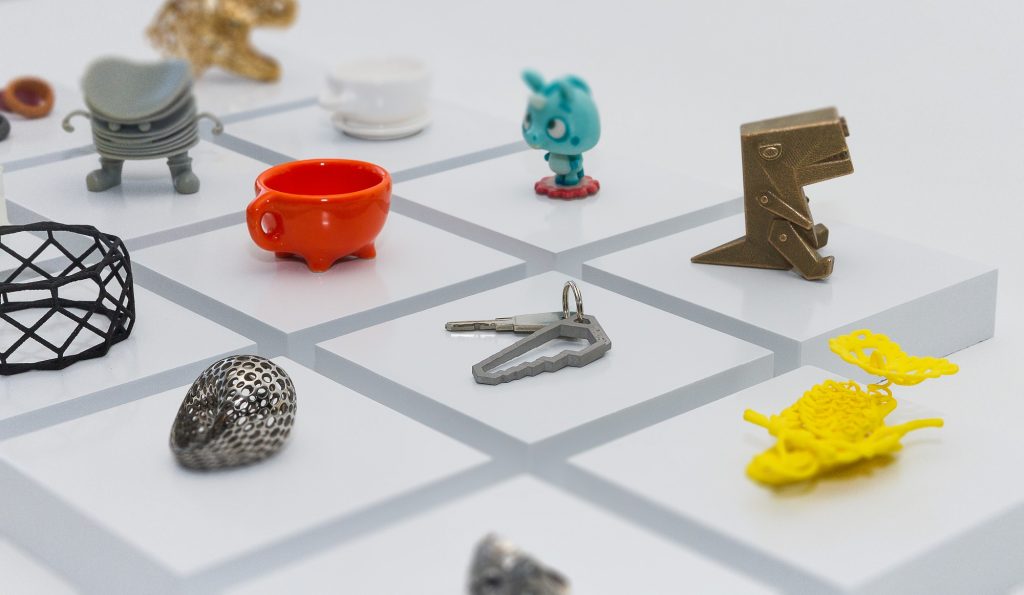
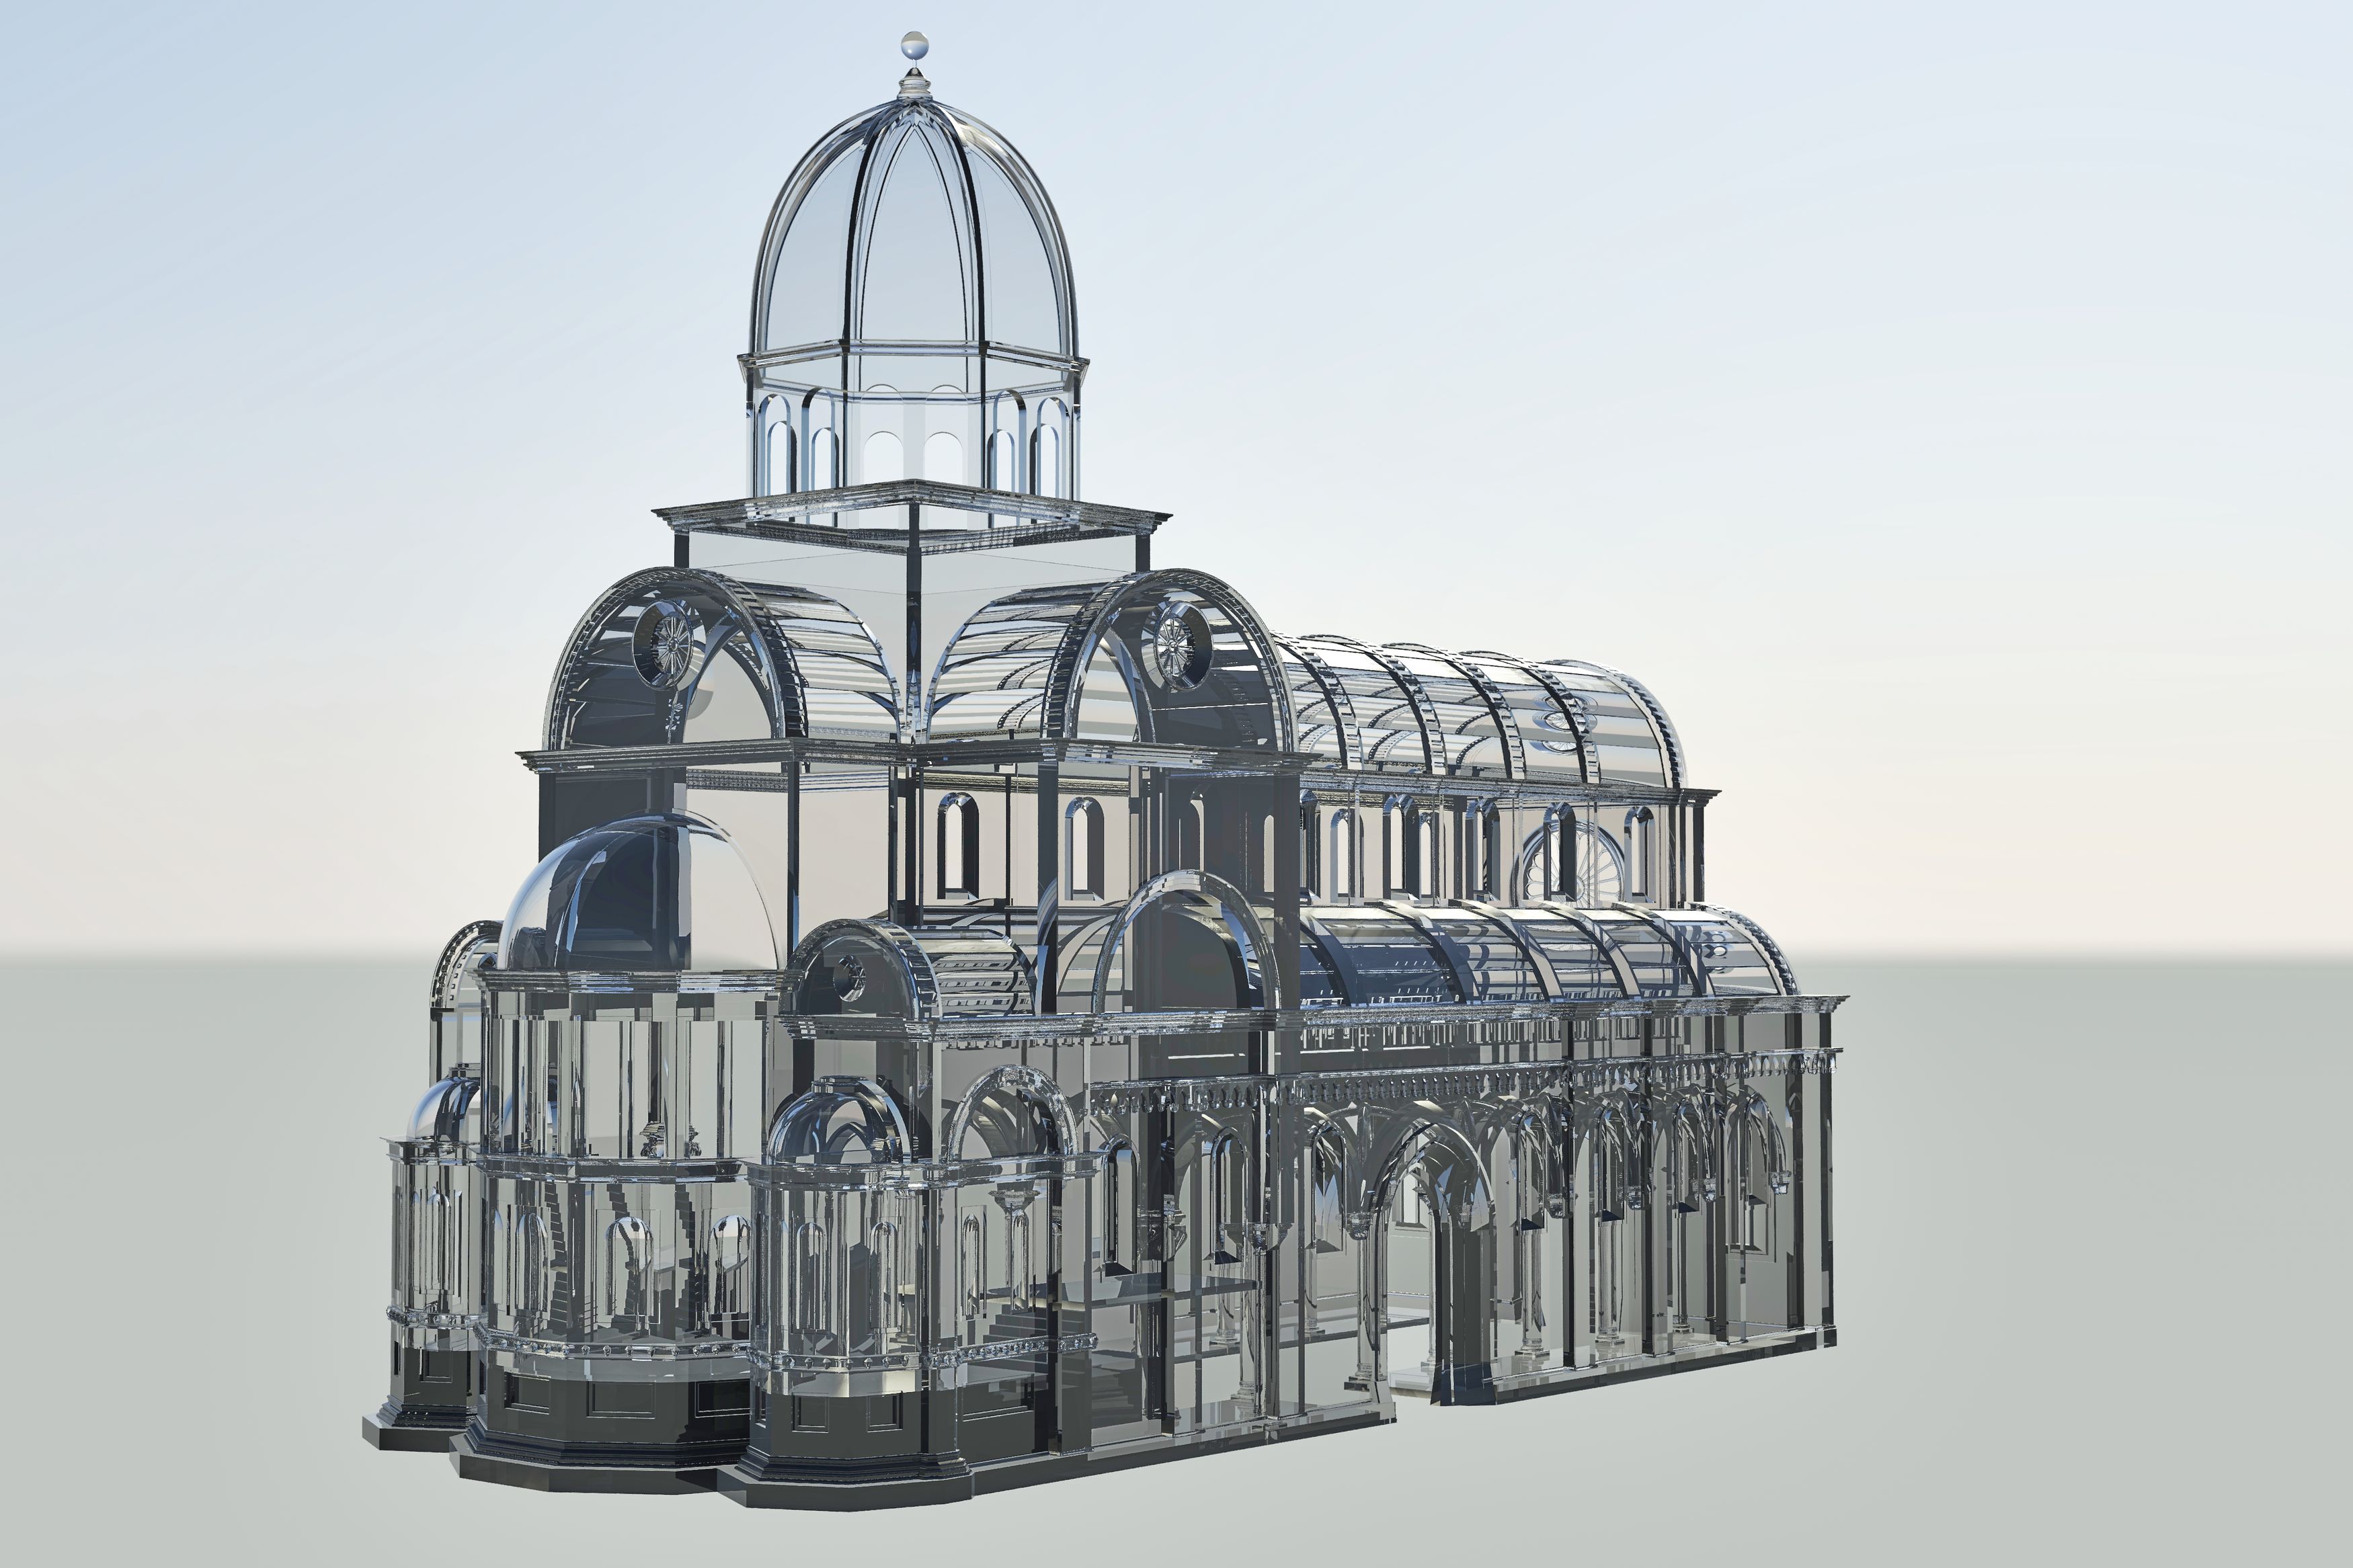
Get high-quality 3D prints like these with i.materialise’s online 3D printing service.